Hello World,
In this post, we continue our journey through the new RDS (Remote Desktop services) solution provided by Microsoft. You might be interested in reading the previous posts in order to have the necessary background information about our RDS deployment scenario. Follow these links for previous posts
- RDS – Remote Desktop Services Overview – PART I
- RDS – Remote Desktop Services Roles – Part II
- RDS – Quick Install Remote Desktop Service – Part III
- RDS – New RDMS Management Console – Part IV
- RDS – Accessing your RemoteApp – Part V
- RDS – More configuration for RemoteApp Access – Part VI
- Configuring Windows Integrated Authentication (WIA) – PART VII
- RDS – Publishing RemoteApp – Part VIII
In this post, we will have a look at the Remote Desktop Gateway role.
When to use the RD Gateway Server ?
You might want to provide access to your RemoteApp infrastructure to external users. The Remote Desktop Gateway server has been designed for this purpose. You can have Internet users connecting to your corporate Remote Desktop Services Infrastructure in a secure way. The remote Desktop Gateway will basically encapsulate the RPC Traffic into an HTTPS tunnel (RPC over HTTPs) in order to create a secure encrypted connection. The Remote Desktop Gateway will act as a proxy between the external user and the Remote Desktop infrastructure.
The RD Gateway role is usually deployed when there is a need to have internet users accessing corporate resources in a secure manner. There is another situation where you might want to consider RD Gateway. In some projects, we have deployed the RD Gateway and this RD Gateway was used by Internal users. Why would you install such server role when you are using it internally ? Because of firewall ! In these projects, we were working in a large distributed infrastructure where each site was protected by firewalls.
Because it’s not easy to get the firewall port opened for the port 3389 (the one used by RDP Protocol), as a workaround; we have installed RD Gateway servers. Because the RD Gateway is using port 443 (HTPS), this was not a problem anymore for the firewall guys; the port was already open. Users located in remote locations were able to connect to the centralized RDS infrastructure through https protocol only.
Installing the RD Gateway Server
Now that you understand what and how to use the RD Gateway, it’s time to install it. The installation will require to use SSL certificates. To add a RD Gateway server to our existing infrastructure; we have performed the following tasks :
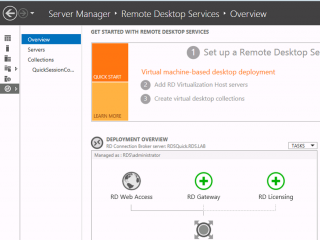
Step 1 – Open the Server Manager, Locate the Remote Desktop service node. Click on it. In the overview page, go to the pane deployment overview and click on the icon RD Gateway
Click on Picture for Better Resolution
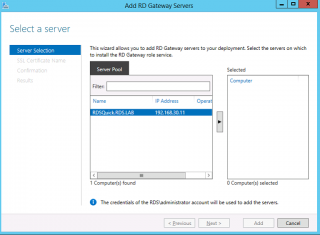
Step 2 – The Wizard starts. In the Select a server page, select your server, Press on the arrow. When done . Press Next
Click on Picture for Better Resolution
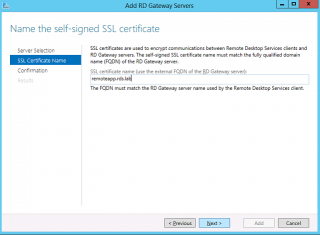
Step 3 – In the name Self Signed certificate, provide the name to be used. Because in our scenario; we have deployed all the roles on the same server, we will reuse the same name as the RD Web Server roles. Press Next
Click on Picture for Better Resolution
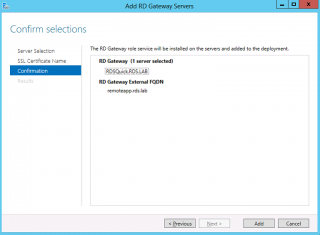
Step 4 – In the Confirmation Page, review your settings and Press Add
Click on Picture for Better Resolution
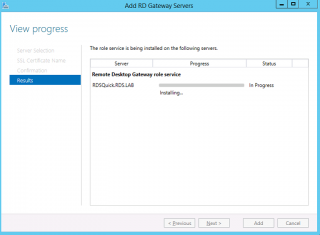
Step 5 – In the view progress page, wait for the process to complete
Click on Picture for Better Resolution
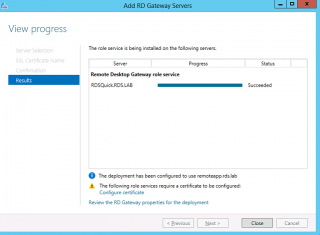
Step 6 – When the installation is complete. You can decide to close the wizard or you can decide to already configure the Certificate Settings. at the bottom of the page; click on the configure Certificate link
Click on Picture for Better Resolution
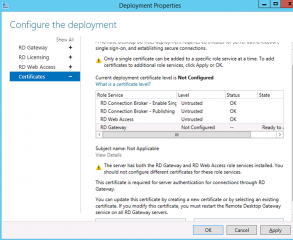
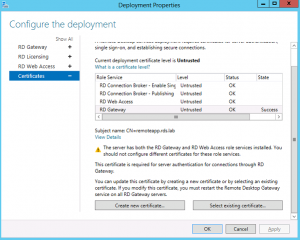
Step 7 – The Configure The Deployment Wizard- Node Certificates opens. Select the RD Gateway role and then press on the button Select existing certificate
Click on Picture for Better Resolution
Click on Picture for Better Resolution
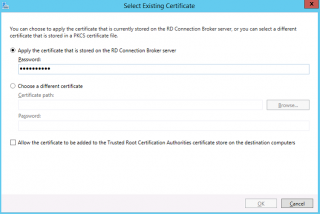
Step 8 – The select existing certificate wizard opens. Choose the first option and tick the checkbox at the bottom of the page. Press OK
Click on Picture for Better Resolution
Step 9 – In the Configure the Deployment. Press Apply. After completioin, you should see that the RD Gateway has a certificate associated. Press OK to Close the Wizard.
Click on Picture for Better Resolution
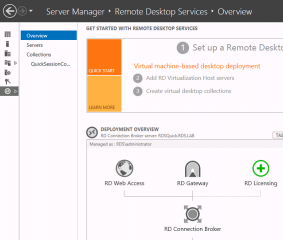
Step 10 – If you go back to the overview page of the RDMS, you can see that your RD Gateway role has been installed and ready to be used.
Click on Picture for Better Resolution
Configuring the RD Gateway Server settings
If your users are accessing the RemoteApp via the RDWeb Access interface, you will simply need to ensure that your RDS Deployment has the correct settings applied for the RD Gateway role. You will simply need to check if the RD Gateway server has been specified in the Deployment Configuration Settings.
In the RDMS Console, Overview Page, in the Roles pane, click on the tasks button and select the option edit deployment settings
Click on Picture for Better Resolution
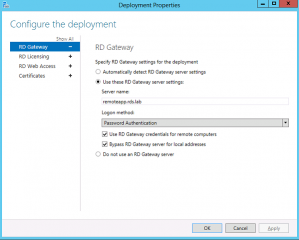
In the Deployment Wizard, select the appropriate settings from the Wizard. In our scenario, we want to have the users connecting through the Remote Desktop Gateway. So, we have configured our deployment settings in order to have the RD Gateway specified and used while accessing the remote applications.
Click on Picture for Better Resolution
Note:
You should unchecked the box Bypass RD Gateway for local address… if you want to use RD Gateway for internal use as well.
This is the only action you could perform in order to have your RD Gateway server ready to use
Additional Configuration settings RDGW
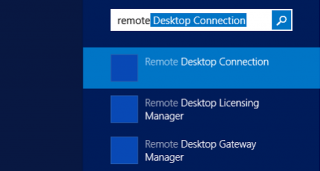
After installing the RD Gateway, you will have an additional MMC console that has been installed (which is not integrated with the RDMS Management interface). If you click on start, and search for Remote Desktop Gateway, you should see the Remote Desktop Gateway Manager Console.
Click on Picture for Better Resolution
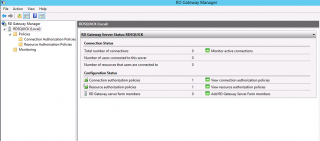
Click on it and the RD Gateway Manager will open
Click on Picture for Better Resolution
From there, you can configure additional settings. If you right-click on the server object and select properties, you will see the different options available to you. let quickly go through them.
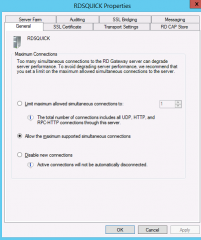
In the General Tab, you can configure some settings related to the connections. You can allow maximum connection or disable new connections or limit the number of simultaneous connections.
Click on Picture for Better Resolution
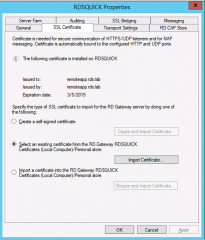
In the SSL settings, you should find the same information we have configured through the deployment wizard. You could adjust your settings as well
Click on Picture for Better Resolution
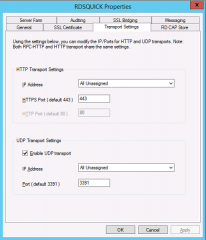
In the Transport settings tab, you can specify the HTTPS port to be used as well if you want to enable or not the UDP settings. The UDP transport layer is a new feature of RDS 2012 R2. UDP could be used to improve performance over WAN.
Click on Picture for Better Resolution
RDS 2012 R2 can create three internal connections. 1 connection will be based on HTTP and ensure that connection between client and target server is established and maintained. The 2 other connections are UDP based and ensure the rich multimedia experience.
Note also that the load balancing architecture has changed. DNS Round robin is not supported because of the UDP connections. To have fault tolerant RD Gateway infrastructure, you will need to have a hardware or software load balancer that can do IP-Affinity,cookie-based session or SSL session….NLB can be used as load balancer as this one support IP-Affinity.
Click on Picture for Better Resolution
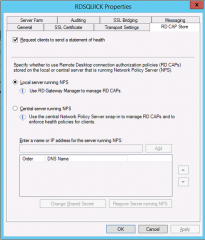
The RD CAP store (Connection Authorization Policies) tab define where to get the policies (locally or using another server on the network
Click on Picture for Better Resolution
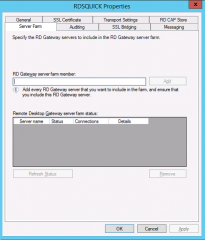
The Farm tab can be used to specify the farm name you might have created and specify which RDS servers will be part of it. We will discuss server farms in a coming post.
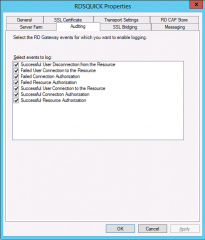
In the Auditing Tab, you can specify which events you want to have recorded in the Event Viewer
Click on Picture for Better Resolution
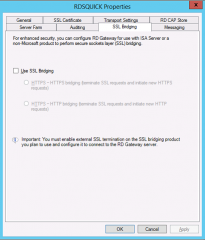
You can configure SSL Briding if you want to via the SSL Briding tab
Click on Picture for Better Resolution
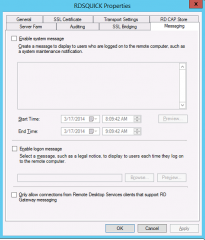
via the messaging tab, you can display system messages or login messages when a user logs into your server.
Click on Picture for Better Resolution
CAP and RAP policies on RDGW
In the RD Gateway manager; you should review the policies that have been implemented by default. This check is necessary in order to ensure that the policies allows your users to perform connections to your RDS infrastructure.
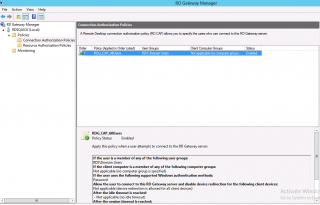
In the RD Gateway manager console; click on connection authorization policies node, and you can see the default CAP defined. The default one allow domain users to connect to the RD Gateway server. If you want to you could change or create a new connection policies.
Click on Picture for Better Resolution
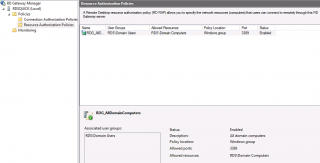
If you click on the Resource Authorization polices (RAP) node, you will see that a default RAP has been created. The RAP tells you which network resources can be accessed. The default one allow access to all resources. For security reasons, you might want to create a new RAP more restrictive and grant access only to needed resources.
Click on Picture for Better Resolution
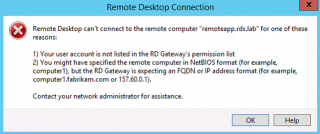
During my Deployment, I had encountered a small issue while trying to connect to the RD Gateway and accessing my remoteapps. This is the error message I was getting
Click on Picture for Better Resolution
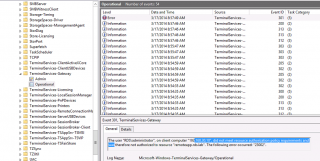
After checking the event viewer; I’ve found out that the CAP or RAP was to restrictive and wouldn’t let me connect
Click on Picture for Better Resolution
Connecting through the RD Gateway Server using RDP Client
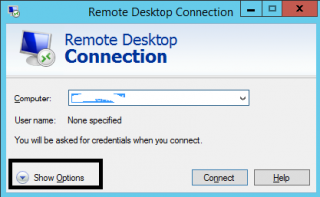
To connect to your infrastructure through RD Gateway, you might need to configure your RDP client (if you perform a remote desktop connection directly). If you open your rdp client, you will see a screen like this
Click on Picture for Better Resolution
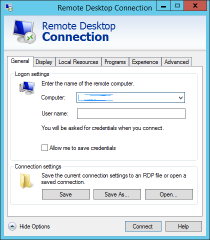
Click on the Show Options button and you will see advanced settings tab
Click on Picture for Better Resolution
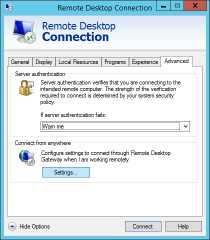
Click on the Advanced tab and tell click on the button Settings
Click on Picture for Better Resolution
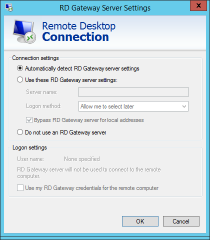
In the connection settings page; you can specify how you want to connect to the RD Gateway
Click on Picture for Better Resolution
If you choose the option Automatically detect RD Gateway server settings (default), the rdp client will retrieve the value set by a GPO if the gpo has been enabled and configured.
If you choose the option Use these RD Gateway server settings, you basically needs to provide the name and authentication method. for the Name, you will have to use the FQDN
If you choose Do not use an RD Gateway server, you will not connect through the RD Gateway and you will be connecting directly to the Remote computer you want to connect to.
Specify the RD Gateway through GPO
If required, you can use two gpos that can help you automate the RDP client configuration for the RD Gateway settings. The only limitation of the GPO is that you can specify only one RD Gateway which should be good enough if you want to centralize your infrastructure.
You can create a Group policy where you could configure the user settings for the RD Gateway. As shown in the screenshot below, you can configure 3 user settings in relation with the RD Gateway server
Click on Picture for Better Resolution
Final Notes
That’s it for this quite long post. And as you have noticed we are only scratching the surface so far. We started our journey with a simple/quick deployment for session virtualization. We still need to add one RDS role (RDS Licensing) and we would have a complete RDS infrastructure. This will be the subject of one of the coming posts.
Now that we have seen how to deploy a simple infrastructure, we might want to look at more complex infrastructure and scenarios. We might also want to discuss about the VDI solution that can be implemented through RDS roles as well.
This can become a really long series about RDS…… Well we will see
Till Next time
See ya
Some advanced Topics readings :

Thanks!
Hi,
Excellent writeup. Does this mean you can setup the GW in MSTSC as shown and then connect to remote apps published on the RDS deployment ? I am trying to work out how to do this so using the GW to proxy 443 requests to the WebAccess server so I can type in https://rds.test.com/rdweb and get the login page.
Hello Ivan,
Do not understand what you want to try.
In RDS, if you install the RD Gateway, you will be able to configure the RD Web Access page to use the Default Gateway by default as well. You do not need to care about the mstsc.exe. IF RDS infra is setup correctly, it will be done automatically for you
Hope this help
till next time
See ya