Hello World,
This post is about streamlining user experience while accessing RemoteApp through the Web interface. If you remember,from the previous post, we have seen that when the user access the web interface, it will encounter a number of confusing messages and popups while trying to access to the RemoteApp application. This post will explain how we can perform additional configuration on the Remote web access in order to avoid this situation.
In this post, we will show you how to
- providing a simplified url to access the RDWeb web site. instead of using https://netbiosName/RDWeb we want to use a simpler url that would be easy to remenber for the users. For example, you could use the url https://remoteapp.rds.lab/ or https://WebApp.rds.lab
- We want to get rid of the warning message when connecting to the web site. To perform this, we will need to issue a valid certificate.
- Finally, we want to get rid of the warning popup message when connecting to the RemoteApp via the Web interface. At configuration level, we will need to trust the publisher in order to not having this annoying popup
- (optional) – In certain situation, you might want to use the Windows integrated login method instead of the Forms authentication mechanism. The Windows integrated login can be used when you are using remoteApp within a AD forest/Domain. If you are planning to publish your RemoteApp server to the external world, the form mechanism seems to be a better option
Ready…. Let’s go !
Easy to Remember URL for Remote Web Access Server
To improve the user experience while using our Remote Desktop service infrastructure, we want to create for the Remote Web Access an easy to remember url. We do not want our user to type something like https://name_of_the_RDWebServer/RDWeb. Instead, we would like them to use a standard internet url something like https://remoteapp.yourdomainName/ or https://CloudApp.yourdomainName.
To achieve this, we will simply need to create an additional record in our DNS infrastructure. You can decide to create a Host record or an alias. To create such record, perform the following actions :
- Open your DNS console, and select the zone name where the records needs to be created
- Right-click on the selected zone and select create New Host (or create New Cname)
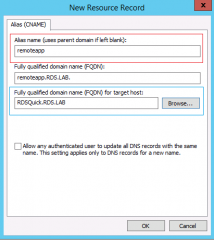
- Provide the following information
- Name : the simplified name to be used in the url (ex: remoteApp or CloudApp )
- FQDN : the name of the Remote Web Access Server
Click on Picture for Better Resolution
As result, you should see something link this in your DNS infrastructure
Click on Picture for Better Resolution
At this stage of the configuration, you still need to enter an url like https://remoteapp.rds.lab/RDWeb. We want to avoid typing the RDWeb part. So, we will need to configure the IIS server to redirect us to the correct location.
To perform this configuration change, perform the following actions
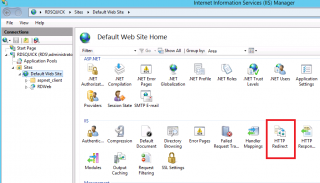
Open your Inetmgr console, Go to the web site. click on it and in the right pane, select the option http redirect
Click on Picture for Better Resolution
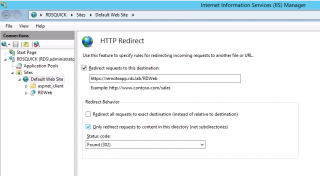
The Http Redirect Page is displayed. Provide the requested information and ensure that the option “Only redirect requests to content in this directory (not subdirectories)” is selected
Press Apply (on the right side of the screen)
Click on Picture for Better Resolution
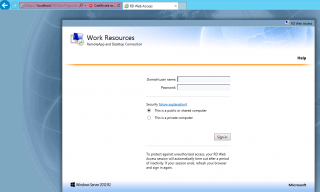
Now, try to access the web site using only the simplified url (i.e. https://remoteapp.rds.lab) and you should be redirected automatically to the correct location (i.e. https://remoteapp.rds.lab/RDweb)
SSL Configuration
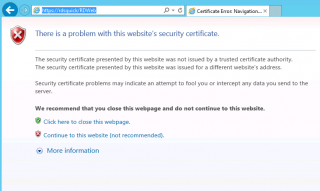
Now, it’s time to get rid of the warning message we get while access the Remoteapp web site. We will need to obtain a valid SSL certificate which would match the name of the DNS alias we have created for our remoteapp web site.
In the first scenario, we will be still using a Self signed certificate that will be generated through the RDMS console. We will then implement a GPO that would make this certificates seen as trusted by the computers within the machines. In a coming post, we will be using a certificate issued by an Enterprise CA. Here, we just want to demonstrate the process in this initial scenario.
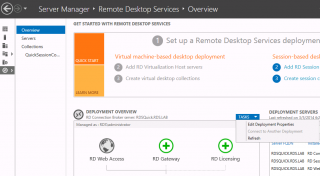
Open your RdMS console, in the overview page, click on the task button under the deployment task pane and select Edit Deployment Properties
Click on Picture for Better Resolution
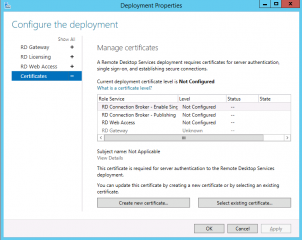
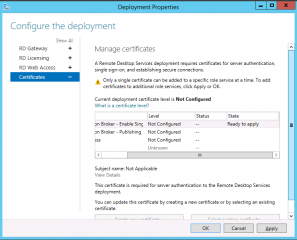
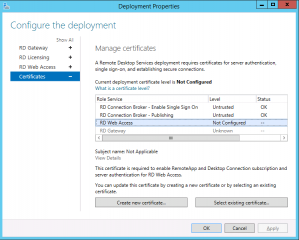
In the deployment properites dialog, click on the Certificates node. In the Manage Certificate page option, click on the Button “create new certificate…”
Click on Picture for Better Resolution
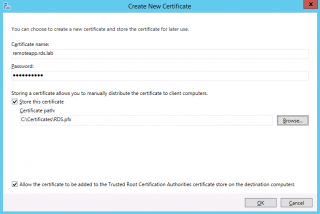
The following page will open.
Click on Picture for Better Resolution
The important thing here is the field Certicate name. This name should match your Defined UrL (the easy to remember url). Tick the Check box and specify a path where to store the certificate. When Done, Press OK
You will be back to the Manage Certifcates where you can see a warning symbol telling you that you can apply a certificate one by one for each roles defined. Select the role where you want to apply the certficate (for example RDCB) and click on the button Apply
Click on Picture for Better Resolution
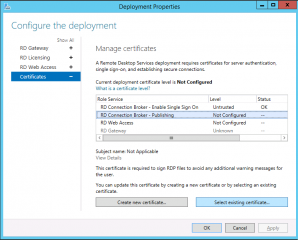
After pressing the apply button, you should see the status of the certificated changed from Not Configured to Untrusted. We have the Untrusted status because we are using a self signed certificate. If you were using a proper certificate, you should see Trusted instead of untrusted
Click on Picture for Better Resolution
To assign the certificates to other RDS roles, you will now click on the Select existing certificate button and assign it to the remaining RDS role needing a certificate
Click on Picture for Better Resolution
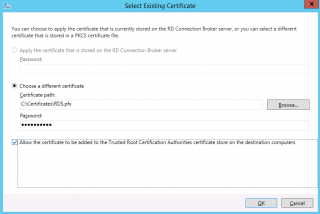
Fill in the requested information and Press OK. In the Configure the Deployment, Press Apply to have the certicate applied to selected Role. After some time, the status for the selected role should be changed from Not Configured to Untrusted.
Click on Picture for Better Resolution
Proceed as such for all the roles you are seeing in the Manage Certificate Pages. When done, you can close the Wizard and move to the next action.
Because we are using a self-signed certificate, this one will not be trusted by default by the computers being part of the domain. To overcome this situation, we will be using a GPO to deploy this certificate and mark it as valid for our domain. To perform such operation, we will simply create a GPO. In our scenario, we have created a gpo called Deploy SSL Cerficates – RDS
Click on Picture for Better Resolution
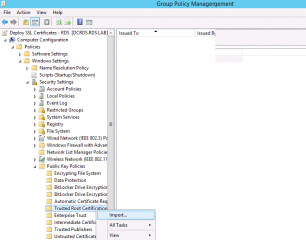
If you edit this GPO, and you expand the node Computer Settings > Windows Settings >Security Settings > Public Key Polices > Trusted Root Certificates. Right-click on it and select Import
Click on Picture for Better Resolution
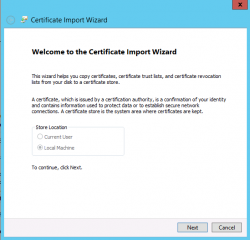
A wizard will start. In the Welcome Page, Press Next
Click on Picture for Better Resolution
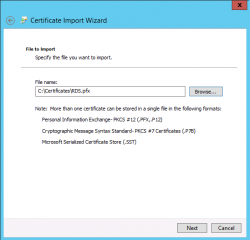
In the filename, provide name and location of the certificate you want to import. The pfx file has been created when you have created the Self-signed certificates in the previous section. When Done Press Next
Click on Picture for Better Resolution
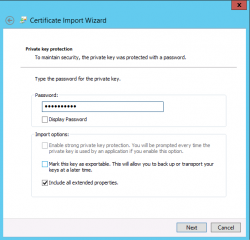
In the Private key Protection, provide the password for the certifcate and Press Next
Click on Picture for Better Resolution
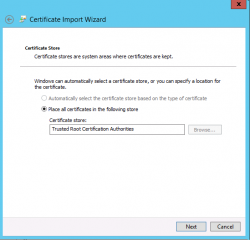
In the Certifcate store page, accept the settings and Press Next
Click on Picture for Better Resolution
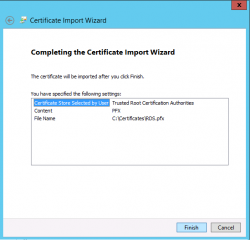
In the Completing Wizard, Press Finish
Click on Picture for Better Resolution
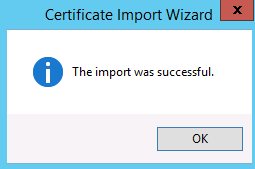
You should see a message stating that the import has been succesfull
Click on Picture for Better Resolution
Note :
Again, here you are using a self signed certificate for demo purposes. When we will be deploying a more complex RDS topology we will be using a real CA infrastructure.
Trusted Publisher Configuration
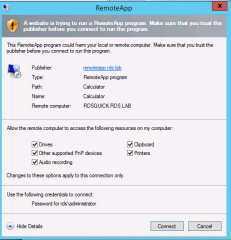
Since we have installed a valid SSL certificate that we trust, we can access the web interface without any warnings. However, when you try to launch your remoteApp, you might see a popup stating that the Publisher of the Application is not Trusted. Again, we want to get rid of this warning.
Click on picture for better resolution
To bypass this popup box, you have to configure your domain to trust the publisher. We will again use a GPO to apply these changes through the domain. What we will need to do is to get the Thumbprint of the Certificate and use this information within a GPO that will notify the computer that the Publisher is trusted. To do this, you will need to perform the following actions :
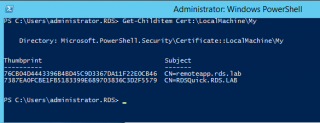
On the RDS server, we need to get the Thumbprint of the certificate, we will use the Powershell Cmdlet to get it. Issue the following command
Get-Childitem Cert:\LocalMachine\My
Click on Picture for better Resolution
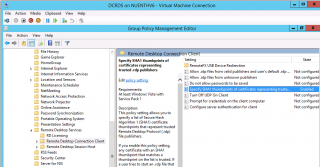
Open your GPMC, browse to the GPO you want to modify and browse tot he following node/settings : Computer Settings > Administrative Templates >Windows Components > Remote Desktop services > Remote Desktop Connection Client. Select the option “Specify SHA1 thumbprint…” and double-click on it.
Click on Picture for better Resolution
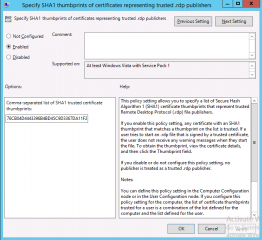
You will see the following window displayed. As you can see, you have to provide the thumbprint you wanna trust. Copy/paste the thumbprint you have found in the previous step and Press OK. Close your console.
Click on Picture for better Resolution
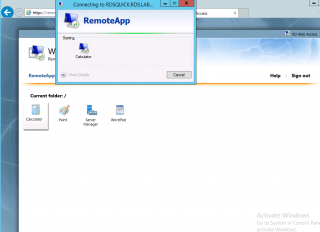
After applying this policy, the user should be able to access the RemoteApp applications without the warning prompt as shown in the screenshot below
Click on Picture for better Resolution
Note :
Obviously, this is working for computers that are part of a domain and where you can use GPOs to control such behavior. If you need to grant access externally to your RemoteApp server, you might not be able to use GPOs to control all the described behavior. You will need to find others ways to get rid of the popups.
Windows Integrated Authentication
This is a an additional setting that can be configured. If you are using an Active Directory infrastructure, you can indeed avoid the use of forms authentication and have a direct access to the remoteapp web page. This can be helpful in a SSO scenario if you have such requirement.
We will describe how to configure this settings in the next post.
Final Notes
And Voila ! So far, with all the posts from this serie, you should be able to easy configure your basic RDS infrastructure and provide a really nice user experience if you take time to perform the additional configuration work. In my current assignment, we went up to the Windows Integrated Authentication configuration settings and we had the buyin from the user community. As mentioned, earlier, we will want to describe the Windows Integrated Authentication Configuration steps in the next post.
Till then
See ya


Hi, Griffon
thank u i have learnt so much!! very clear and awesome post thanks again for sharing
In addition am really interesting to see the coming post about working for computers that re not part of a domain accessed externally and experience confusing messages and popups while trying to access to the RemoteApp application .
Alexander
Hello Alex,
Nice to see that some people have some interest in the RemoteApp solutions. This can be a really great asset in a company
Till next time
See ya
Question, is there a way to allow users access to remote apps while blocking them from logging on locally to the server. Basically I don’t want them having access to the server, just the remote apps. Thank you
Hello Chad,
RemoteApp relies on the Remote Desktop concept. A user need to have login access right to the server to start the application. Normally, the user will have the possiblity to remote login on the server and have access to the full desktop session. Using GPO, you can already restrict a lot of what a user can do on the server (in the remote session)
if you really want to “prevent” user to log into the server via remote desktop, you will need to find a more creative way. The RemoteApp uses the rdpshell.exe to launch the application. When a user logs in into a RDS Server, the userinit.exe file is used. You could try to block the userinit.Exe file (or create a script to logoff users when connected on the server) for the Remote Desktop Users. Ensure that your Administrators can still login on the server 🙂
Hope this help
Till next time
See ya
Hi,
Thank you very much for your great article. It helped me so much, thank you 🙂
Hello Anthony,
Welcome back ! Good to see that we can provide good information and possibly useful help to other people
Thank for the visit and the positive feedback
Till next time
See ya
Hi,
I got the SSO authentication to work. It got all the way through the remote desktop session and it asks for password. It should not ask for a password and should auto log in. Is this on the VMs settings?
Here is my post for detail set up:
https://social.technet.microsoft.com/Forums/windowsserver/en-US/79d090d4-bf99-4fcc-8711-7d33c116ccba/sso-for-rdweb-hyperv-2012-r2-and-windows-7-vms-from-thinpc-win7?forum=winserverTS
Hello Tuan,
I would not need to test this….I think I understand the issue…but I have to come back to you about that.
If you can wait a little bit and we come back to you
Till next time
See ya