Hello World,
Today, we will dig a little bit more in the remoteapp publishing process. We will also discuss about the RemoteApp program folder which I think it’s really a nice addition and a customer requested feature.
In this post, we assume that you have followed the steps described in the previous posts related to RDS
- RDS – Remote Desktop Services Overview – PART I
- RDS – Remote Desktop Services Roles – Part II
- RDS – Quick Install Remote Desktop Service – Part III
- RDS – New RDMS Management Console – Part IV
- RDS – Accessing your RemoteApp – Part V
- RDS – More configuration for RemoteApp Access – Part VI
So, let’s continue our journey into the RDS world : -)
Publishing RemoteApps – The Basics
So far, we have seen how to deploy an RDS Serve in a simple deployment scenario (i.e. all roles hosted on one server). Now, that you have your infrastructure ready, you might want to publish some useful applications to your users. As you will see, using the new RDMS console, publishing apps is really easy.
Publishing/Unpublishing RemoteApp
Before publishing apps, you will need to install them on your RDS server in order to make them available to the RemoteApp interface.
To Publish applications to your web interface, you need to publish them through the RDMS console > Collections Node > select your collection
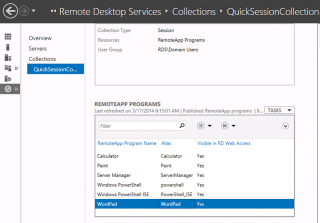
In this console, you have the pane RemoteApp Programs (as shown in the screenshot below)
Click on picture for better Resolution
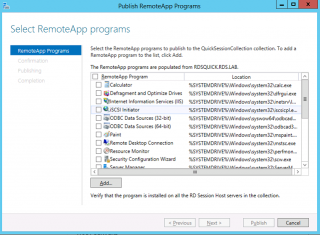
If you click on the Tasks button, you can decide to publish/unpublish applications through a wizard
Click on picture for better Resolution
The Wizard will look for the application that could be installed and will present you with this screenshot. Select the application you want to publish and Press Next
Click on picture for better Resolution
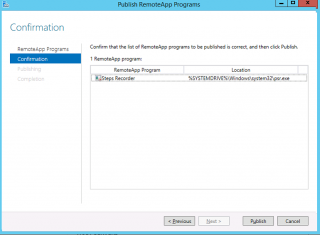
In the confirmation page, review your settings and Press publish
Click on picture for better Resolution
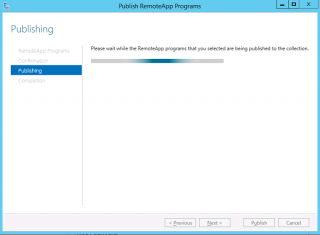
Wait for the wizard to publish the application.
Click on picture for better Resolution
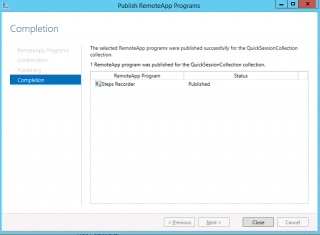
At the completion screen, Review the settings and Press Finish
Click on picture for better Resolution
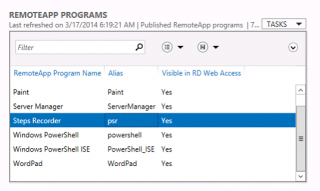
When the wizard closes, you can check that your application is listed under the RemoteApp Program pane
Click on picture for better Resolution
As you can see, in this basic wizard, we were just able to select which application would be published. There were not settings related to security. If you need to restrict the usage of remoteapp to specific groups, you will need to go through each remoteapp and configure these additional settings
Additional Configuration Settings for RemoteApp
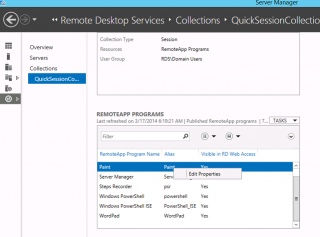
To see which additional configuration settings are available to you, let’s select one application and right-click on it. You should see the option “Edit Properties”
Click on picture for better Resolution
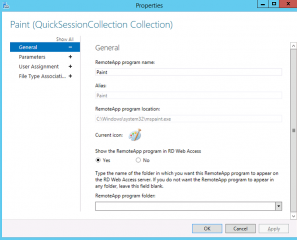
In the general page of the Properties dialog box, you can decide to change the name of the application, define a alias make the application visible or not in the web interface or add the application to a remote Program folder.
Click on picture for better Resolution
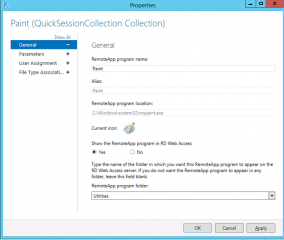
This last option (Remote Program folder) is really interesting and this is a new feature available since Windows 2012 version. With this feature, we have the possibility to create folders which will help you to group remoteApp programs together. I think that really a good feature. In the past, if you had a lot of remoteapp published, it was not always easy to find right away the correct icon and launch your application.
With this new feature, you are basically grouping your applications inside a folder. In our scenario, we will create 2 categories (i.e. folders) called Admin Tools and Utilities. To create this folders, you will simply typ them in the drop down box and then assign them to the applications
Click on picture for better Resolution
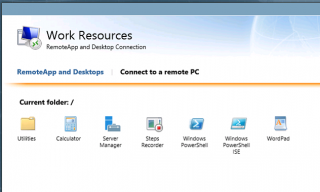
If you go to your web interface, you should see something like this now
Click on picture for better Resolution
It’s a better and clearer view, don’t you think ?
If you go through the remaining pages of the Edit Properties Dialog box, you will see that you can decide to specify or not parameters when launching your application.
Click on picture for better Resolution
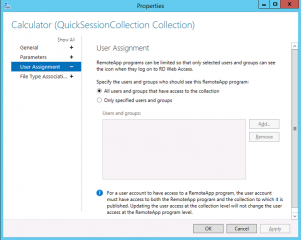
You can also decide which users/group should have access to the RemoteApp. As you can see, by default, there is not group defined. The setting is inherited from the collection session settings. By default, all users member of the Domain Users group will be able to access the published RemoteApp. If you want to restrict the access of some application (ex: visio because of licensing costs), you can create a dedicated group (i.e. RemoteApp Visio Users) and authorize only this group to access the visio published application
Click on picture for better Resolution
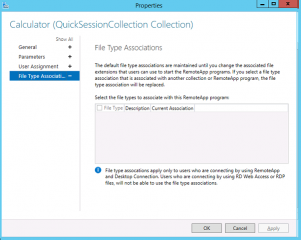
Finally, you can configure also the File association type to be used with the RemoteApp
Click on picture for better Resolution
Final Notes
This is it for this short post. With the information provided here, you should be able to easily publish/unpublish your applications and decide who should have access to them. As you have seen, additional configuration settings is done per-application base. Finally, we have seen how you could group your remoteapp together by using the Remote program Folders
I hope you enjoy this post
Till next time
See ya


I am working on a specialized application of RemoteApp Web Access. I would like to launch directly to a specified app from the login page and bypass the desktop page where you can select which app you want to open. Is there anyway of doing this?
Hi Griffon,
I have followed your guide and succesful to built a testlab RDS, but still have confuse one thing about RemoteApp / RDSH . Here my server
server 1 running roles Remote Desktop Connection Broker , RD Sessions Host
server 2 running role RDWEB , RD Gateway
All is worked fine, RemoteApp can access from internal / external .
but if i add 1 more server to running RDSH , and create collection for this server. All new RemoteApp visible on RDWEB , but cannot run with information: “your computer cannot connect to the remote computer because a error occurred on the remote computer that you want to connect to…”
Do i miss somthing to config on RDWEB ? or anything else ?
Please help.
Thuan