Hello World,
Today, we will explore a less known feature of MDT 2012. This feature is less known simply because it can be used in really specific situations. We will see how you could create a bootable media that will allow you to perform an offline installation. This can be the case for a branch office where installing an MDT is not an option but where you could ship a core build image and perform the installation completely disconnected from the MDT infrastructure.
Let’s do this !
Overview
As explained above, in some really specific situation, you might not be able to connect to your MDT infrastructure but you still need to perform your deployment operation. MDT 2012 offers an option to create a media which will contains all the necessary applications,drivers, packages, Operating system packages and task sequences needed to perform an offline installation. I never had to use this feature till now. The process is quite straightforward and we will go through it to demonstrate how this works.
Create the media
In fact, this is a two step process. We will first need to create the media object within the Deployment workbrench console and then we will need to populate this media.
To create the media object, perform the following actions :
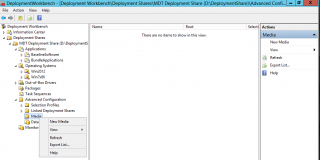
Open the Deployment WorkBench,navigate to the Advanced Configuration Node, expand it. Right-Click on the node and select New Media
Click on Picture for Better resolution
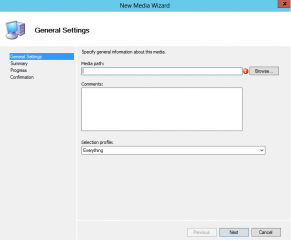
The Media wizard starts. In the general settings page, specify where to store the media and which profiles to use. Press Next
Click on Picture for Better resolution
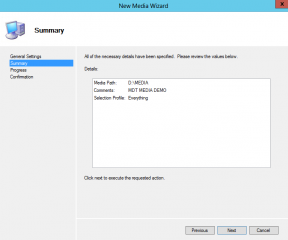
In the Summary Page, Press Next
Click on Picture for Better resolution
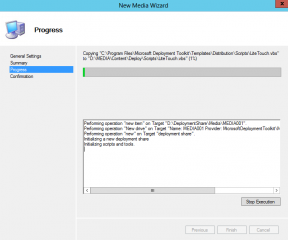
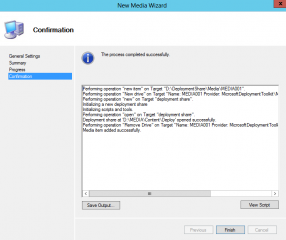
Wait for the process to complete
Click on Picture for Better resolution
In the summary page, review the output and Press Finish
Click on Picture for Better resolution
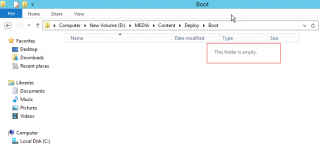
If you browse to the folder where you have saved the output of the media creation process, you will notice that the folder is empty. This is expected given that we have simply created the media object.
Click on Picture for Better resolution
Update the media (and generate the iso)
So far, we have just created a container for the media we want to create. We will need to populate this folder structure and generate the iso. Again, the process is quite straighforward. Perform the following actions :
Open the Deployment WorkBench, navigate to the Advanced Configuration Node, then select the Media folder. In the right pane, select the media object you want o generate. Right-click on it and select Update Media
Click on Picture for Better resolution
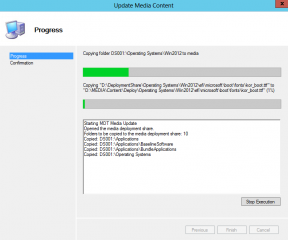
Wait for the process to complete. This can take some times.
Click on Picture for Better resolution
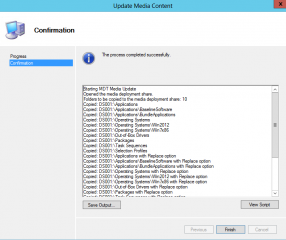
In the confirmation page, review the output and Press Finish
Click on Picture for Better resolution
If you browse back to the folder location where the media file should be created, you will see now that an iso file has been created.
Click on Picture for Better resolution
Perform your deployment
As you can see the process is really easy. You first create a container for the media and when you are ready, you will be able to generate your iso file. If the size of the iso fits on DVD, you can burn it and start distribute it. Nowadays, a better approach is to create a bootable USB Stick. (To see how to create a bootable usb stick, you can have a look at “how to create a bootable stick or disk”.
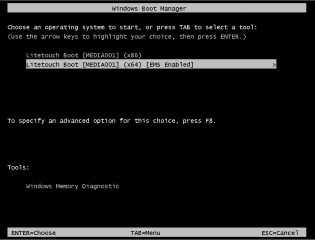
When you bootable media (DVD or usb stick) is ready, you will have to test it on a machine. If you boot from the media, you have just created, you should see something like this on your screen
Click on Picture for Better resolution
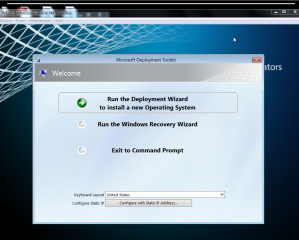
You will notice that all your customization settings (done via the CustomSettings.ini file) have been lost while using the media you have created
Click on Picture for Better resolution
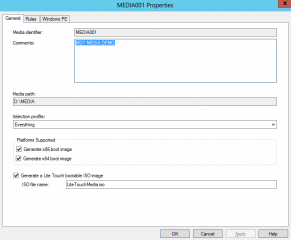
If you want to customize the look ‘n feel and control the Wizard pages to be displayed, you will need to reconfigure your rules under the media node. Again, this is quite straightforward. You will simply need to right-click on the media object and select properties.
Click on Picture for better Resolution
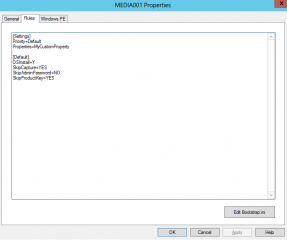
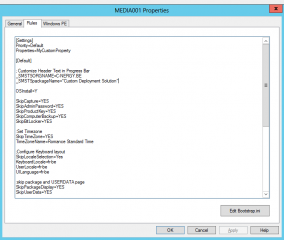
Click on the Rules tab. You will see that the rules are populated with minimum information.
Click on Picture for better Resolution
If you want to configure zero touch configuration style (i.e. control which pages to display during the Deployment), you can add the required variables (as described in this post).
Click on Picture for better Resolution
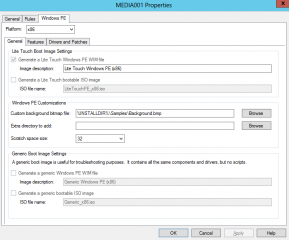
If you want to customize your background image during the deployment, you will need to move to the WinPE tab and specify the background file you want to use. In this tab, you will also need to specify which winpe packages to be used. If your task sequence is using PowerShell scripts, you will need to enable the module within winpe as described in the post “Using Powershell in your task sequence”
Click on Picture for better Resolution
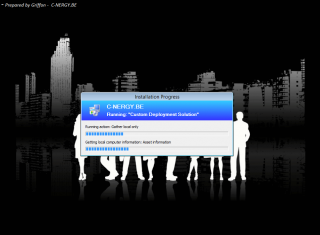
And voila ! If you boot from the new media you have just created, you should see all of your customizations.
Click on Picture for better Resolution
Final Notes
If you need to perform offline installation (where you have no connection to your MDT server), you can always create a bootable deployment media. MDT 2012 team has taken into account this scenario. Again, we have used this feature really ocasionnally but this can be really handy in situation where MDT infrastructure will not be deployedand where the IT staff does not have really experience in deployment procedure.
That’s it for this post !
if you want to read our previous posts about MDT 2012, have a look at this links
If you want to read previous post about MDT 2012, have a look at
- Part I : Installing MDT
- Part II : MDT Deployment Share
- Part III : Deploying OS with MDT
- Part IV : Adding PXE Capabilities to MDT
- Part V : Perform a Basic MDT Deployment
- Part VI: Branding your MDT Infrastructure
- Set Screen Resolution automatically with MDT
- MDT 2012 – Automatically Set computer Name
- Part IX : Applications and Applications Bundles
- Part X : Using Powershell Script with Task sequences
- Part XI : How to join computer into domain

I have been trying to find a good way to imagex capture images that are compressed to maximum, in xp it seemed easy, win7 I tell it to compress maximum in the string i get the save size image compression or not. can you provide some insite.
Im using
X:imagex /capture X: X:\compress maximum\name.wim “xdrive”
Corrrection to last post, sorry about that
I’m Using
Im using
X:imagex /capture X: X:\Name.wim /compress maximum “cdrive”
Hello there,
Note XP and Win7 are different operating system. Windows 7 capture image will be always larger than the windows XP file. You will not be able to change that… The initial wim file for Win 7 is already expressed in GB….
If you want to compress the image you are capturing, you have two options……
you can use the imagex command line (or if you want a front-end GUI, you could use Gimagex), the syntax you are providing seems correct to me
imagex /compress maximum /capture c: d:\MyCapture.wim “MyCustom Image”
In Windows 7, you have also the possibility to use the DISM command line
Dism /Capture-Image /ImageFile:MyCapture.wim /CaptureDir:c:\ /Name:MyCapture
Image will be compressed but again….do not expect to have the same image size as the Windows XP capture image….
Hope this help
Thank you Griffon for your time, this has been very helpful. Another question do you have any tutorial on how to sequence your disk 1 image to ask for example a disk 2. for example loading drivers, instead of MDT loading them in the image, or to loading a backup folder to the C:.
No Problem Badger
Euh..I do not understand your question ? Do you mean, selecting/partitionning disks ?
Can you explain a little bit further what do you want to achieve so I can may be see what I can do ….
Till Next Time
Im talking about a Ejection Script, to load additional files from a 2nd disk. I have seen this done before with drivers; Disk 1 did not have drivers load from disk 1 in the task sequence because of multi-laptop deployment. Disk 1 is ejected, you are asked to load disk 2, once drivers are loaded disk 2 is ejected and installation continues with disk one. As you stated in earlyeir post, the .wim image is much larger. In my case I want to just load an additional folder that is almost 2 gigs bigger than is allowed on a dual layered disk. I hope this make more since.
Hello Badger,
In theory, yes you could create a script that would check for drivers. if not found; ask you then to insert an additional disk, …
But you will need to create your own script to do that or find the right tool to perform what you need to do
Why don’t you simply use the MDT Server for that and build you task sequence accordingly ?
The quick workaround here is not to use DVD but usb stick (16GB, 32 Gb,…). You can make the stick bootable and simply copy the content of the iso file on the stick and you will have a perfect, reusable deploy media
Hope this help
Till next time
Thank you Griffon, I’ll take a look at MDT.
Do you have any guides on creating offline media in MDT? I am looking for help on creating a bootable USB drive that acts the same way my MDT does. I am having troubles getting the task sequences to show up when I boot up my USB drive, the window is blank where I would normally be able to choose which task sequence I want to use.
Hey Brice,
The post you have just read give you all the information to create offline media. MDT Deployment Media create an iso file by default that you can burn into a dvd or create a bootable usb. There is a link in the post that explain how to create the bootable usb stick. If you do not see task sequences, maybe you have hidden them via the Customsettings.ini or you didn’t include the tasks in the profile
Hope this help
Till next time
I am trying to get a task sequence setup to install the image on disk 1.
Task sequence name: Deploy W7 x64 to D1
Task sequence tab –> Pre Install –> Format & Partition Disk | Values: Disk Number: 1 Disk Type: Standard(MBR) The box is checked for Create extra active partition
Task sequence tab –> Install –> Select the location where you want to apply the operating system: Specific Disk and Partition Disk: 1 Partition: 1
I then click OK and then edited the unattended.xml via the MDT task sequence Deploy W7 x64 to D1 –> OS Info (tab) –> Edit Unattended.xml Button. Then expanded Windows PE –> amd64_Microsoft-Windows-Setup_neutral –> Image Install –> OS Image –> InstallTo | Settings: DiskID value is 1; PartitionID 1
I have rebooted the deployment server, I also rebuilt the deployment share… Watching the deployment on the screen Lightouch says preparing Disk 1 Partition… When the install completes I see a black screen: BootMgr Missing. If reboot with F12 and select to boot from the Hard Drive it boots on the image, Bios says that is disk 0. When Windows loads I see data on Disk 1, the SSD as well as data on Disk 0. This is a Dell M3800 with 2 drives installed. No matter what I do I can’t seem to get the image to laydown on Disk 1.
Hello Nate;
As I’m quite busy lately…I will try to have a look this w-e and see what we can do to help you
Till next time
See ya
Having the same issue as Nate, it seems.
If I find a solution Nate, I’ll be sure to post as well. I’m now investigating why the process identifies the USB as a possible installation disk, hoping to remove the USB from that list….
Hey Stockman,
Thank for sharing possible findings… At the moment I overloaded and have no time to check on this….
Asap, I will try to come back on this topic
Till next time
See ya
Hey everyone, tried this method but my iso file is 146GB. Thats a bit much. Any suggestions on getting this to a more manageable size?
Thanks
Hello Evan,
You probably didn’t create any profile within MDT so you are basically including everything in your ISO.. (all OS, all Apps, All Drivers,….)
You need to create a selection profile for the ISO image you want to create (for example Windows 10 + Office 2016 + Std Apss + Drivers for Model X) and you will end up with an ISO with a much smaller size. to create selection profiles, open MDT Workbench, expand your MDT Share > Advanced Configuration > Selection Profiles
Hope this help
Till next time
See ya