Hello World,
We continue our journey into the MDT software and how it can be used to deploy windows operating systems. In part I, we have described how to install the software and install the necessary components needed to run MDT successfully. In part II, we have started to configure the MDT WorkBench console. We have seen how to create the folder structure used by the software and how to import Operating system files into the MDT server. In this part, we will quickly check how you can “easily” integrate applications, Drivers and packages (in other terms, windows updates – no service packs !) in your deployment process.
Let start it !
Import Drivers
MDT offers you the possibility to import out of the box drivers and allowing you thus to access these drivers during the deployment process. I intend to use this MDT installation to deploy virtual machines on my Proxmox VE infrastructure. If you have read some of my posts related to Proxmox VE, you know that’s best practice to use virtio drivers when running kvm virtual machines (see this post for more information). These drivers are not recognized by the Windows setup routine. You have to specifically import them. To demonstrate the import drivers process, I’ll import the virtio drivers within the MDT infrastructure. You need to get the drivers (can be downloaded here). To import drivers, you can perform the following tasks
Note : If you plan to import multiple drivers, I would recommend you to create a folder structure within the Out-of-the box Drivers nodes. As an example, you could create a folder called PVE Drivers and import the drivers into it. This is again to have a better and organized view on the deployment process.
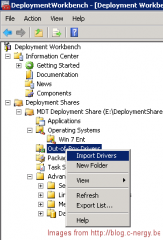
Step 1 : Go to the Out-of the box drivers node, right-click on it and select import drivers
Click on picture for better resolution
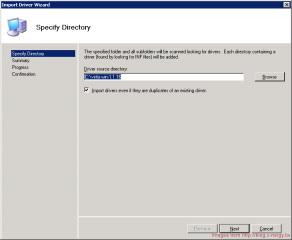
Step 2 : The wizard starts. In the specify directory page, specify the location of the drivers you want to import
Click on picture for better resolution
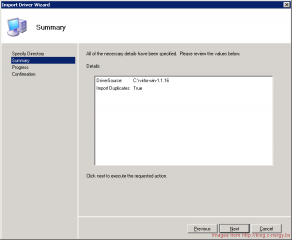
Step 3 : In the summary page, review the settings and press Next
Click on picture for better resolution
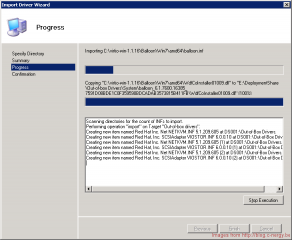
Step 4 : In the progress page, you can monitor progress of the task. Wait for this to complete
Click on picture for better resolution
Step 5 : In the confirmation page, you can press finish to exit the wizard
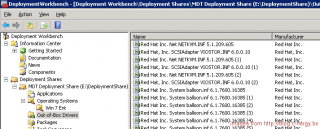
If you look into you MDT console, you will see that the out-of-the-box Drivers folder has been populated accordingly.
Click on picture for better resolution
Import Packages
You can also if you need to import windows updates wihtin your MDT infrastructure. This will ensure that these updates will be installed as well during the deployment process. Note, however, that you cannot deploy Services Pack through this mechanism. If you need to deploy OS with Service pack, you will first need to deploy the OS + service pack and then capture an image and import this image into your MDT infrastructure.
We will not demonstrate the process here because it’s similar to the Import Drivers process.
Import Applications
You can also if needed import applications within the MDT. Again, we will not go too muc in deep in this post. The most common application that you will be deploying is Office suite. You can find a good example on how to perform this integration here. Obviously, you should be able to deploy other applications if needed.
For the moment, we will not focus on this topic. The idea behind these posts is to provide you a quick and dirty guide on how you can start deploying Operating Systems using MDT. At a later stage, we will probably come back on this topic and explain in more details how to use this feature and also how to tweak the MDT software to automate as much as possible the deployment process.
Task Sequence Creation
Task sequence are basically the intelligence behind your deployment. You can create multiple tasks sequences that can meet different scenario you might have to deal with. Each task sequence can address a specific scenario. Using task sequence, you can also limit the number of master images that you need to create to one. Indeed, because you can integrate during the deployment process drivers, applications, and windows updates, you can customize the settings of the master image based on your scenario. The same master image could be deployed on workstations with different hardware.
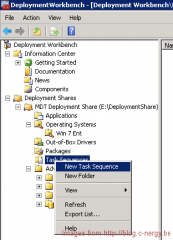
Step 1 : Go to the tasks sequence node,right click on it and select the option New Task sequence
Click on picture for better resolution
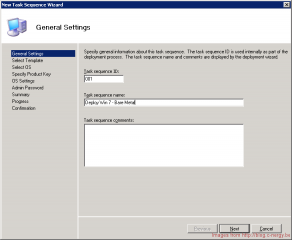
Step 2 : The Wizard start. In the General settings page, give a ID to the task and a descriptive name. Click on Next
Click on picture for better resolution
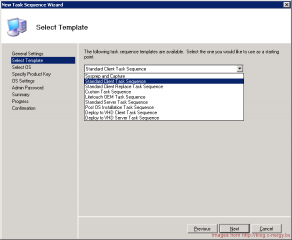
Step 3 : In the Select template, choose the most appropriate template based on your requirements. Press Next
Click on picture for better resolution
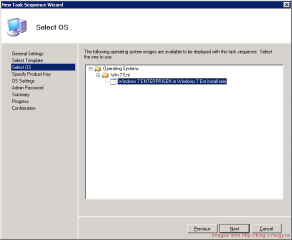
Step 4 : In the OS page, select the operating system you want to deploy. Press Next
Click on picture for better resolution
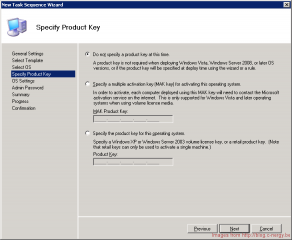
Step 5 : In the Specify product key, select the most appropriate option. Press Next We are deploying Windows 7 so we do not specify product key. KMS server will be used to activate these computers
Click on picture for better resolution
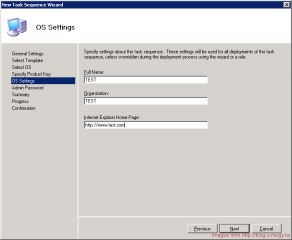
Step 6 : In the OS settings page, you can specify some basic information. Fill in the requested info and Press Next
Click on picture for better resolution
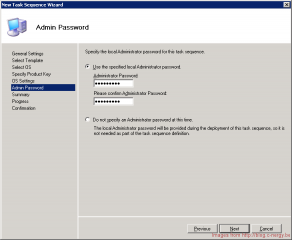
Step 7 : In the Administrator page, select the appropriate settings. We have set an admin password in your example
Click on picture for better resolution
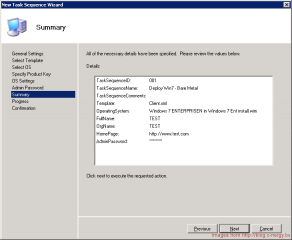
Step 8 : In the summary page, review your settings and Press Next
Click on picture for better resolution
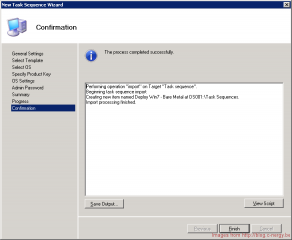
Step 9 : You will see the progress page. wait for the completion and in the confirmation page Press finish
Click on picture for better resolution
Update the Deployment Share
At this stage, you have performed all the necessary steps needed to deploy Operating System. However, you need to reflect the changes within the Deployment Share. Each time you modify settings in the Deployment share node, you will need to update it so the changes are comitted accordingly. How do you update the Deployment Share ? Easy, simply follow these steps
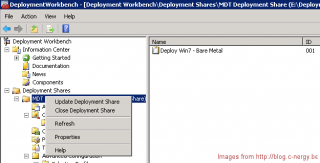
Step 1 : Go to your deployment share, right-click on it and select the option Update Deployment Share
Click on picture for better resolution
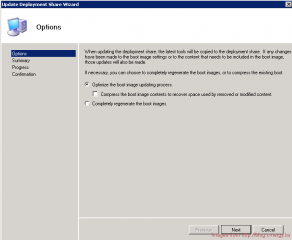
Step 2 : The Wizard is deployed. In the options page, select the appropriate option and Press Next
Click on picture for better resolution
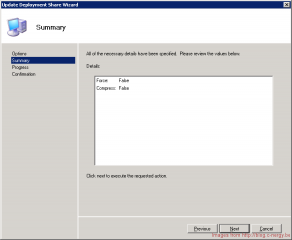
Step 3 : In the summary page, review the settings and Press Next
Click on picture for better resolution
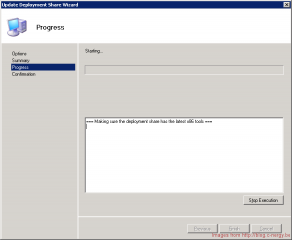
Step 4 : The progress page will be displayed. Wait for completion. Press Next
Click on picture for better resolution
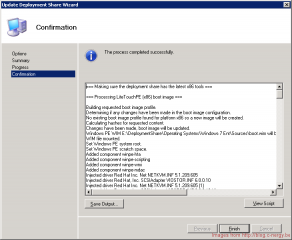
Step 5 : In the confirmation page, review the text and press Finish to quit the Wizard.
Click on picture for better resolution
Final Notes
At this stage, if you browse to your deployment share folder (DriveLetter:\DeploymentShare\Boot), you will see that MDT has generated iso images and wim images files. Using these images, you will be able to deploy your Operating System. One option is to burn the iso (or put it on a usb stick) and start the deployment process from there. However, for large deployment, this is probably not an option. We want to deploy OS through network. The only problem here is that MDT does not provide PXE infrastructure. You can use the PXE WDS infrastructure if you want to.
But if you remember, as mentioned in the first part of the series, I want to have a fully functional Deployment infrastructure based on MDT with no dependencies with WDS or Active Directory. We will need to create our own PXE server on top of MDT and this will be discussed in part IV of this series
Till then
See ya
Related Links
I have just stumbled across your web site AND I LOVE IT! You can’t imagine the amount of Technical web sites I visited to read pages and pages of guff to scramble my brain, just to get at what I need to know. Very good documents with explanations and PICTURES! I need them.
Your sites a Blessing!! Please keep it going it’s a great resource
Keeping it simple
Thanks!
Hello Derrick,
Thank you for the comments and the support… I wish I could have more time to do this…
Till Next time
See ya