
Hello World,
I have done my home work as you will see. On October 23, 2014, Ubuntu 14.10 has been released to the public. We have already posted some information about ubuntu 14.10 (the beta version) and xrdp package coming from the ubuntu repository. We have seen that the installation and tweaking process has not changed much. However, we have noticed that the xrdp package has been updated from version 0.6.0-1 to version 0.6.1-1 (or something similar). So, the ubuntu package has been updated in order to include some bug fixes.
I was working with my beta version of Ubuntu and had received the popup box asking me if I wanted to update. I decided to update my system. I didn’t notice immediately the xrdp package update. So, I started performing the installation of xrdp and tested it. And……..
Surprisingly, I was able to reconnect to the same session with no changes in the configuration file or with no need to perform a custom installation. So, they really did something in this package.
In this post, we will go again through the setup process for xrdp and take into account the fact that the xrdp package has been updated and that you do not need anymore tweaks to reconnect to your session.
Let’s go !
Some Assumptions
In this post, we assume that you have installed the Ubuntu 14.10 version (Final version).
We also assume that you have experience in Ubuntu. Because we have written some many posts about how to install xrdp on ubuntu, we will only provide main instructions needed to install the xrdp package on your ubuntu.
In this post, we will install as alternative desktop the MATE-Desktop interface which is for us the most appropriate when working via xrdp. If you want to install a different desktop environment (xfce or lxde), please refer to this post for instructions – Ubuntu 14.10 – How to install XRDP and have it working
We will perform everything from the command line……
So in order to access your terminal box, perform the following actions
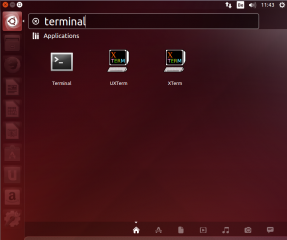
- Using the Dash button, in the search box, type Terminal
Click on Picture for Better Resolution
- Click on the terminal icon and the Terminal console will open
Install XRDP Package from Ubuntu Repository
In this post, we will be using the Ubuntu xrdp package (the version 0.6.1-1) which allows you to reconnect to an existing session.. (Man, this is so cool!)
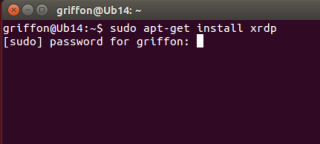
In the Terminal, type the following command
sudo apt-get install xrdp
You will be prompted for your password
Click on Picture for Better Resolution
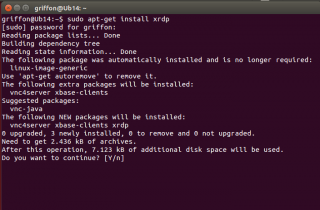
You will be then informed about the package size. To proceed with the installation, press Y
Click on Picture for Better Resolution
Wait for the completion
When done, you need to install an alternate desktop environment. So, let ‘s move to the next section….
Install Mate-Desktop software
As you know, we need to install an alternate desktop environment when connecting through xrdp. The Unity is not supported and not working when performing your remote desktop connection with xrdp. This is why we need to install the mate desktop environment so when performing the xrdp connection, we have access to the mate-desktop interface. Again, from the command line, you will execute the following commands
sudo apt-get update
sudo apt-get install mate-core mate-desktop-environment mate-notification-daemon
Note :
Some people encountered some issues using the command above in order to install the mate-desktop. The workaround (see comments) consist of using the ubuntu repository. So, you can install ubuntu remix mate desktop 1.8.1 executing the following commands
sudo apt-add-repository ppa:ubuntu-mate-dev/ppa
sudo apt-add-repository ppa:ubuntu-mate-dev/trusty-mate
sudo apt-get update
sudo apt-get upgradesudo apt-get install –no-install-recommends ubuntu-mate-core ubuntu-mate-desktop
Read this post (Ubuntu 14.10 – How to install XRDP and have it working) – Section MATE-Desktop because the last time we tried this command, the greeter configuration was changed. Something you might want to be aware of. This might have changed since. So please provide feedback so other people can benefit from your experience
Configure the xsession file
Now, we have to tell xrdp that when connecting it needs to use the mate-desktop interface. One way to configure this is to create ad update the .xsession file. For this post, we assume that you have only one user login into your Ubuntu machine.
In order to configure your xsession file for Mate-Desktop Interface, you will need to execute the following operations
echo mate-session >~/.xsession
Restart the xrdp service by issuing the following command
sudo service xrdp restart
Note :
If you have multiple users on the system that needs to connect, you will need to configure the xsession file for each user ! You can achieve this by having users logged in into the system and execute the above commands or you can automate the process by updating your startwm.sh file. A post is being prepared in order to explain how to configure xrdp when multiple users needs access to your system….
Configure your Keyboard layout at the xrdp Login screen
By default, the xrdp login screen keyboard layout is set to english. If your keyboard layout is set to something else than english, when entering your credentials in the xrdp login box, you should either
- remember that you have an english keyboard and you have to be sure that what you type is the correct password value (use the username textbox to check what’s your are typing…)
- change the keyboard layout to the one you are using
If you need to change it to another xrdp keyboard layout, you should proceed with the following actions while login into the ubuntu system directly (not via the xrdp session)
Step 1 : You go to the /etc/xrdp directory
Step 2 : you issue the command setxkbmap -layout <%your layout%> to define which keyboard map/layout to use (ex. setxkbmap -layout be – for Belgian keyboard)
Step 3 : create a copy of the km-0409.ini file into the same directory. It seems that this is the default file used by xrdp to define the keyboard layout. You will need to use sudo in order to be able to write into the directory
Step 4 : Check that you have a backup of your file by typing the dir or ls command
Step 5 : update the file by issuing the following command sudo xrdp-genkeymap km-0409.ini
Test your connection(s)
At this stage, you should be ready to test your installation.
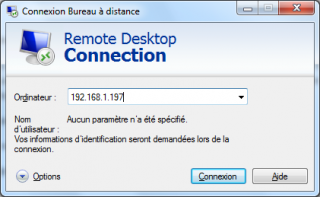
Go to your windows machine, start remote Desktop client and enter the ip address/name of your ubuntu machine
Click on Picture for Better Resolution
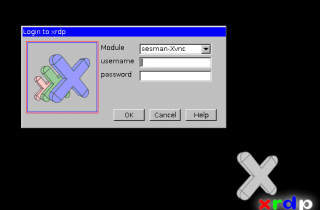
You should see then the login screen of xrdp presented to you. As mentioned above, we have normally changed the keyboard layout. You can check that your keyboard is set correctly by typing the password in the username textbox. So, you will be sure that you have the correct keyboard layout.
Click on Picture for Better Resolution
Enter your username and password and Press OK
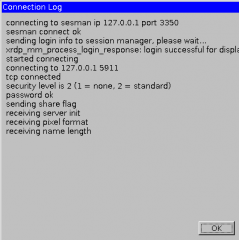
You will see a dialog box showing the login process
Click on Picture for Better Resolution
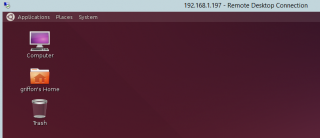
If everything is configured correctly,you should see your desktop loading and you should be able to perform your work through this desktop environment.
Click on Picture for Better Resolution
Open calcutor or customize your desktop. Disconnect and try to reconnect again…..
And you should be reconnecting to the same session with no additional configuration……You are done
Final Notes
This is it for this post ! Finally, the xrdp package has been updated and bring an important feature with it. You can now reconnect to an existing session with no additional configurations. The xrdp installation is become easier and there is less and less post configuration needed. From now on, you have everything you need in order to perform remote desktop session connections to your Ubuntu machine and you will be able to reconnect easily to your existing session and take back your work where you left it.
This is a great news for all the xrdp users out there…So, yes, upgrade to Ubuntu 14.10 or upgrade to the lasted ubuntu xrdp package
Till next time
See ya
Thank you very much! Your blog is a treasure-chest of information.
Hello Man,
No problem. I’m happy you have found the treasure-chest 🙂
Thank for the visit and positive comments
till next time
See ya
When i try to donwload “sudo apt-get install mate-core mate-desktop-environment mate-notification-daemon” y have error message unable to locate package “mate-core and mate-desktop-environment”…do you know what is the problem?
Thanks
Hello Peter,
Have you performed the sudo apt-get update before issuing the command sudo apt-get install…. to update your repository and have the mate listed
Give it a try a let us know if this is working
till next time
See ya
Griffon,
Having the same problem as Peter. Yes I did do the sudo apt-get update first. Does an alternate repository need to be added?
Thanks
I will answer my own question here. Perhaps it will help others similarly stuck.
To install MATE 1.8.1 in Ubuntu open a new Terminal window and run the following commands:
sudo apt-add-repository ppa:ubuntu-mate-dev/ppa
sudo apt-add-repository ppa:ubuntu-mate-dev/trusty-mate
sudo apt-get update && sudo apt-get upgrade
sudo apt-get install –no-install-recommends ubuntu-mate-core ubuntu-mate-desktop
Hello Kevin,
Sorry for the delay in my response….
We have mentioned indeed that to have the MATE 1.8.1 desktop interface, you good use the repository you have specified
You can check the post (http://c-nergy.be/blog/?p=5874)
As soon as I have some time, I’ll try to update the post to include this part
The funny part however is that I can still install the Mate-desktop 1.8 version using the command I have provided….
I did not encountered the issue so far
Thank for the comments, the positive feedback and the visit….
till next time
See ya
Wow! You have no it’s his may things I’ve tried. None of them worked.
Except this one!
Just saying thank you so much for how2-to . Always gave up on a new server
sorry meant almost gave up
Hello Man,
Thank you for the visit and the feedback
Till next time
See ya
Hey,
I know this post is old, however it seems that versions of xrdp below 0.6.1 doesn’t not manage the session reconnects properly. I have tried starting it with -1 port then reconnecting to same port which works in most cases, but using -1 sometimes instead of starting port 5910 starts 5911 and after that using -1 again starts a new session instead of forcing reconnect to last session.
I saw this was fixed in 0.6.1, but it does not seem to be an official update for ubuntu server 14.
How would i install this or update xrdp to 0.6.1?
Hello Warren,
I’m not sure I understand you question. If you have Ubuntu Server 14.10, the xrdp package that allows you to reconnect should be available.
If you want to use the latest package available, you can try to use this link (http://www.ubuntuupdates.org/package/core/xenial/universe/base/xrdp)
From this location, you should be able to download and install the latest xrdp package available
Hope this help
Till next time
See ya
I have windows 10 and ubuntu 16.10 and install this tuto, and all is update and upgrade.
I conect whit session sesman-xorgxrdp and error, when de credencial is correct in grey in the center monitor … error–> Could not acquire name on session bus.
If I select sesman-Xvnc whit you It said VNC error problem connecting some problem
If i used XFCE it succesfull, i think have a problem with Mate and some file
@Mitch,
Ubuntu 16.10 has introduced important changes in the way you can work with XRDP Software…..
If you are using Ubuntu 16.10 and you want to have XRDP working with MATE Desktop, you might want to have a look at the following post (http://c-nergy.be/blog/?p=10165)
Hope this help
Till Next time
See ya