|
|
The script hereafter is outdated and has been replaced by a newer version. Please Check the Download page for latest version.
|
Hello World,
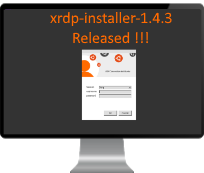
Holidays are coming soon and we are still working on the xrdp-installer script. We are happy to let you know that a new release of the famous xrdp-installer-script is available for you to test and download. Initially, the script was focusing on Ubuntu+ Gnome desktop interface. However, based on feedback and requests from users, we are trying to support more distributions (still not perfect but work in progress). Version 1.4.3 brings some minors features/improvements and fixes also some minor bugs
Thanks to our readers and more specifically thanks to Hiero 🙂 who is really active lately and providing really good feedback and share good ideas in order to improve the script.
The new version of our famous xrdp installation script will be set to 1.4.3 (i.e. xrdp-installer-1.4.3.sh). This script replaces all previous versions.
So, let’s proceed with this latest version….
Overview
By now, you should know that the xrdp-installer script aim to ease installation and post-configuration actions of xRDP on top of Ubuntu Operating system. xRDP is a piece of software that enable remote desktop services on Linux. This means that windows users can use their Remote desktop client (mstsc) and perform a remote connection to Ubuntu Computer.
Initially, the script was supporting only Ubuntu with Gnome Desktop interface. However, recent version of script tries to detect the Desktop interface in use and try to perform the post-configuration actions as required. Recent version of the script also can run against Debian Operating system as well
What’s new in this release (Version 1.4.3) ?
Informational message when performing the remote desktop connection (Credits to Hiero)
Credits goes to Hiero (one of our readers) for this feature. Hiero contacted us recently and made an interesting suggestion in order to avoid the frequent issue with xrdp black screen symptom. As you should know by now, xRDP does not allow you to perform a local and remote connection using the same user account at the same time. It’s either a local connection or a remote connection. If you try to perform concurrent connections with the same account, you will end up with a black screen. Some workarounds exists but we do not recommend to use them as they can also introduce some other issues… You can find more information at
- xRDP – Allow multiple sessions (local and remote) for the same user – More Option
- xRDP – Allow multiple sessions (local and remote) for the same user – HowTo
- xRDP – xRDP shows only black screen after authentication windows – HowTo Fix !
Hiero came up with the idea to introduce a warning message box when performing your remote desktop connection. The popup would show up only if the user trying to connect via RDP is already logged on locally on the Ubuntu machine. After integrating his code into the script, we have tested the functionality. So, if a user has already an existing local connection on the computer, when he will perform the remote connection, he will get the following message

Click on Picture for better Resolution
This is a nice little addition. In the future, we might want to perform the same kind of check (if possible) when a user is remotely connected via xRDP and tries to login locally. As you can imagine, the same symptom/behavior will occur. When login locally (while already logged remotely), only a black screen will be show to you…. We might want to have the same kind of warning message implemented but we have no timeline yet….
Basic error detection for sound redirection compilation
Since some readers reported some issues when running sound redirection from different distribution flavor, we have noticed that no error handling was available in the sound redirection code section. To overcome this limitation, we have slightly modified the code to have a really basic (quick and dirty) error detection system. The idea here is to simply notify the user if there is a problem during the execution of the script.
To find the root cause of the issue, you will still need to have a look into the output provided by the script which can probably provide you hints on why the sound redirection installation didn’t work as expected. Again, really a minor change but might help increase awareness in case of problem with sound redirection compilation process….
Installing additional packages for sound redirection feature
Again, thanks to a multiple readers, we have noticed that sound redirection was generating a lot of questions. On some distributions, the sound redirection compilation was not performing as expected. After a quick test (multiple actually) on different distributions, we have noticed that some packages needed for the compilation was missing and probably does not ship by default. Again, to overcome possible issues when try to get sound redirection working, we have added some code to ensure that necessary packages will be installed. The following additional packages will be installed when running the script with sound redirection option enabled
- meson,
- tdb-tools,
- libtdb-dev,
- doxygen,
- check
Our focus is on Ubuntu + Gnome Desktop and based on several tests we have made, it’s seems that this version of the script is running ok and sound redirection should be working fine. If you have different distributions, please give it a try and provide feedback. If you find that something is not working as expected, let’s us know and we will try to fix this…
Minor Bug fixing
As we were reviewing the script, we have also discovered some part of the code that was not covering all possible scenario which could have impacted the installation of the xRDP software. We have modified this part. We have not performed extensive testing but we think it should be ok. The modified code should better detect if you have used standard mode or custom mode. If you have performed a standard mode installation and you are trying to run on top of it a custom installation, the installation will not go through. If you want to move from standard mode to custom mode, you have to remove the xrdp package (xrdp-installer-xx.sh -r) and perform the custom installation afterwards.

Click on Picture for better Resolution
How to Use the Script
The xrdp-installer-1.4.3 script will work in a similar way as the previous versions. The following section will explain how to download, extract, set executable mode and perform the installation using the script. The script provides some switches that can be used to customize the installation process.
So, let’s see how this would be working….
Disclaimer
Prerequisites and assumptions
The following conditions should be met in order to have the best results while using the script
- We assume that your machine is connected to internet while performing the installation. This is needed as additional packages and software needs to be downloaded and installed on your Ubuntu machine
Script version & Supported Ubuntu Version
The xrdp-installer-1.4.3.sh script will support the following Ubuntu operating system version assuming that Gnome Desktop is the default Desktop interface
- Ubuntu 18.04.x
- Ubuntu 20.04.x
- Ubuntu 22.04.x
- Debian 10
- Debian 11 (only if you select custom mode installation !!!)
The xrdp-installer-1.4.3.sh script can be run against the following Ubuntu flavors but we cannot guarantee that everything will work as expected (best effort)
- Kubuntu (20.04 and later)
- Ubuntu Budgie (20.04 and later)
- Ubuntu Mate (20.04 and later)
- Xubuntu (20.04 and later)
- Lubuntu (20.04 and later)
- Linux Mint (Experimental at this stage)
- Pop!_OS 22.04
Note : If you are running any of these distributions and you want to help us improving the support on those, please download and test the script. Do no hesitate to share your findings so we can try to incorporate them in the next release
Step 1 – Download the script
To download the script, you have multiple options. You can from a Terminal issue the following command
wget https://www.c-nergy.be/downloads/xRDP/xrdp-installer-1.4.3.zip
You can also simply use your browser and click on the link to download the script :
Step 2 – unzip the file
After downloading the zip package containing the file, you will need to unzip it first. To unzip the package, you can use the Terminal console and issue the following command
unzip xrdp-installer-1.4.3.zip
You can also use the GUI and the Nautilus file manager to select the downloaded package, right-click on it and select the option Extract Here
Step 2 – Set Execute Right on the script
Download the xrdp-installer-1.4.3.sh script to your system, extract content and mark it as executable . To do this, perform the following action in a terminal console
chmod +x ~/Downloads/xrdp-installer-1.4.3.sh
Note : Adjust the path where the xrdp-Installer-1.4.3.sh script to reflect your environment
Step 2 – Run as normal user
The script needs to be run as a normal user. The script will start running and will prompt you for password when sudo actions are initiated. If you run the script as root or using sudo command, the Download folder does not exist for the root user and the script fails to run as expected. To overcome this situation, the script also check which user is executing the script. If the script is run under sudo or root accounts, a warning message will be displayed and the script will not execute
Step 3 – Switches and parameters
The xrdp-installer-1.4.3.sh script can be executed as is (with no parameters or switches). This will perform a standard (and basic) installation of xRDP. No sound or custom xrdp login script will be made available. However, remote desktop, drive redirection and clipboard redirection would be available with this installation mode.
The xrdp-installer-1.4.3.sh script accept also some additional parameters that will help customize the xrdp installation and enable additional features. The script provides the following parameters
--help or -h          => will display a basic help menu
--sound or -s         => will enable sound redirection
--loginscreen or -l   => will customize the xRDP login screen
--remove or -r        => will remove the xrdp package
--custom or -c        => will perform a custom installation (i.e. compiled from sources)
Step 4 – Perform xRDP installation using the script
The following sections will provide some examples and scenario on how you can use the script…..
Standard Installation – No Parameter
As mentioned above, you can decide to use the default xrdp package available in the Ubuntu repository and perform a basic installation which will provide you remote desktop capability and will also customize the remote sesssion. The script will ensure that the same look n’ feel will be maintained when the user logs on locally or remotely.
To perform a standard installation, you execute the script with no parameters. Open a Terminal console, browse to the location where the script has been downloaded and issue the following command
./xrdp-installer-1.4.3.sh
When the xrdp installation package will start, you be requested to enter your password. Provide the password and proceed with the installation. Wait for completion of the script. The machine will not reboot automatically when done so you can review the actions performed by the script….
Standard Installation with Parameters
The script can be used to perform a standard installation and still passes some parameters to get the most of the xRDP packages and their features. For all the Ubuntu versions, we could use the following combination of parameters
./xrdp-installer-1.4.3.sh -s      (this would enable the sound redirection)
./xrdp-installer-1.4.3.sh -l      (this would customize the xrdp login screen -see here)
Obviously, you can combine the switches (any order) to have more features enabled
./xrdp-installer-1.4.3.sh -s -l (this would enable the sound redirection and customize the xrdp login screen)
Important Notes
The script can be run multiple times on the same machine. If you have run initially the script with no parameters but you decide afterward to enable additional features, the script can be re-executed and the additional features will be enabled.
Custom Installation – Default Installation
Custom installation script is really flexible. Custom installation means that the script will compile the xrdp package from the source binaries. The custom installation script always uses the latest xrdp package version available
To perform a custom installation, you will need at minimum to pass one parameter. The following command line shows you how to perform a custom installation
./xrdp-installer-1.4.3.sh -c (this would perform a custom installation but will not enabled adv features like sound redirection or custom login screen)
Custom Installation – Additional Options
If a user wants to enable additional features, you will pass some additional parameters as shown in the following examples
./xrdp-installer-1.4.3.sh -c -s     (this would perform a custom install and enable sound redirection)
./xrdp-installer-1.4.3.sh -c -l     (this would perform a custom install and customize xrdp login screen)
./xrdp-installer-1.4.3.sh -c -l -s  (this would perform a custom install, enable sound and customize login screen)
Important Notes
The script can be run multiple times on the same machine. If you have run initially the script with no parameters but you decide afterward to enable additional features, the script can be re-executed and the additional features will be enabled.
Remove Installation option
This version of the script also ship with the option to remove xRDP package. The removal option should be only used if you have uses this version of this script to perform the installation. To remove the xrdp package, you would simply execute the following command
./xrdp-installer-1.4.3.sh -r (to remove the xrdp packages)
Step 5 – Test your configuration
After the script has run and after the reboot/shutdown and start process, it’s time to test and see if you can indeed perform a smooth remote connection to your Ubuntu machine. Start your favorite rdp client and simply enter your credentials and start testing your installation. If everything is ok, you will see a similar Desktop interface where Gnome Desktop is used and the Dock is visible.
Limitations
Switch between standard and Custom install
This version of the script can be run multiple times on the same machine. However, because of this new behavior, you cannot perform a standard installation and then decide to perform the custom installation. Once you have selected your installation mode, you will have to stick to it. This is kind of checked by the script.
So, if you have performed a standard installation but afterwards you might want to use the custom installation option, the script will ignore the request. If you want to move from standard install mode to custom mode (or vice versa), the correct process is
- remove xrdp (using the xrdp-installer-1.4.1.sh -r option)
- perform a new installation using your selected installation mode (standard or custom install mode)
Final Notes
This is it for this post !
The script version has not been tested extensively but we hope that the minor changes we have introduced will not cause any additional issues. We wanted to release this version mainly because of the nice little addition about the warning message when concurrent connections from the same user exists. This is really a useful one. Hiero has also shared some other ideas in order to improve support to other distributions. This would be our next step.. reviewing Hiero recommendations & ideas and try to integrate them into the script. This might show up in the next version of the script….
Thank you to Hiero for all the positive feedback provided so far and thanks for sharing your findings and suggestions…This is really highly appreciated…. 🙂
Please if you have time or want to help us in creating the best xRDP installer script, download the script, test it and provide constructive feedback. If you find a bug or an issue with the script, let us know as well so we can try to fix it.
Till next time
See ya
As a tip for those with an Intel or Nvidia GPU in their systems;
if you change the script, and add –glamour to the compile options you get hardware accelerated rendering! this has a huge impact on bandwith used (it goes up) but also massively reduces cpu usage and provides a smoother experience. Things like tux-racer over Rdp work fine now.
It might be nice to offer this as an option when installing with the script, be aware the results differ per system but in my case (integrated GMA630 in an 10th gen corei7) combined with Ubuntu 22 is works like a charm.
if any info or questions about how to set it up let me know.
@Gijs,
Thank you for visiting our blog and providing feedback. Thank you for sharing your findings… we are aware of the –glamour option but we never had time to look into this…
At a later stage; we will have a look and we will probably contact you to share your findings if ok with you… Since we are working on an heavy project, not much will happen in the coming weeks but we will definitely look into this 🙂
Till next time
See ya
Possible to add support to cutefis os?
@MingQiang,
Thank you for visiting our blog and providing feedback… We will see if we can add cutefish os as additional best effort option but will not done immediately. in the mean time, if we have time, we could give it a try and provide some guidance 🙂
till next time
See ya
Hi everyone,
Did someone manage to compile pulseaudio on Linux Mint 21?
I get a strange error, that no deb-src is added, although in software sources I have source code repositories checked.
@Alexkara,
Thank you for visiting the blog and providing feedback.. We have not yet fully tested the script against Linux Mint. We would need to check this one but it will take some time to us ( 3 to 4 weeks)… If someone else got some time or an idea of what could be the issue : )
Thank you for feedback
Till next time
See ya
Hello,
I encountered two issues. One is on Linux MINT, the other is on Debian.
– on Linux MINT
Sound compilation fails.
Linux MINT’s version of apt-add-repository does not support -s option.
Therefore, source code repository is not added and download of pulseaudio source code fails.
I enabled source code repository using synaptic->Settings->Repositories dialogue.
After that, download source code and compilation succeeded and sound works well.
– on Debian.
I get following error during compile/install xrdp.
/usr/bin/mkdir: cannot create directory ‘/usr/local/share/man’: No such file or directory
/usr/local/share/man directory does not exist, at least just after Debian is installed.
It is necessary to add “sudo mkdir /usr/local/share/man” for Debian.
Hiero
@Hiero,
Thank you for the feedback…. The script has been updated to tackle the Debian issue… for Linux Mint, I have no solution at the moment…we will need to look into this. since Linux Mint is one of the latest addition and still marked as experimental, we will tackle this issue in the next release (if doable)
Till next time
See ya
Hello @Griffon,
Just for info, i’m on Kali on latest version and all updated on VM in Proxmox.
My OS from i run RDP is Windows 11 Insider 25179
I need to redirect sound from Kali and redirect mic from Windows to Kali VM
I try you script on 1.4.3 but Kali is not in your script, also i remove all part of “Function 0 – check for supported OS version”
And i need to send you manys big thanks to you!!! You is my Hero!!
All work so nice… it’s so fun because i have search from many weeks how i can make redirect work on RDP!
Thank you so much!
P.S.: I see you blog is on .be, i’m french if you want to speak with me on mail 😉
Question: does this installer automatically install the absolute latest version of xrdp from it’s repo? (https://github.com/neutrinolabs/xrdp/releases)
Scratch my previous question; I took a gander through the script and see that it does.
Any chance on getting it to run with Raspbian as well? Running it now, I obviously get:
Your system is not running a supported version !
The script has been tested only on the following versions
Ubuntu 18.04.x/20.04.x/22.04/21.10/Debian 10/11
The script is exiting…
My (latest version is based on Debian 11, so it *seems* like it should work):
Distributor ID: Raspbian
Description: Raspbian GNU/Linux 11 (bullseye)
Release: 11
Codename: bullseye
@Doud,
Thank you for visiting our blog and providing good feedback. En effet, Kali n’est pas encore supporté par le script 🙂
We had not time to test yet against kali and we might be able to add this OS as supported Os in the future…
Thank you for letting us know that the script could work against Kali 🙂
Till next time
See ya
@J Scott Elblein,
Thank you for visiting our blog and providing good feedback. The script has not been tested against Raspbian OS. The script is checking the Description field and if it finds something like Debian, it would execute. You could try (at your own risk !!) to either modify the function check_os() within the script and replace the *debian* with *Raspbian* value or simply command the call to the check_os() function and see if the script would run against your system
Maybe in the future, we might want to add Raspbian in the list of possible OS candidates that the script can run against
Till next time
See ya
Works fine with sound after running as root.
Debian 11 user. No need to restart after doing
“`./install.sh -c -s“`
I tested on latest unstable Debian 11 build. Does not work out of box – you need to comment out lines that check for sudo.
Hello,
I used the script to configure remote desktop on a ubuntu 20.04 (from a windows machine). As soon as i enter my credentials, the windows rdp client crash. Any idea ?
@Jean-Pierre
Sorry for the late answer (but we are really busy at work at the moment)
So, the script ran fine, right ? How did you perform the installation standard mode or custom mode ? Which version of xrdp are you running (xrdp -v on a command line)
Can you reboot the machine to be sure that all services are running (or you can check them by issuing systemctl status xrdp )
Can you ensure that the xorgxrdp package has been installed correctly (easiest would be to reinstall the package if you have used a the standard installation) or check that package is installed dpkg -l | query xorgxrdp
Can you check that the ~/.xsessionrc is created and populated accordingly ?
Finally, can you check the logs to see if there is any hints that can try to fix the issue (in ~/.xsession-errors.log and in /var/logs/xrdp.log and /var/logs/xrdp-sesman.log)
Waiting for your feedback
Till next time
See ya
@Jean-Pierre
make sure you arn’t logged into ubuntu outside of xrdp
Thanks for providing this script. I ran it on Pop!_OS 22.04, and a side effect is that in remote desktop sessions the Dock no longer works in accordance with the Settings.
For example, I specify in Settings that the Dock should always be shown and that it should be on the right. It is not shown at all except when I hit the Super key or select Activities, in which case the Dock appears at the bottom, with a search bar and workspace switcher at the top, and a scaled-down desktop in the middle.
Do you have any idea how I can make the system once again respect the Dock parameters specified in Settings?
@Mark,
Sorry for the delay in answering your message.. we have been busy at work…
The desktop interface should replicate what you have on your local session. This should be controlled by a file ~/.xsessionrc… The content of this file is trying to import session and settings from your current desktop
This file is generated each time you login into your remote session. The file that trigger this action is /etc/xrdp/startwm.sh (comment code below the #Improved Look n Feel Method line)
Check the content of the ~/.xsessionrc file and see if you have some contents and should look like this
#Improved Look n Feel Methodexport GNOME_SHELL_SESSION_MODE=pop
export XDG_CURRENT_DESKTOP=pop:GNOME
export XDG_CONFIG_DIRS="/usr/share/pop:/usr/share/gnome:/\${PWD}/.local/share/flatpak/exports/share:/var/lib/flatpak/exports/share:/usr/local/share:/usr/share"
This piece of code should fix the look’n feel….
You can have a look at this post where we explain step by step how to install and configure xRDP (see https://c-nergy.be/blog/?p=16637)
We will try to test it again and come back to you
Till next time
See ya
Thanks for that. For some reason, I had some extraneous entries in /etc/xrdp/startwm.sh. There were lines assigning values to the env vars just as you posted. But down below that, the lines were repeated in their original form, i.e. with nothing after the = for each assignment. So the settings were being overwritten with empty values. I deleted the extraneous lines with no values assigned, and it works as expected now.
Thanks again for a useful script, and for the extra help!
@Mark,
Ah great…Thank you for the feedback.. we will check the script soon and possibly try to re-write some parts to make it even better (and simpler to maintain :))
till next time
See ya
Dear Griffon;
Awsm work. Pls can you update the script linux mint version. i cant work the sound. Tnx
Tried few sites but was not able to get the sound working on Ubuntu 22.04 on Hyperv. Using this script (version 1.4.4) worked like a charm. Thank you very much
@VJ,
Thank you for visiting our blog and providing feedback…. Always happy to see that the script is working as expected and can be useful
Till next time
See ya
@MD,
Thank you for visiting our blog and sharing your finding… We have quickly checked the Linux Mint and the Sound redirection. so, the problem is that Linux Mint has a different way to add sources repository. As a quick workaround, you can manually enable them through the Sources Updates > Optional Sources > Enable Sources Code Repositories…. Then run again the script with the -s switch and the sound should be back….
We will try to update the script for Linux Mint and Sound Redirection
till next time
See ya
I’ve installed XRDP on a Ubuntu 22.04 physical machine using your awesome script, and basically it’s working fine.
However I’ve found that the local, physical display / monitor of the machine turns completely off after some time running XRDP and doesn’t turn back on even if I hit a key on the keyboard etc.
Also the IPMI console shows a blank screen.
XRDP or SSH log-in keeps working as expected.
This is a problem, because the machine is intended to be used either from remote or directly
After a reboot the Ubuntu log-in screen / greeter turns up again.
This looks like some lock-screen / screen-blanking problem.
Any ideas ?
HEllo Thomas,
Thank you for visting our blog and providing some feedback. We have not encountered this issue so far..on physical machines(HP/ACER Brand). This problem could be something related to the hardware or could be related to Power settings configuration.. You might have Hibernation feature enabled… But again…not sure because we have never got this kind of issue so far
Till next time
See ya
I’ve used this script a couple times…….wish someone would do similar for Raspberry Bullseye
@Russ;
Thank you for the feedback and for visiting our blog.. We are trying to include more and more Linux flavors…maybe we will include raspberry pi in the future
Till next time
See ya
Thank you for your tutorial. When I use GUI with xrdp and Ubuntu Server 22.04, although Internet connection is not showing in GUI. Internet is working in the system. Please tell me how to solve it because it shows no internet to use software center from GUI
@Hector,
Thank you for visiting our blog… No clue at this stage…we will need to check this setup… which Desktop interface are you using ?
Waiting for your feedback
Till next time
See ya
Hi.
Does the microphone work on the remote computer?
Hi.
Does the microphone work on the remote PC?
@Dimitry,
We have no clue.. we never tested it and never needed. Our guess is this is probably not working
Till next time
See ya
So, could you make it work, and give some recommendations to fix lags?
@Dimitry;
We do not know yet… we will need to have a look and see if this would be feasible. Lately, we have been working on a heavy project and we have not much time to blog… We will have a look for sure but it might take some time…
Till next time
See ya
What a bizarre script, you claim “After the script has run and after the reboot/shutdown and start process, it’s time to test and see if you can indeed perform a smooth remote connection to your Ubuntu machine. Start your favorite rdp client and simply enter your credentials and start testing your installation. ”
Surely this isn’t true, if you just reboot wsl, what is going to start xrdp? how do you start xrdp? Do you need to configure the port in /etc/xrdp/xrdp.ini ?
Given you didn’t document any of this, it’s hard to have confidence there’s nothing else required that you didn’t bother documenting.
After I configure (manually! ) xrdp, and start the service manually, THEN I can connect after running the script. But no audio (even after reboot). So if there’s some other thing that needs running manually, who knows. The pulseaudio gui can’t connect to pulseaudio so I’m guessing it isn’t running. And why would it be, WSL has no systemd.
oh and on ubuntu 22.04.3 LTS, the script fails for missing libpulse. I had to install that manually.
Oh… I guess it’s my bad, I thought the script was designed to support WSL, and it’s not, it’s just for generic Ubuntu, so my bad on that one. Still, would be nice if someone could have instructions to get it started on WSL.
I can confirm that this works for Ubuntu 20.04 Desktop, running inside a LXC container.
I exported all of the packages that were installed from a “real” Ubuntu Desktop VM installation with:
$ sudo apt update -y && apt upgrade -y
$ sudo apt install -y xfce4 xfce4-goodies xorg dbus-x11 x11-xserver-utils xfce4-terminal xrdp
$ sudo update-alternatives –set x-session-manager /usr/bin/xfce4-session
$ sudo apt-get install firefox -y
$ sudo systemctl status xrdp
$ dpkg –get-selections | grep -w “install” | cut -f1 > packages_list.txt
and then installing them with:
$ apt install -y $(cat packages_list.txt)
And ran this script to enable audio redirection and it works.
I’m new to Linux and I have two Mint Cinnamon 21.3 VMs (based on Ubuntu 22.04) installed under HyperV (Windows Server 2016 version) and both VMs are members of a Windows domain. I also had working xrdp/xorg installations on these machines, but without audio.
So I used your script (version 1.5) to first remove the existing xrdp installation (-r option) and then install xrdp/xorg with the -s option.
The result was great. Now I am able to redirect audio from both VMs to a (Windows 10) RDP client.
Do you know how to achieve the same effect in a HyperV console? Problem here is probably that a Linux VM cannot be started so easily in extended mode.
@wkg-tu,
thank you for visiting our blog and sharing your questions. So, not sure what you are asking for here. If you want to enable Enhanced mode and still use xrdp package, you might want to have a look at this post we wrote some time ago. Visit this post (xRDP – Hyper-v Enhanced mode for Ubuntu through xRDP software – Revisited)
Hope this help
Till next time
See ya