Hello World,
In our previous post, we have quickly demonstrated how to perform the installation of Pop!_OS. Pop!_OS is the Linux Distribution developped by System76 and based on Ubuntu. The post was written because a lot of people were asking me/suggesting me to perform an installation and give it a try. Pop!_OS is providing a really nice user experience and the look n theme provided is indeed refreshing and polished.
The next most popular request we have received related to Pop!_OS operating system was to quickly provide a simple step by step guide on how to install the Linux Remote Desktop solution (i.e. xRDP software) on top of Pop!_OS and have it configured accordingly….
So, this post will explain exactly that…. Let’s do this…..
Overview
Since we have received a lot of request about installing and configuring xRDP software on top of Pop!_OS, we will provide the necessary steps to perform the installation and post-configuration actions needed to have it working. If you are following us for a long time, you problaby know about xRDP software, its purpose and how to install it either manually or automatically using the script we are providing.
Since our xrdp-installer script is not supporting (yet?) Pop!_OS, we will perform the xRDP installation manually on the Pop!_OS operating system.
So, let’s go !!!
Prerequisites and assumptions
The following conditions should be met in order to have the best results while using the script
- We assume that your machine is connected to internet while performing the installation. This is needed as additional packages and software needs to be downloaded and installed on your Pop!_OS machine
- We have performed the installation on Pop!_OS 20.04
- No additional Desktop interface is used ( xRDP session will be showing Gnome Desktop)
- We are performing a manual installation
Basic Installation Process
Installing the xRDP package
The manual installation is quite straight forward. You simply need to open a terminal console and execute some commands. The manual installation process will be using the xRDP packages available in the Official Pop!_OS Repository. To perform your installation, you simply need to issue the following command
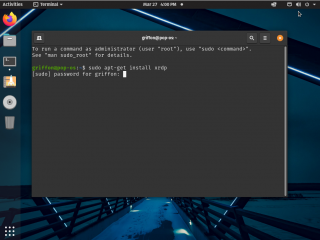
sudo apt-get install xrdp
If requested, please provide the password and press Enter to Proceed with the installation
Click on Picture for Better Resolution
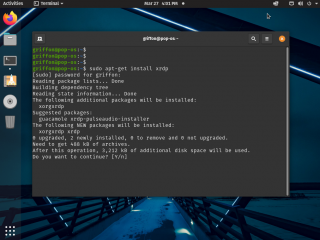
If prompted, please confirm the installation process
Click on Picture for Better Resolution
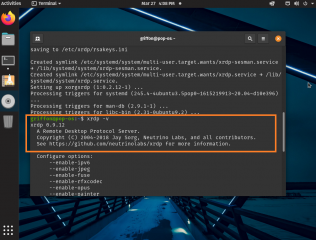
To check xRDP version, open a Terminal console and issue the following command
xrdp -v
Click on Picture for Better Resolution
At this stage, you should be able to perform an remote desktop session but you will not enjoy a seamless user experience. We will explain later in this posts how to perform the post configuration actions in order to avoid small annoyance while performing the remote desktop connection.
Test your xRDP connection (no post configuration settings yet !!!)
Important !!!
Before trying to perform a remote connection to your Pop!_OS computer, no one must be logged on on the machine. Please ensure that the user account that will be used to perform the remote session that this user account is not logged locally on the computer. This is by design. A same user account can be connected either locally or remotely but not both at the same time…. If you see a black screen when performing the remote desktop connection, this means that the user account performing the remote connection is also logged on locally on the Pop!_OS machine. So, please logoff from the Pop!_OS machine…..
Click on Picture for Better Resolution
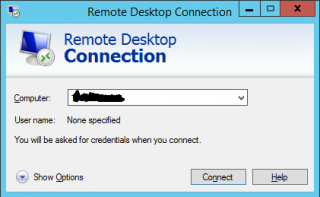
To test your xRDP connection, open your favourite remote Desktop Client. Provide the hostname or ip address of the Pop!_OS computer and press the connection button
Click on picture for better Resolution
You will be prompted with a certificate warning. Press OK to proceed
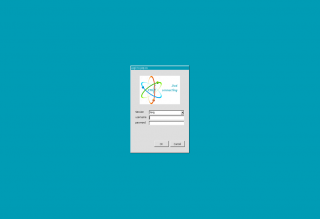
You will be then presented with the xRDP login page (with a green background)
Click on Picture for Better Resolution
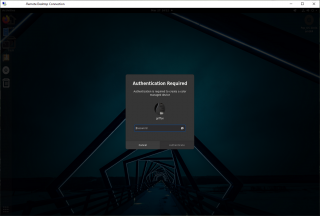
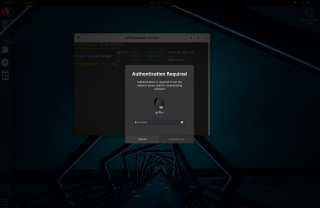
Provide the credentials and press OK. If everything is OK, you should see your Pop!_OS desktop presented to you. However, after a few seconds, you will see some dialog box prompting… Provide the credentials and Press OK in order to proceed.
Click on Picture for Better Resolution
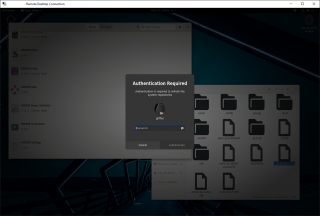
Again, after some time, you might see an additional Dialog Box popup. Provide the credentials and Press OK in order to proceed
Click on Picture for Better Resolution
If you try to open the Software center (or Pop!_Shop) application, you might also see the following dialog box showing up……
Click on Picture for Better Resolution
All these popups can be annoying for the users. By tweaking Polkit rules (see next section), we can get rid of these popups and provide a better user experience
Finally, if you pay a little bit more attention, you will also notice that the look’n feel (theme) of the Desktop is not exactly the same as the one you see when logged on locally on your Pop!_OS machine.
Click on Picture for Better Resolution
Again, with a little trick, it will be possible to replicate the desktop look’n feel when connected to the remote session…Keep reading…
Post Configuration Setup
Implementing Polkit Rules for xRDP on Pop!_OS
As mentioned above, with no additional configuration on your Pop!_OS machine, you will see a number of popups while working in your remote session. By tweaking your system slightly and generating custom polkit rules, we can prevent these popups to showing up…
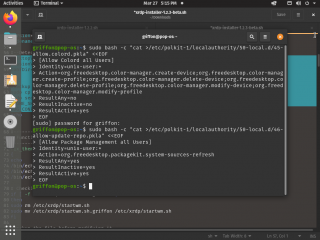
To create these polkit rules, login locally on the Pop!_OS machine and copy/paste the following command in your Terminal console and Press Enter. You might be prompted for your password. Provide your credentials in order to proceed
sudo bash -c "cat >/etc/polkit-1/localauthority/50-local.d/45-allow.colord.pkla" <<EOF
[Allow Colord all Users]
Identity=unix-user:*
Action=org.freedesktop.color-manager.create-device;org.freedesktop.color-manager.create-profile;org.freedesktop.color-manager.delete-device;org.freedesktop.color-manager.delete-profile;org.freedesktop.color-manager.modify-device;org.freedesktop.color-manager.modify-profile
ResultAny=no
ResultInactive=no
ResultActive=yes
EOF
Then, copy/paste the following code and press Enter
sudo bash -c "cat >/etc/polkit-1/localauthority/50-local.d/46-allow-update-repo.pkla" <<EOF
[Allow Package Management all Users]
Identity=unix-user:*
Action=org.freedesktop.packagekit.system-sources-refresh;org.freedesktop.packagekit.system-network-proxy-configure
ResultAny=yes
ResultInactive=yes
ResultActive=yes
EOF
Click on Picture for Better Resolution
Fixing the Theme and Desktop Look’n Feel
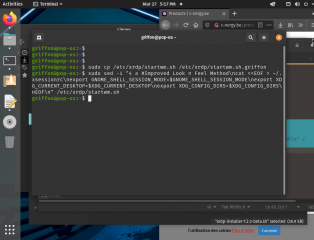
To fix the Desktop look’n feel, you will simply copy/paste the following commands in the terminal console
#Backup the file before modifying it
sudo cp /etc/xrdp/startwm.sh /etc/xrdp/startwm.sh.griffon
sudo sed -i "4 a #Improved Look n Feel Method\ncat <<EOF > ~/.xsessionrc\nexport GNOME_SHELL_SESSION_MODE=$GNOME_SHELL_SESSION_MODE\nexport XDG_CURRENT_DESKTOP=$XDG_CURRENT_DESKTOP\nexport XDG_CONFIG_DIRS=$XDG_CONFIG_DIRS\nEOF\n" /etc/xrdp/startwm.sh
Click on Picture for Better Resolution
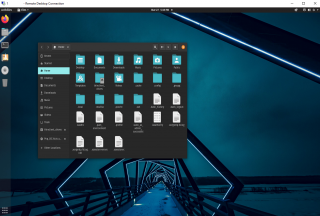
Test again your XRDP connection
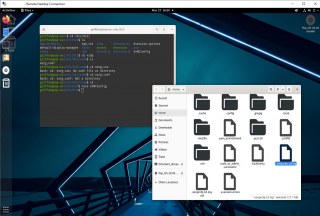
After making all these small tweaks, you should be able to access your Pop!_OS session with no dialog box and presenting you the same look’n feel as the one available when logged on locally
Click on Picture for Better Resolution
Final Notes
Voila ! This is it ! In this post, we have been able to perform a simple installation of xRDP package in order to provide remote desktop capabilities. We have also tweaked a little bit the Pop!_OS system in order to have a seamless user experience. As you have seen, it’s really not too difficult to have remote desktop capabilities enabled on a Pop!_OS machine.
If you are following us since a long time, you know that we have developed the xrdp-installer script that automate installation and post configuration actions of xRDP. The script was not used here because it’s actually support (so far !!) only Ubuntu Operating system. As a new version of Ubuntu is about to be released, we will probably release a new version of the xrdp-installer and we might include support for Pop!_Os….
Till next time
See ya
how to get this to connect to your existing X session so you get your actual desktop?
IOW, how it works in windows? I know there must be a way….
@Cameron,
Thank you for visiting our blog and providing some feedback. With newer xrdp and xorgxrdp packages, it is not possible to connect to the actual desktop session. Using the trick described here (https://c-nergy.be/blog/?p=16698), you could have the same user connected at the same time on local console and remote console . If you want to access the actual desktop, you would need to use something like vnc software or other third party software but not xRDP
Hope this answer your question
Till next time
See ya
Just tried this with 21.10 and it didn’t work.
@Pete,
Thank you for the feedback and visiting our blog. We are working on the next version of the xrdp-installer script… we have run the script against pop!os 21.10 and it’s working as expected. The xrdp package is installing accordingly and we are able to connect to the desktop using remote desktop client. We have done another test today Pop!0s 21.10 standard installation of xrdp package…and it works
Can you explain what’s not working ? what’s failing ? when connecting do you get a black screen ? is the connection not going through ?
waiting for your feedback
Till next time
See ya
Thank you for helping community and saved my time 🙂
@Ahmet,
Thank you for visiting our blog and sharing your positive experience. Happy to see that our little contribution is helping out
Till next time
See ya
not working… blank screen after login
@Dan,
Thank you for the feedback and visiting our blog. We have received confirmation from another user that the procedure was working as expected.
Black screen is usually generated by two situation
1/The user trying to perform the remote session is already logged on into the system locally. so, Please ensure that no one is logged on on the system before trying RDP
2/The ~/.xsessionrc file if empty or incorrectly filled in can also generate the black screen behavior
Hope this help
Till next time
See ya
Don’t forget to add the following to either ~/.xsessionrc to or the top of /etc/xrdp/startwm.sh:
export GNOME_SHELL_SESSION_MODE=pop
export GDMSESSION=pop
export XDG_CURRENT_DESKTOP=pop:GNOME
This is for the Pop!_OS Cosmic desktop within RDP.
@nobody,
Thank you for visiting our blog and providing some feedback…
Thank you for emphazing the information about POP!OS However, note that this information seems redundant with the content of the post. Actually, if you read the section Fixing the Theme and Desktop Look’n Feel, you will notice that we are providing exactly the same information. We are placing code in top of the /etc/xrdp/startwm.sh.
Any way thank you for mentioning it
Till next time
See ya
Hi,
I use PopOS 22 as a VM running on my Synology NAS. Installing and tweaking as described in your article works very nicely!
Thanks you!