Hello World,
Today we will speak a little bit about Microsoft world. So, I’ve recently downloaded the Windows 8 preview version available for free (see this post). I wanted to test the new HYPER-V 3.0 version that’s included within the next Windows Operating system release. In order to test hyper-v, you would need to have a machine that’s capable of supporting hyper-v (or you could use ESXi 5 to run a virtualized instance of windows 8 with Hyper-V functionality included – for a later post).
I wanted to have a good performance experience so I decided to install Windows 8 on a laptop where I could test Hyper-V 3.0. An operating system was already loaded on this laptop. I could perform an “classical” dual boot installation. Instead, I decided to perform the installation on a VHD file. This give me the opportunity to write a long awaited how to about installing operating system on vhd.
You will see it’s really simple. So, let’s do this.
Prepare your structure and create your VHD Disk
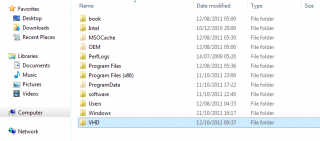
From my running laptop (where an operating system is loaded), I have created a folder under the c drive where I’ll store the bootable VHD disks I’ll be creating. I have also copied on the c:\software folder the sources files for the windows Operating system I want to install
Click on the picture for better resolution
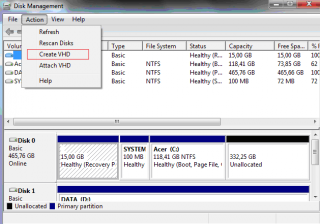
The next step would be to create the virtual disk. To perform such operation on a Windows 7 computer, you can open the disk management console, go to Actions and select the option create VHD Disk
Click on the picture for better resolution
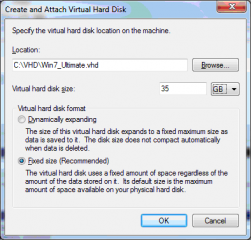
The Create and Attach VHD Disk dialog box will be displayed. You can simply fill in the information accordingly. Provide the location where to store the vhd file, the size of the vhd file and type of the vhd file. I have selected the fixed disk size.
Click on the picture for better resolution
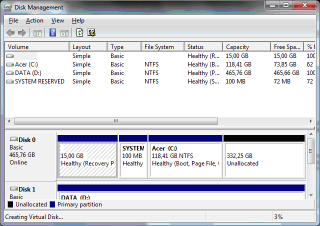
When ready, click ok and you will see at the bottom of the disk management console the creation progress status
Click on the picture for better resolution
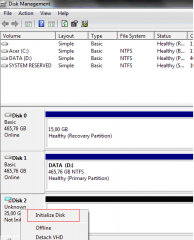
When the disk has been created, you will see that it’s attached automatically within the disk management console. However, you might need to initialize the disk and format it in NTFS.
Click on the picture for better resolution
Note : For completeness, I have to mention that you can create the vhd disk by using the famous diskpart command line. There is an option called create vdisk that can be used to create such vhd disk.
- DISKPART
- CREATE VDISK FILE=”C:\VHD\Win8.vhd” TYPE=FIXED MAXIMUM=35000
- SELECT VDISK FILE=”C:\VHD\Win8.vhd”
- ATTACH VDISK
- CREATE PARTITION PRIMARY
- EXIT
Apply WIM Image to VHD Disk
At this stage, you are ready to apply the image into the VHD disk. I was looking for an easy way to perform the installation and I have found this nice little powershell script called InstallWindowsImage.ps1 (can be downloaded from internet if you google for it). From your running Windows Operating system, you can apply the wim image to the VHD Disk. Isn’t it cool ?
First, you will need to identify which version of the Operating System you want to install. To do this check, you simply type from the powershell console the following command :
.\InstallWindowsImage.ps1 -WIM <location of install.wim file> (in my case c:\software\Win8\sources\install.wim)
Click on the picture for better resolution
Identify the index number next to the version of the operating system you want to install and then issue the following command to apply this image to the vhd disk
.\InstallWindowsImage.ps1 -WIM <location of install.wim file> -Apply – Index <ID> -Destination <Drive Letter of the attached VHD File>
Click on the picture for better resolution
You will see a warning that the operation can take up to 15 minutes. If after 20 minutes, you do not see anything on the scree, type 2/3 times enter and see if you can the completed successfully message
Configure the Boot Manager
Finally, you will need to create/modify the boot file in order to have the 2 operating system listed in your boot manager. Again, the process is really simply, you simply need to issue the following command line
copy c:\Windows\system32\bcdboot v:\windows (where v: is the drive letter of the attached VHD disk)
Click on the picture for better resolution
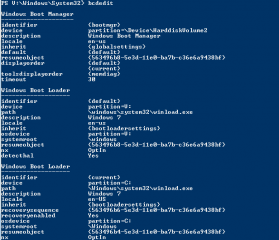
At this stage, you can verify that the boot entry has been added by simply issuing bcdedit
Click on the picture for better resolution
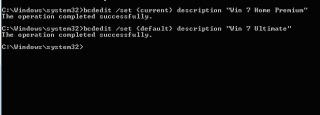
You might want to rename boot manger entry. If you look at the previous screenshot, you will see that both operating systems are using the same description (Windows 7). I want to have a more explicit differentiation between these 2. So, using bcdedit, I can modify this by issuing the commands shown on the screenshot.
Click on the picture for better resolution
Final Notes
After that, you can simply reboot your computer, select from the boot manager, the new operating system located on the VHD disk and go through the installation Wizard. A final step would be to install any drivers that are needed by the system. When this is done, you will have a multi-boot installation system where one of the operating system is stored on a VHD disk.
As you can see, this was not too difficult. Now, It’s up to you. Obviously, you can still perform a classical dual boot configuration by creating a physical partition or using the flexible vhd format disk to create your multiboot configuration. When you have finished with your tests, you can simply delete the vhd file (and modify the boot configuration file using bcdedit) and you are back in time with your previous configuration.
That’s it for this post
Till next time, See ya
source : http://technet.microsoft.com/en-us/library/gg318049(WS.10).aspx



Link to InstallWindowsImage Powershell script is bad! Thus, this won’t work!
@Joe,
Thank you for your feedback and letting us noticing that the link was not valid anymore. So, we have updated the post and removed the offending link
if you need to use the powershell script, please use a search engine an look for the installWindowsImage.ps1. We hope that the script would be still available somewhere
Till next time
See ya