Hello World,
Ubuntu 19.04 has been recently released and it’s time for us to update our well-known xrdp installation scripts. In our previous post, we have already noticed that some changes have been made in Ubuntu 19.04 and more specifically to xrdp packages availability in Ubuntu repositories. This release seems to not include the xrdp-pulseaudio-installer package which was used to enable sound redirection within a remote session. This change might not be the only one.
So, in this post, we will first perform a manual installation of xRDP and see what else might have changed. This manual installation will also allow us to revisit the code used within our scripts in order to see if any improvements can be done. These improvements will then be described and integrated in the new xrdp scripts….
Let’s start…..
xRDP installation on Ubuntu 19.04
Assumptions
For this post, we have make some assumptions.
- The Ubuntu 19.04 final release will be used
- At time of writing, all available updates were installed on the Ubuntu machine
- No alternative Desktop will be used. Default Gnome desktop will be the default desktop accessible via the xrdp session
- We are using the standard xrdp package available within the Ubuntu repository for Ubuntu 19.04
- Ubuntu machine has been installed as virtual machine using Virtualbox software
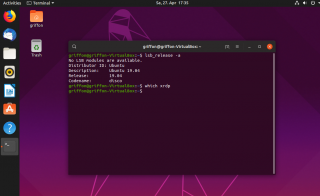
The following screenshot shows the current version of Ubuntu we are using and also shows you that no xRDP software is installed yet.
Click on picture for better Resolution
Installing xRDP software
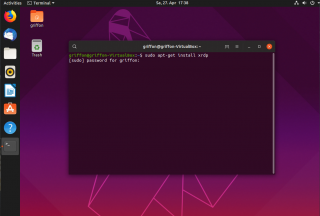
The manual installation is quite straight forward nowadays. You simply need to open a terminal console and execute some commands. The manual installation process will be using the xRDP packages available in the Official Ubuntu Repository. To perform your installation, you simply need to issue the following command
sudo apt-get install xrdp
Click on picture for better Resolution
You might also be prompted for a password. Provide it and proceed with installation
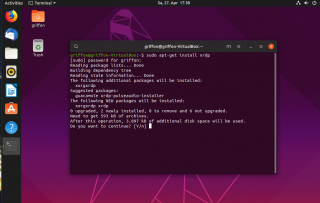
Review the information on the screen… You should see that additional packages (xorgxrdp) will be installed as well to provide a better experience.
Click on picture for better Resolution
If requested Press Y to proceed with the installation.
And Voila, you are done….
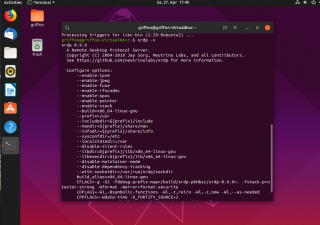
At this stage, you can check that xRDP has been installed and you can check which version has been made available. In the terminal Console, simply type
xrdp -v
Click on picture for better Resolution
You can see that we are using the latest version of xRDP package (i.e. 0.9.9)
Make a remote desktop connection
The manual installation perform a “basic” xrdp installation. Using the official xrdp packages, you should be able to perform a remote desktop connection to Ubuntu, use clipboard and use drive redirection. However, this manual installation is limited and post-configuration actions would be needed to provide a better user experience. For example, the manual installation will not configure sound redirection. The manual installation is also not providing the same look’n feel experience and some additional actions are needed in order to obtain a really similar experience while connected locally or connected remotely
To Test your configuration, you need to perform the following steps
- step 1 – Logout from the Ubuntu machine (same user account can be connected either locally or either remotely – not both)
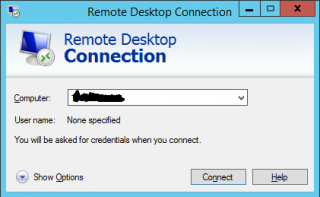
- step 2 – Start your favorite remote desktop client and provide the ip address or hostname of your ubuntu machine
Click on picture for better Resolution
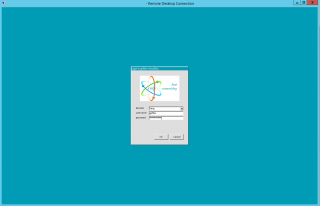
- step 3 – At this stage, you should see the xRDP login page. Provide your credentials
Click on picture for better Resolution
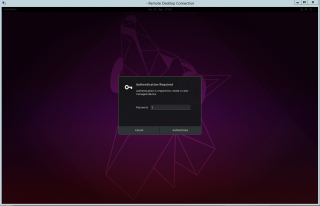
- step 4 – If your credentials are correct, you will access your remote Desktop environment and you will receive a popup box that ask you again some credentials. Ignore this dialog box for the moment and press cancel. This might happens multiple times (so far we have count 2 times). This error will be tackled later on….
Click on picture for better Resolution
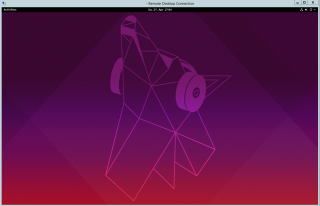
- step 5 – If your credentials are correct, you will access your remote Desktop environment which does not look like the one used when locally logged on. (No Dock bar,…)
Click on picture for better Resolution
The desktop environment when performing a remote desktop connection does not look like the one a user would get when logged on locally. If you are following us for a long time, you know that we have provided through our famous script a way to automatically reconfigure the system in order to a user to get the same desktop interface when using Remote Desktop connection… We can see that this issue still exists in Ubuntu 19.04 when installing xRDP…
Final Notes
So, performing a manual xrdp installation will allow you to perform a remote desktop connection but as you have seen, there are some minor annoyances showing up when using this approach. First annoyance concern the Desktop look and feel you receive when performing your remote connection. Out of the box installation implies that desktop interface when locally logged on would be different in the remote session. The other annoyance is related to the authentication popup.
We have already explained how to overcome these limitations in some previous posts (see links below) and we have also provided two scripts that can be used to fully automate the xrdp installation and provide the best user experience. Using these scripts, you can perform an automated installation and avoid to manually configure your system to provide the same user experience when logged on locally on remotely.
Release of Ubuntu 19.04 has introduced some changes when working with xRDP and we needed to perform the manual installation in order to identify the minor issues that would popup. Now, that this is done, we can move to the next steps which will explain how to fix the different desktop interface and how to solve also the authentication popups displayed when performing a remote connection
Keep reading as new info will be provided soon
Till next time
See ya
Links and References
- Ubuntu 18.04 – Install xRDP the easy way (Scripted Installation – Version 0.2)
- xRDP – The Infamous “Authentication Required to Create Managed Color Device” Explained
- xRDP – How to Fix the Infamous system crash popups in Ubuntu 18.04 (and previous versions)
- xRDP – How to Fix Theme issues in Ubuntu 18.04 remote session
- xRDP – Install xRDP the easy way (Scripted Installation – Version 0.3)
- xRDP – How to Fix different lock screen colors in Ubuntu 18.04 remote session
- xRDP – Install xRDP the easy way (Scripted Installation – Version 0.4)
- xRDP – Install xRDP the easy way (Scripted Installation – Version 0.5)
got this working.
But, still having a peculiar issue:
When in a remote session, as i click on the software icon I get this message in the app:
“Unable to download updates: You do not have permission to install software.”
The software Updater app does not work as well.
@Doug,
wild guess… this would be blocked by the polkit technology… This is kinda known limitation… if you need to install software or get updates, you should use command line instead…
We will try to tackle this issue and see if we can come up with some options/workaround/solution for this…but this might take some time as we are busy on several projects…
Thanks for notifying us and for the positive feedback
Till next time
See ya
Thanks a bunch. If I see or come up with something I’ll let you know.
@Doug,
Thanks you and let’s hope we can fix this small annoyance…..
till next time
See ya