 Hello World,
In our previous post, we have been describing small issues related to Look’n Feel related to the Desktop in Remote sessions. The post was discussing small issues encountered by users when connecting for the first time remotely on their Ubuntu machine after installing manually xRDP. If the xRDP package has been installed manually, inside the remote session, additional configuration actions are needed in order to get access to the Dock, the App Ubuntu indicator menu and to get the Ubuntu default theme (Ambiance)… As you can see these issues are more cosmetic annoyances and will not block users to connect remotely..
In this post, we will tackle another Look’n feel issue… The infamous GDM Login screen color difference within the remote session… Again, this is not a blocking factor but we think that having a coherent and similar experience when logged on locally or remotely is an important topic because this will improve the user experience when working remotely on the system….
Let’s see if we can fix this issue…
GDM Login/lock background in xRDP Sessions
Overview
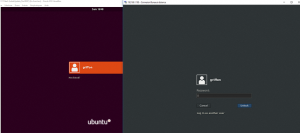
This section will try to describe in more details the annoyance generated by the introduction of the Gnome Display Manager (GDM) login screen in Ubuntu. When performing a login/logout/lock action on the local machine, the theme color used by the Gnome Display Manager (GDM) is based on the purple color used by Ubuntu and Canonical. However, when a user lock the workstation during a remote session, the GDM background color is not Purple (as it should be) but grey.
Obviously, the grey background comes from the original Gnome Desktop software which is using this color as default. When performing a remote connection, the original information is read somewhere on the system and present the user with the grey lock screen.
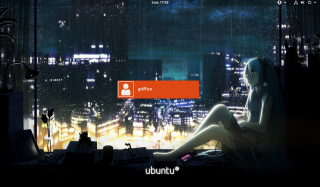
This two part posts (part I & Part II) described how to change the background image when using GDM as login manager. Basically, the look n feel for the login screen is controlled by some css files. Updating information in these files will alter the look n feel of the login screen (as shown in the following screenshot)
Click on picture for better Resolution
Initially, some of our colleagues thought that fixing this issue would have been as simple as modifying the css file controlling the visual aspect of the login screen… Guess what ? It didn’t worked as planned. This was expected as the local session present a coherent visual on login/lock page (Purple color). On the other hand, the visual aspect in remote session is also coherent as the grey color appears at login and when locking the screen….
Reading through blogs, forums and documentation about GDM, a more detailed information about gdm and login background image was found (see this link in french). This link basically explain how to change the background image used by GDM but not by modifying the css file (which was basically a hack introduced by System76 and Ubuntu to customize their OS) but by de-compiling and recompiling resources files used by GDM….So, we decided to give it try….
Step by Step Process
Using the information provided in the link, we have put together a script that execute all the necessary actions needed to perform the visual change in GDM login background color/image…. The next section will explain quickly what the script does…
Download & Install some pre-requisites…
Because we will need to compile some of the files, we need to install some additional packages not available by default on Ubuntu… So, you need to open a Terminal console and issue the following commands
sudo apt-get -y install libglib2.0-dev-bin
sudo apt-get -y install libxml2-utils
Create Staging Folder Structure to generate new resource file for GDM
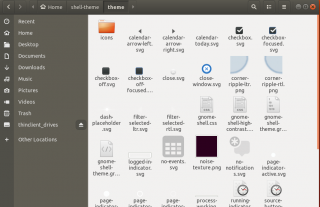
In this stage, we need to create a folder structure that will be used to generate the new file that will be read by GDM and which will define the new background image or color to be set. We have created the Folder called shell-theme in Home and within this folder we have created the folder Theme and subfolder icons.
workdir=${HOME}/shell-theme
if [ ! -d ${workdir}/theme ]; then
       mkdir -p ${workdir}/theme
       mkdir -p ${workdir}/theme/icons
fi
Extracting elements and resources from the compiled file
The following commands will extract resources from the compiled “gnome-shell-theme.gresource”. The different files,icons, images used to provide visual layout will be extracted in this folders. We will need to modify some of these elements in order to “fix” the discrepancy between local lock screen and remote session lock screen…
gst=/usr/share/gnome-shell/gnome-shell-theme.gresource

for r in `gresource list $gst`; do
      gresource extract $gst $r >$workdir/${r#\/org\/gnome\/shell/}
done
Generate the new grerource.xml file
The script will then create a new gnome-shell-theme.gresource.xml file that will be used during the re-compilation of the GDM theme. The contents should look similar to this one. This file might need to be updated when new version of Ubuntu will be released…
# create the xml file
bash -c "cat >${workdir}/theme/gnome-shell-theme.gresource.xml" <<EOF
<?xml version="1.0" encoding="UTF-8"?>
<gresources>
<gresource prefix="/org/gnome/shell/theme">
<file>calendar-arrow-left.svg</file>
<file>calendar-arrow-right.svg</file>
<file>calendar-today.svg</file>
<file>checkbox-focused.svg</file>
<file>checkbox-off-focused.svg</file>
<file>checkbox-off.svg</file>
<file>checkbox.svg</file>
<file>close-window.svg</file>
<file>close.svg</file>
<file>corner-ripple-ltr.png</file>
<file>corner-ripple-rtl.png</file>
<file>dash-placeholder.svg</file>
<file>filter-selected-ltr.svg</file>
<file>filter-selected-rtl.svg</file>
<file>gnome-shell.css</file>
<file>gnome-shell-high-contrast.css</file>
<file>logged-in-indicator.svg</file>
<file>no-events.svg</file>
<file>no-notifications.svg</file>
<file>noise-texture.png</file>
<file>page-indicator-active.svg</file>
<file>page-indicator-inactive.svg</file>
<file>page-indicator-checked.svg</file>
<file>page-indicator-hover.svg</file>
<file>process-working.svg</file>
<file>running-indicator.svg</file>
<file>source-button-border.svg</file>
<file>summary-counter.svg</file>
<file>toggle-off-us.svg</file>
<file>toggle-off-intl.svg</file>
<file>toggle-on-hc.svg</file>
<file>toggle-on-us.svg</file>
<file>toggle-on-intl.svg</file>
<file>ws-switch-arrow-up.png</file>
<file>ws-switch-arrow-down.png</file>
</gresource>
</gresources>
EOF
Modify default gnome-shell.css file
This is where all the magic happens. The default color used by gnome is the grey one . This color code can be found in the gnome-shell.css file under the lockDialogGroup section. The css code for grey code is #2e3436. So, we replace this css color code with the one used by Ubuntu to have the purple color.
sed -i -e 's/background: #2e3436/background: #2c001e/g' ~/shell-theme/theme/gnome-shell.css
Re-compile and replace files
Finally, it’s time to recompile the gnome resource file and replace the existing one.. The following code performs exactly that..
#Compile file and copy to correct location....
glib-compile-resources gnome-shell-theme.gresource.xml

# make a backup of the file and copy the file....
sudo cp /usr/share/gnome-shell/gnome-shell-theme.gresource /usr/share/gnome-shell/gnome-shell-theme.gresource.bak
sudo cp ${workdir}/theme/gnome-shell-theme.gresource /usr/share/gnome-shell/gnome-shell-theme.gresource
Reboot the machine
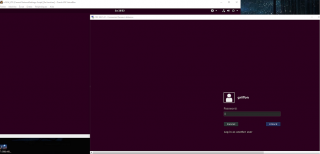
The final (and most important) operation consist of restarting the computer. After rebooting the gdm lock screen in your remote session should be matching the default purple color available when locally connected to your ubuntu machine.
Click on picture for better Resolution
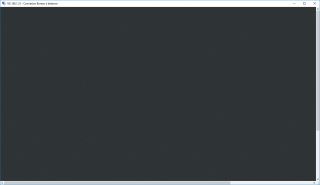
Still Grey color visible at login
If you perform a remote connection via xRDP, you will notice that at the login time,just after the black screen displaying while establishing the connection, the infamous grey background is still visible.
Click on picture for better Resolution
Again, looking around, it’s possible to set the background color during the login process to Ubuntu purple color. The only way to do this (at least the one we found) is to open the noise-texture.png in an image editing program and fill in the image with the color you want to use…. To set the purple color everywhere, you would need to change the noise-texture.png picture in the ~/shell-theme/theme/ location (before the compilation) and then you can compile again the gdm theme (as shown in the screenshot below)
Click on picture for better Resolution
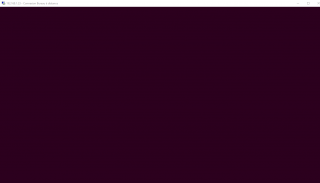
After compilation, and after rebooting your system, you should see that even at login process, the background color is set to purple Ubuntu color…
Click on picture for better Resolution
Final Notes
This is it for this post ! Lately, we have been discussing a lot about Look’n feel and all the small issues/annoyances that seems to be recurring in using xRDP against Ubuntu operating system. By spending some time and efforts, it has been possible to detect, identify and fix some of these issues. In the previous posts, we have been able to explain and fix the following issues
- xRDP – The Infamous “Authentication Required to Create Managed Color Device” Explained
- xRDP – How to Fix the Infamous system crash popups in Ubuntu 18.04 (and previous versions)
- xRDP – How to Fix Theme issues in Ubuntu 18.04 remote session
In this post, we have tackled the lock screen different color between local session and remote sessions… So, after explained and finding out all this additional information,we need to update our famous Std installation script for xRDP. Guess what ? This is currently under work and should be published quite soon…
so, stay tuned for more adventures
Till next time
See ya
Thanks for this post… I’m struggling with the “purple flash” during normal login on a local desktop and had the same observation about #lockDialogGroup in gnome-shell.css – the color parameters don’t seem to be having any effect, but the specified image clearly does show up and so can “take over.”
Do you know what the “next layer down” from this .css specification is? like: the thing that reads it and decides what to display.
@Mike inman,
Do not understand fully your question… to change color and css is not enough, you have to change the picture noise-texture.png (as explained in the post) and you should then be able to have a solid background of your choice
Hope this help
Till next time
See ya