Hello World,
Let’s continue our journey into the wonderful world of Ubuntu and PXE technology.
In Part I, we have described how to perform a network installation of Ubuntu 18.04 Server Edition on BIOS-Based systems. Deploying Ubuntu Server through PXE technology is apparently quite well documented and you can find such information a little bit everywhere.
In Part II, we have described how to perform a network installation of Ubuntu 18.04 Desktop edition on BIOS-Based. This operation should be quite common as we can automate the deployment of workstation using pxe technology. However, finding the good technical information about this was not that easy. After some trial and errors, we finally put together a good step by step guide.
So far, the focus was on Bios-based systems. However, modern computers are not using BIOS layer anymore but are almost all based on modern UEFI layer. It’s time to explain and describe how Ubuntu network installation on UEFI-based systems can be performed. This is basically the purpose of this post..
So, let go and try this…..!
Overview
This guide will explain how to configure your dhcp/pxe/tftp server infrastructure to support UEFI-based systems network installation. Obviously, we assume that you have read the two previous posts (this post and this post) as they provide information on how to install some of the necessary software to achieve our goal. This post will provide detailed information about how to update this existing PXE infrastructure in order to add UEFI support.
Assumptions
The following assumptions have been made in order to have this scenario working
- TFTP/PXE/DHCP infrastructure is already installed (see previous posts)
- Hyper-v platform is used to emulated UEFI based virtual machines
- VM Generation 2 will be used in order to have UEFI and SecureBoot option enabled (detailed instruction can be found here)
- You have internet connection in order to download additional necessary packages
- You have Ubuntu 18.04 Server ISO or installation files
- You have Ubuntu 18.04 Desktop ISO or installation files
Step by Step Guide
Step 1 – Build up your PXE Infrastructure
As described in our previous post, a single Ubuntu machine will be hosting all the necessary packages needed to setup a PXE server. These packages are
- dnsmasq (providing DHCP,DNS and TFTP services),
- apache web for storage purposes and
- NFS packages if you are planning to deploy Ubuntu Desktop through your PXE infrastructure.
If you have followed part I and Part II of this posts serie, we are ready to move to the next step….
Step 2 – Download additional UEFI boot files needed
In order to be able to deploy UEFI based system through PXE infrastructure, we will need to obtain some additional files. Because we are deploying Ubuntu on UEFI based systems with Secure Boot option enabled, the pxe boot loader that we need must be signed. The UEFI version of pxelinux can be used to provide UEFI capabilities. However, files provided are not signed and will fail to boot in a scenario with secure boot option.
Luckily, Ubuntu is providing necessary signed boot loader files which will be used in this post. So, let’s move to the real action
Update the TFTP Folder structure
Because the UEFI PXE boot process will be using the grub package, we will need to add a folder in our TFTP Directory. So, based on our infrastructure, our root tftp folder is located is /tftp. We will need to create a sub-folder called grub issuing the following command
sudo mkdir /tftp/grub
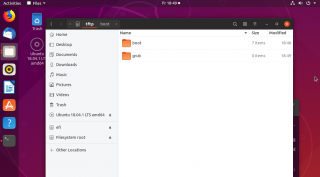
At the end of the process, we should end up with the following folder structure
Click on Picture for Better Resolution
Downloading uefi files
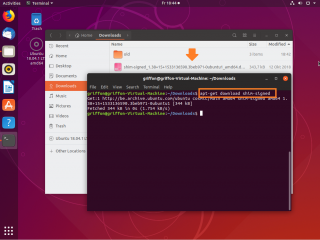
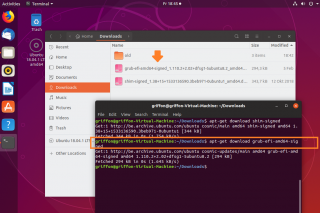
We need to download the necessary boot loader files for UEFI. These files are called shim.efi and grubxnet64.eif and can be downloaded from Ubuntu repository. To download these files, open a terminal console and issues the following command
apt-get download shim.signed
Click on Picture for Better Resolution
apt-get download grub-efi-amd64-signed
Click on Picture for Better Resolution
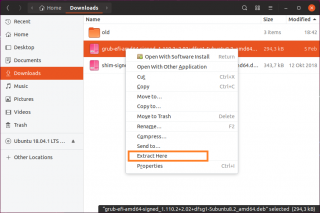
Go to the location where you have download the files. You will then need to extract the content of the file. We need to extract content of both downloaded files. So, right-click on the shim-signed downloaded package and select the option extract here
Click on Picture for Better Resolution
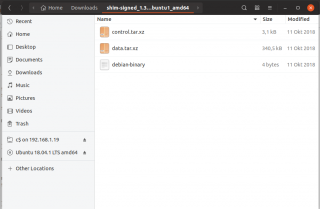
Browsing inside the shim extracted folder, you will see two folders (also compacted) : control and data
Click on Picture for Better Resolution
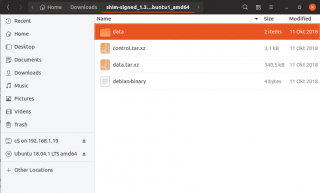
Double-click on data and data folder uncompressed will be created
Click on Picture for Better Resolution
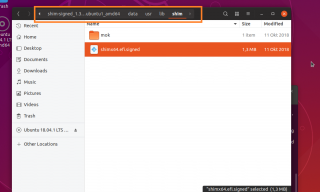
Browse on the data/usr/lib/shim/
Click on Picture for Better Resolution
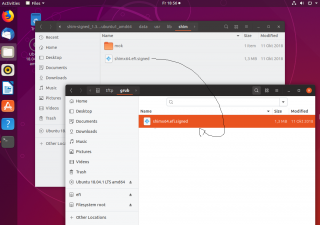
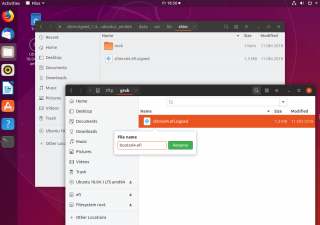
Copy the file called shimx64.efi.signed under your /tftp/grub folder
Click on Picture for Better Resolution
Rename the file shimx64.efi.signed as bootx64.efi….
Click on Picture for Better Resolution
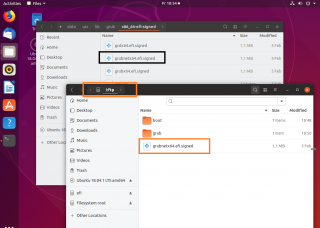
We will perform the same kind of operation for the grub package we have downloaded. So,navigating to the folder containing the grub packages and we move to /data/usr/lib/grub/ and copy the grubnetx64.efi.signed file to /tftp folder
Click on Picture for Better Resolution
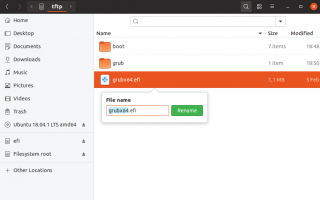
You will need to rename this file into grubx64.efi
Click on Picture for Better Resolution
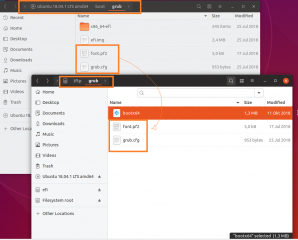
Finally, we will copy the following files (grub.cfg and font.pf2) that are located on the ubuntu ISO file under /boot/grub into the /tftp/grub folder
Click on Picture for Better Resolution
We are almost done !
Step 3 – Update DHCP Configuration for UEFI Support
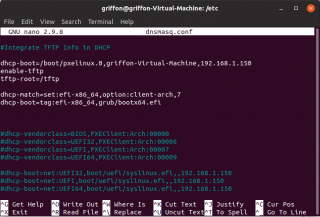
In this step, we need to tell the DHCP server where to find the correct boot loader if an UEFI system is making the request. This step is quite simple. We will need to update the /etc/dnsmasq.conf file in order to add the uefi boot loader information. Add the following options at the end of the file
dhcp-match=set:efi-x86_64,option:client-arch,7
dhcp-boot=tag:efi-x86_64,grub/bootx64.efi
Click on Picture for Better Resolution
To make the change effective, we need to restart the dnsmasq service by issuing the following command
sudo systemctl restart dnsmasq
Step 4 – Create your grub.cfg file
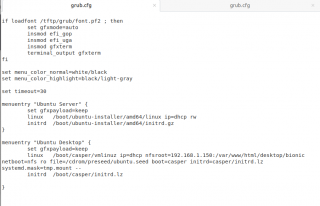
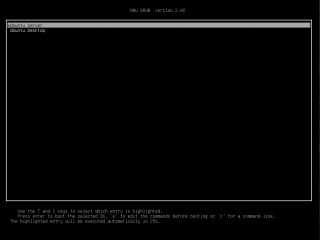
In this step, we are simply creating a grub menu that can display the different option. in the screenshot below, we have populated the file so it will display two options: Installing Ubuntu Server or Installing Ubuntu Desktop version.
Click on Picture for Better Resolution
Step 5 – Test your configuration
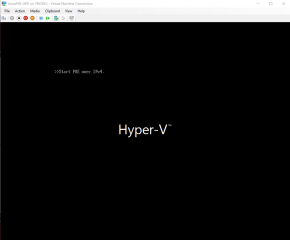
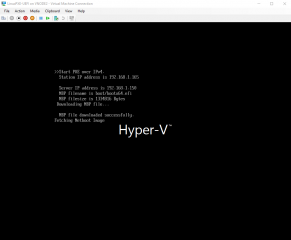
We just need to test and validate our configuration. So, let’s boot our virtual machine UEFI based and we should see the following screen indicating that we are booting from the network
Click on Picture for Better Resolution
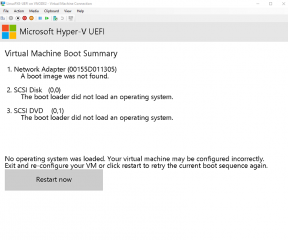
if you receive something like this, there is an error in your configuration. This can be location of the file or in configuration file you are not using the correct path or wrong file names. You might need to review your configuration.
Click on Picture for Better Resolution
On the other hand, if everything is configured correctly, you should see really quickly the following screen
Click on Picture for Better Resolution
Just after you should see the grub menu and you can proceed with your choice…
Click on Picture for Better Resolution
Try both options and you should see that you will be able to perform installation through network for either BIOS-Based systems or UEFI based systems….
Final Notes
Voila ! This is it ! We are quite happy we had the time to update our knowledge base about network installation of Ubuntu using PXE technology. We have been able to demonstrate how to deploy Ubuntu Server as well as Ubuntu Desktop versions. Finally, because UEFI is becoming the standard, we have also described how to integrate this in our PXE infrastructure. This posts series has been based on some trial and error process but at the end we were able to reach our goal.
We could proceed with our investigation by providing more info about automating the installation or about customizing the look n feel of the PXE process. However, as we are really busy busy and Ubuntu 19.04 is on its way, we might not have the chance to dig deeper the subject. We shall see what future brings
Till next time
See ya
References :
https://wiki.ubuntu.com/UEFI/SecureBoot/PXE-IPv6
https://wiki.ubuntu.com/UEFI/PXE-netboot-install
apt-get download shim.efi.signed
apt-get download shim.signed
@Dave,
You are right.. There is indeed a mistake in this post… I will updated it asap
Thanks for the visit and your positive feedback 🙂
Till next time
See ya
hey Griffon,
i have followed the same steps as in the blog. When i boot my bare metal VM on hyper V .It shows network adapter(00155D606710) DHCP failed Error.I have been working on this since many days and found your blog.
My server i in same subnet within hyper V.
thanks
@Shree….
Euh ok, Based on the error, I would say that the DHCP server is not providing ip addresses to your virtual machine…
Either your dhcp configuration is not correct or the vm machine is not getting ip because of some configuration within the VM….
I would first check if DHCP server is configured properly. So, next to the dhcp server, I would create a new virtual machine with operating system (any), configure it to use DHCP and see if I get an ip address -> if yes, DHCP server is fine and working as expected
Then, I would move to the DHCP Client VM that’s having some issues… and I would check if there is no configuration settings preventing the dhcp lease (like DHCP GUARD in the VM settings)
Another test would be to install another dhcp server (Microsoft or TFTPD32) and see if the vm gets an ip…. If this is not working, VM could be the problem
Hope this help
Till next time
See ya
Hey Griffon…
Every step mentioned here worked for me until NBP file downloaded successfully.
I’m getting the error
>>Checking Media Presence……
>>Media Present……
>>Start PXE over IPv4. Press ESC key to abort PXE boot.
Station IP address is my ip
Server IP address is sever ip
NBP filename is bootx64.efi
NBP filesize is 1196736 Bytes
>>Checking Media Presence……
>>Media Present……
Downloading NBP file…
Succeed to download NBP file.
Fetching Netboot Image
GNU GRUB version 2.02~beta2-36ubuntu3.16
Minimal BASH-like line editing is supported. For the first word, TAB
lists possible command completions. Anywhere else TAB lists possible
device or file completions.
grub>
when i exit from grub prompt i’m getting :
Network Adaptor The boot loader did not load an operating system.
Please help me to get rid of this error.
@Shree,
After the fetching netboot image, you should see the grub menu displayed on your screen… If you see the Minimal bash, it might be because the grub.Cfg file might not be configured correctly…You might want to check these top 3 posts (see http://c-nergy.be/blog/?cat=42) that provide maybe a better structure for pxelinux configuration
Hope this help
Till next time
See ya
Hi all,
I followed the tutorial to the fullest, however I am not able to boot in secure mode, if I disable the secure mode.. booting works and everything is fine.. any ideas?
Siggi
@Siggi,
Based on the information you have provided, no clue. Can you provide a little bit more information ?
which Ubuntu version are you deploying (Ubuntu 18.04 DEsktop or UBuntu 18.04 Server) ?
Deploying to physical or virtual machine ?
When you boot in pxe, do you see the grub menu ?
When you select the option, do you go through and the installer ?
Do you see a error message ?
waiting for some feedback
Till next time
See ya