Hello World,
In the past, we have spoken about custom tftp and pxe configuration that could be used to deploy windows operating system. Then, we have been speaking about MDT (Microsoft Deployment Tool) that provide the necessary tools and script to deploy windows operating system.
Since a long time, we wanted to cover the pxe and tftp technology on the Linux side but we never had the chance to do so. In the past, we had a working setup on Linux systems. However, as technology evolve quite rapidly nowadays, we had to look for most current information about pxe installation infrastructure on Linux. And… we didn’t find right away the correct information….
So, this post (which will probably become a series of posts) will try to describe how to deploy Ubuntu through network…
Let’s go !
Overview
Nowadays, all large infrastructure are relying on some sort of network installation infrastructure to deploy operating system. WDS,MDT and SCCM are common deployment solutions that can be found in enterprise based on Microsoft technology. In Linux world, you could use solution like FOG, MAAS, Clobber (??)… Most solutions that can perform network installation are basically relying on a number of well known technologies. To implement a network based installation infrastructure, you need to have the following components/technologies available on your network
- DHCP server
- TFTP server
- PXE boot file
- File server or web server (used to store the OS installation files)
These components/technologies can be hosted on a single server or on multiple servers. To keep it simple, in this post, we will assume that a single server will be hosting all the necessary services and packages software.
So, let’s start our journey 🙂
Assumptions
In this post, we have made the following assumptions in order to have working scenario
- A single Server installation will be performed
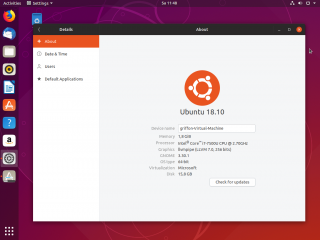
- the server hosting DHCP,TFTP,PXE and File services is running Ubuntu 18.04 or Ubuntu 18.10 operating system
- The server is configured with a static IP address
- dnsmaq package will be used to provide dhcp,dns and tftp capabilities
- apache will be used as repository for the installation files
- Ubuntu 18.04.x server will be deployed. You have an Ubuntu 18.04.x valid iso file
- only BIOS computer will be able to connect to the PXE server and start the installation (no UEFI yet !)
- You have internet connection in order to download necessary packages
Click on Picture for Better Resolution
Step by Step Guide
Step 1 – Install all the necessary packages
By default, Ubuntu 18.04/18.10 does not ship with necessary software needed to setup a PXE server. To build up such server, you will need to install
- Apache Web Server package
- dnsmasq package
The dnsmasq package is a easy to use package that allow you to configure DHCP and TFTP settings through a single file. This package seems to be the standard nowadays for PXE/TFTP implementation
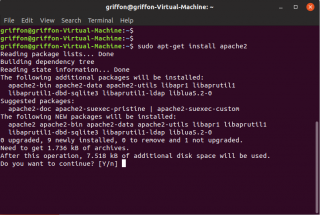
To install the apache package, you will issue the following command sudo apt-get install apache2
Click on Picture for Better Resolution
Start the apache service using the following command sudo systemctl start apache2
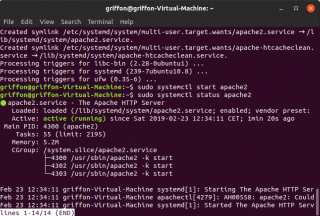
Check the apache service using the following command sudo systemctl status apache2
Click on Picture for Better Resolution
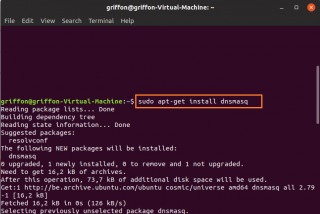
To install the dnsmasq package, you will issue the following command sudo apt-get dnsmasq
Click on Picture for Better Resolution
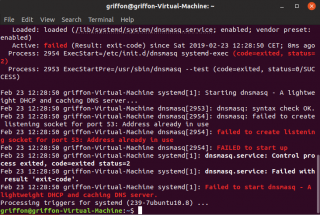
During the installation process, you will see some errors about port 53 already in use… At this stage, you can ignore these errors
Click on Picture for Better Resolution
Step 2 – Set Static IP address
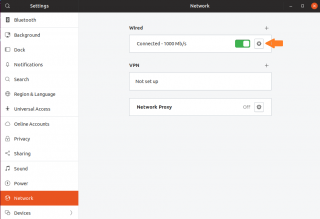
Usually, Ubuntu installation are using dynamic ip addresses (DHCP). We will move from the dynamic configuration to a static configuration. To perform such operation, you will click on the network icon on the right side of the top bar > expand the wired connected and select wired settings
Click on Picture for Better Resolution
In the right pane, click the gear to open the properties pages
Click on Picture for Better Resolution
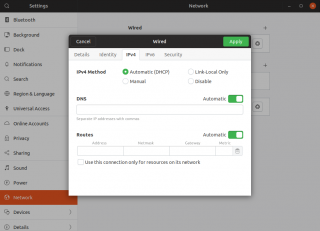
Go to the IPv4
Click on Picture for Better Resolution
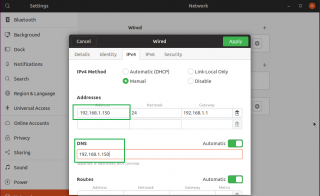
Change from Automatic to Dynamic and set the necessary ip address information. Press the Apply button and you are back to the network settings page
Click on Picture for Better Resolution
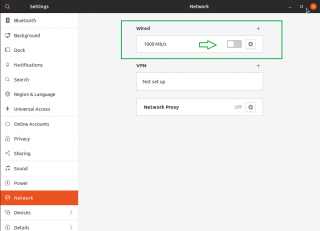
To effectively apply the changes, you have to disable and re-enable the network by using the slider button (or you can reboot the computer)
Click on Picture for Better Resolution
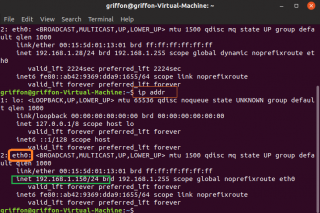
To check that the correct ip address has been set, you can open the terminal console and issue the following command ip addr. In the screenshot, we can see that the ip address is set accordingly. take also a note of the name of the interface (in the screenshot, it’s eth0) as this information will be needed at a later stage
Click on Picture for Better Resolution
Step 3 – Create your TFTP folder structure
In this step, we will simply create a simple tftp directory structure to host the files needed to perform the network boot. In this post, we will keep the structure quite simple and we will not make any distinction about x86 or x64 architecture. In this post, we are focusing only on x64 architecture systems. We will create a top folder called /tftp and a sub-folder called boot
tftp
 |--boot
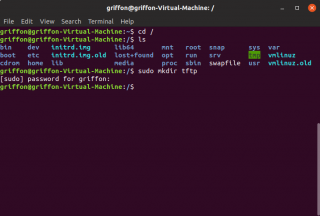
To create the top folder, issue the following command sudo mkdir /tftp
Click on Picture for Better Resolution
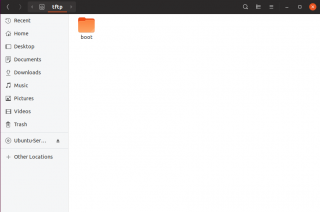
To create the sub folder, issue the following command sudo mkdir /tftp/boot . Using nautilus file explorer, you should see your folder structure
Click on Picture for Better Resolution
Step 4 – Copy the necessary files to the TFTP Folder
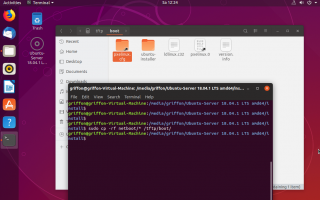
In this step, we have to populate our TFTP folder structure. To perform such operation, we will need to mount the iso file of Ubuntu 18.04 server on the computer. When the cd is mounted, you will need to locate the install folder (see screenshot) and copy the netboot folder available on the cd to the /tftp/boot location.
Click on Picture for Better Resolution
Note :
if you do not see this netboot folder, this means that the cd version you have download is not a correct one and you need to download the proper and latest version…
To copy the files, you can use the GUI (nautilus) or use the command line. If you use the command line, you will have to browse to the correct location and then execute the following command
cp -rf <%Your Path to Install files%>/netboot/* /tftp/boot
Click on Picture for Better Resolution
Step 5 – Copy the installation files in your web server
By default, after installing apache web server, a folder structure is created under /var/www/html. Under /var/www/html, we will create a folder called bionic-server that will contains the os installation files of the Ubuntu 18.04.x Server
To create this folder,from a terminal session, we have issued the following command line
sudo mkdir /var/www/html/server/bionic
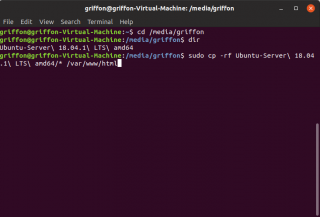
Like in the previous step, we know need to copy the content of the mounted cd in the computer into this newly created folder. To perform this operation, from the terminal console, navigate to the top folder for the cdrom and execute the following command
sudo cp -rf <%Your Path To Install Files%>/* /var/www/html/server/bionic
Click on Picture for Better Resolution
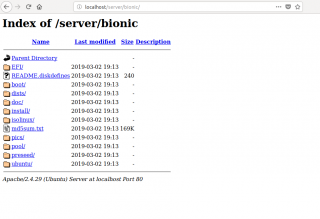
Finally, open a browser and go to the following url from the pxe server, http://localhost/server/bionic. You should see the copied folder structure in the browser
Click on Picture for Better Resolution
Step 6 – Configure your system to use dnsmasq service
We are almost there ! Now, it’s time to configure dnsmasq service which will provide the glue between the different services. Dnsmasq is an easy to use software that provides DNS,DHCP and TFTP configuration capabilities. The configuration is done through a single file located under /etc/dnsmasq.conf
To edit the configuration file, issue the following command sudo nano /etc/dnsmasq.conf and copy/paste the following information at the bottom of the file
Note : You will need to modify it accordingly to reflect your own infrastructure
#Interface information
#--use ip addr to see the name of the interface on your system
interface=eth0,lo
bind-interfaces
domain=c-nergy.local
#--------------------------
#DHCP Settings
#--------------------------

#-- Set dhcp scope
dhcp-range=192.168.1.160,192.168.1.200,255.255.255.0,2h
#-- Set gateway option
dhcp-option=3,192.168.1.1
#-- Set DNS server option
dhcp-option=6,192.168.1.1
#-- dns Forwarder info
server=8.8.8.8

#----------------------#
# Specify TFTP Options #
#----------------------#

#--location of the pxeboot file
dhcp-boot=/boot/pxelinux.0,pxeserver,192.168.1.150
#--enable tftp service
enable-tftp

#-- Root folder for tftp
tftp-root=/tftp
To have the change applied to your system, you will need to restart the dnsmasq service. To perform such task, you will execute the following command
sudo systemctl restart dnsmasq
Then, you should check that the dnsmasq is started correctly and that no errors are reported by issuing the command
sudo systemctl status dnsmasq
Note :
At this stage, you should see that dnsmasq service is running and no error port 53 already in use is thrown on the screen. To avoid this error message, you have to ensure that the three first line of the dnsmasq.conf are correctly set and reflect the settings on your own system…(remember, I asked you to take a note of the interface name showed when you have executed the ip address command…:-) )
Step 7 – Test your setup by pxeboot a BIOS computer…
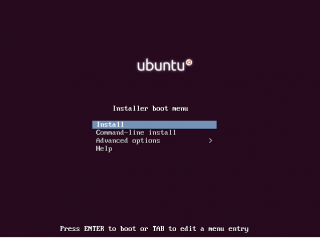
If you have followed these instructions, you should be able to boot a BIOS based computer, receive an ip address, pxeboot and you should see the familiar Ubuntu installation Menu (see screenshot)
Click on Picture for Better Resolution
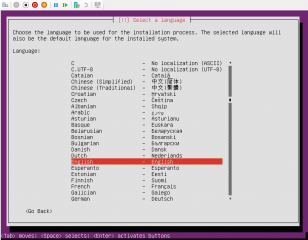
Select the option Install and go through the text based Wizard. Select the Language to use
Click on Picture for Better Resolution
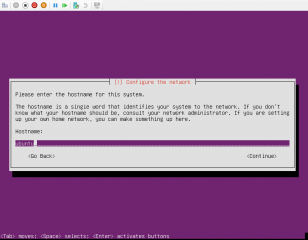
Then select provide the name you want to use for this computer..
Click on Picture for Better Resolution
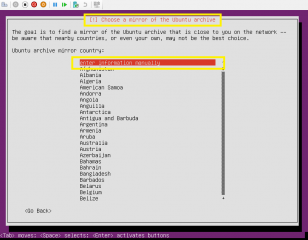
Select the appropriate options within the wizard till you reach the Select a mirror for Ubuntu Archive. Select the option, enter information manually and proceed to the next screen
Click on Picture for Better Resolution
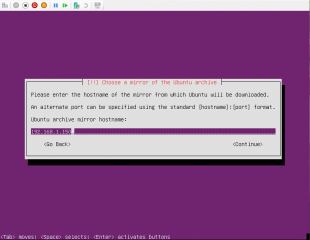
In the next screen, provide the name or the ip address of the pxe server hosting the installation media. Proceed
Click on Picture for Better Resolution
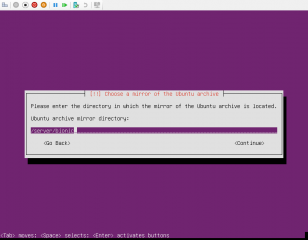
In the directory page, provide the location where the installation files are located. In our example, we have stored the files under the /server/bionic folder structure
Click on Picture for Better Resolution
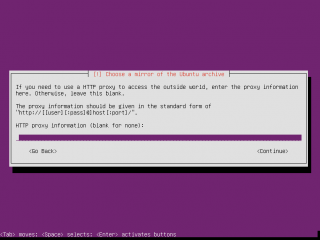
Specify if you need a proxy or not and Proceed
Click on Picture for Better Resolution
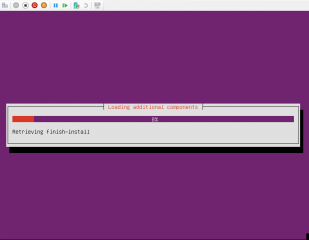
If everything goes fine, you should see the installation process starting…
Click on Picture for Better Resolution
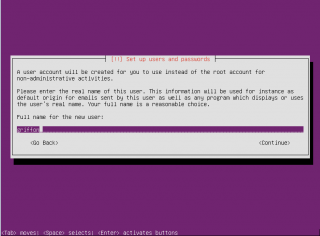
You should see after this, wizard pages with some additional questions in order to complete your installation….
Click on Picture for better Resolution
Note :
After completing the installation, there is a need apparently to update the information to retrieve valid ubuntu repositories. You will need to update the file /etc/apt/sources.list and replace your pxe ip or hostname zith valid archive name for ubuntu (something like archive.ubuntu.com). you can achieve this by executing the following command
sudo sed -i.bak ‘s/<%Your IP address or Hostname%>/archive.ubuntu.com/g’ /etc/apt/sources.list
And this is it !
Final Notes
This is it for this post !
In this post, we have really covered the basics of PXE installation of Ubuntu Server 18.04. This guide should be working for Ubuntu 18.10 and Ubuntu 19.04. So, at this stage, we can boot a computer and start the Ubuntu installation from the network. However, a manual installation is still needed at this stage.
We have the feeling that this is just the beginning of the journey. In this post, we have explained how to deploy Ubuntu Server Edition. In the next post (we are already preparing), we will see if we can also deploy Ubuntu Desktop edition through PXE infrastructure. Deploying Ubuntu Desktop through PXE seems a little bit more challenging than Ubuntu Server based on our research through Internet.
Stay tuned
Till next time
See ya


I have tried following this guide, but I cannot find the netboot folder? I see the note about this in the guide however I have looked through both the desktop and server versions of both 18.04 and 18.10.
The only thing I ever find in the install folder is “mt86plus”.
If I run
$locate netboot
I get nothing?
I am pretty sure I have the latest version of 18.04LTS as I downloaded it from here…
https://ubuntu.com/download/server
and here…
http://releases.ubuntu.com/18.10/
http://releases.ubuntu.com/18.10/
Do I need one of these images?
http://cdimage.ubuntu.com/netboot/
Please provide a download link for the Ubuntu version used in the above guide.
Has the netboot folder moved / been renamed?
Will donate $50 to charity of choice!
@Stuart,
Sorry for the delay, we have been really busy with work..
To answer your question, you have basically two Ubuntu server iso files that can be downloaded.. The iso you have downloaded is probably the Ubunut-18.04-live-xxxx version. you have to obtain the Ubuntu-18.04-server (with no live). In the Ubuntu download page, you should find a link called Use traditional installer. Clicking on this link should lead you to the correct iso file (this is a link for Ubuntu 18.04.2 – http://cdimage.ubuntu.com/releases/18.04.2/release/?_ga=2.64546605.300542079.1561627081-1952411086.1561627081
The other option is to simply download the netboot files (see link http://cdimage.ubuntu.com/netboot/bionic/) and copy content of the folder on your PXE server….
Hope this help
Till next time
See ya
Hi,
is there also a way to work with an existing DHCP server?
I have adapted the dnsmasq.conf for this, but I can’t start ubuntu server with it. (The PXE server is not found either)
Have I overlooked a fundamental setting?
”
interface=eth0,lo
# deactivate DNS
port=0
# DHCP logging
log-dhcp
# Reply to PXE requests
# Run as DHCP proxy
dhcp-range=192.168.178.0,proxy
dhcp-boot=pxelinux.0
dhcp-boot=/boot/pxelinux.0,pxeserver,192.168.1.25
enable-tftp
tftp-root= /tftp
”
Thank you for your effort!
@Dominic,
You should be able to use another DHCP Server located on your network…
What’s your setup ? 1 PXE server then 1 DHCP server (not on the same box), which DHCP Software running on it ?
Basically, you should configure the DHCP Server to point to the correct PXE Server on your network
will try to provide some more instructions….
Hope this help
Till next time
See ya
Can you work out all your guides bro, tried some but are not working?
I want to boot uefi, but its no well documented.
Everything works fine until “Install the system” step.
the last step I succeeded is partitioning the disk.
and then it would throw error,
“”the failing step is: install the system”
do you know why?
@Zhe Xu,
We do not understand your questions/comments. You have to follow the instructions as described in the post. PXE booting Ubuntu SErver vs Ubuntu Desktop involves some differences. So, yes, you have to be using the files and command as described for each version. The error you seeing might be because you might missing some files or because you have been using the wrong iso version of Ubuntu Server (ubuntu-18.04-server-amd64.iso vs ubuntu-18.04-live-server-amd64.iso)
Hope this help
Till next time
@Griffon
I followed exactly what’s described in the article, and I am almost able to install Desktop(by almost, I mean it cannot shutdown normally…after installation finished notification if I shutdown, it would load the installer page again when I reboot it)
Back to server installation, I checked the system log and found “error: cannot find any live images”, while I am pretty sure that I used Ubuntu Server, not Ubuntu-live-server. Any clue how to fix?
@Zhe Xu,
We will need to check…because we have not encountered so many issues as you did… are you deploying Ubuntu 18.04 or Ubuntu 20.04 ? Can you send us a copy of your pxecfg file or grub config file ?
Which method are you using PXE BOOT or UEFI boot ?
For Desktop, you are telling me that the install works but when you reboot, you see again the installer ? are you sure you are not booting again to pxe network ?
waiting for you feedback
Till next time
See ya
18.04, I am sure every thing goes as the tutorial, and I also used BIOS client (Hyper-V gen1)
that said, I found solution. installation step failed error fixed by adding
live-installer/net-image=http://192.168.1.150/server/bionic/install/filesystem.squashfs
to the 0th item in cfg.txt (and it seems it would also work if adding to preseed files)
I have another question though: is it possible to skip the interactive steps? (similar to cloud-init) I want to pre-specify the password, mirror etc.
@Zhe Xu,
normally, you can use a kickstart script to automate the process. Please look on internet, there should be already plenty of examples available
Thanks for the info about the filesystem.squashfs….when time permit, we will review the post and update it to reflect latest information….
Till next time
See ya
@Zhu Xu, I ran into same error “installation step failed”
Would you please advise the detailed steps about how to add below imte to cfg.txt. im not so deep in Unbuntu.
” live-installer/net-image=http://192.168.1.150/server/bionic/install/filesystem.squashfs
to the 0th item in cfg.txt (and it seems it would also work if adding to preseed files)”
thanks, andy
@Andy,
Sorry for the delay in the answer
We will need to check this because so far we never needed to use this squashfs parameter
You can try to have a look to the following post which mentioned the squashfs option (https://blog.scottlowe.org/2015/05/20/fully-automated-ubuntu-install/)
Hope this help
Till next time
See ya
Dude,
thank you for the guide, but it does NOT work. I tried it with ubuntu 18.04.5 server (NOT LIVE!), but after partitioning I get
base-installer: error: Could not find any live images
…
WARNING **: Configuring ‘live-installer’ failed with error code1
WARNING **: Menu item ‘live-installer’ failed.
in debug console (alt+f4).
Installation terminales. It is sort of broken.
Incomplete and broken guides like this one here cost time and suck 🙁
You should have completed step 7 (installation).
Regards,
isuck
Hello there,
Thank you for visiting our blog and providing some feedback
We are sorry that the information provided here is not helpful to you… At time of writing, we have tested the instructions till the end of the installation. As far as we can see, the pxe process is working as expected, you might need to update some config file
you could have a look at the following post http://c-nergy.be/blog/?p=13771 and see if this is fixing your issue
hope this help
Till next time
See ya