Hello World,
It seems that there are some confusion when people are installing Ubuntu operating system on top of Hyper-V. There is a strong believe that Ubuntu machine cannot take full advantage of Hyper-v platform. This might have been true in the past but Microsoft has changed its attitude against Open source community. As you probably know, Hyper-v virtualization platform allows you to create two type of virtual machines. Virtual machine Generation 1 which is basically used for legacy operating system and Virtual machine Generation 2 which includes new virtualization features and can emulate UEFI systems.
This post is about installing Ubuntu 18.04 or 18.10 as a virtual machine on Hyper-V server. This post will describe how to configure the Virtual machine as generation 2 and have the UEFI and secure boot enabled and make Ubuntu working with such settings….
Let’s do this !
Overview
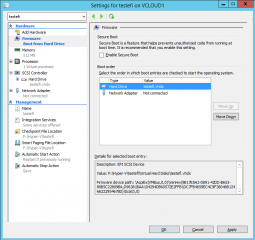
When installing Ubuntu as a virtual machine, most of the people would select generation 1 because UEFI or secure boot options does not seems to work when trying to perform the installation. Only a few people I know would perform an installation of Ubuntu using generation 2 option when creating the Virtual machine within the Hyper-v console but still not take full advantage of the hyper-v solution. When creating such virtual machine, these people would disable the Secure Boot option
This was basically the “old” approach in order to have Ubuntu running on Hyper-v while trying to get Ubuntu using UEFI features and capabilities….
click on picture for better resolution
Nowadays, Microsoft provides a better support on Ubuntu and it’s easy and possible to have Ubuntu running as generation 2 virtual machine where secure boot is enabled. To perform such miracle, you simply need to know which settings to choose (or you have to know that such settings exists…keep reading)
Creating your Ubuntu Gen 2 virtual machine
To perform these installation steps, we have used the Windows 2019 Server Evaluation version which provide the latest version of Hyper-v. Based on the version of Windows 2016 or Windows 2019 you are running, you might not see all the options selected as described here. No Panic ! In the next section, we will explain how to configure these settings using PowerShell… Note that this procedure works only on Windows 2016 and later operating systems.
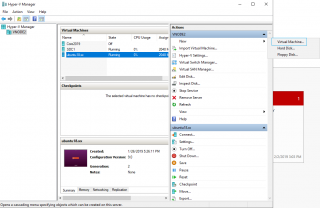
Step 1 – Go to your Windows 2016 or Windows 2019 server, open your Hyper-v console and select the option to create a new Virtual machine
click on picture for better resolution
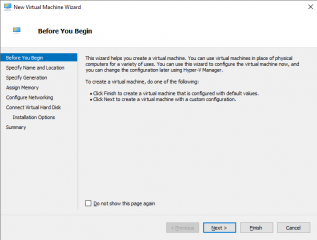
Step 2 – The wizard starts. In the page, “Before you begin”, Press Next
click on picture for better resolution
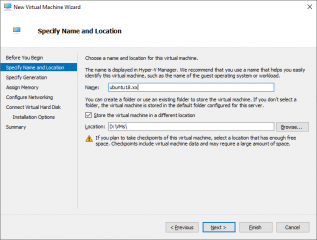
Step 3 – Provide the name and location information for your virtual machine and press Next
click on picture for better resolution
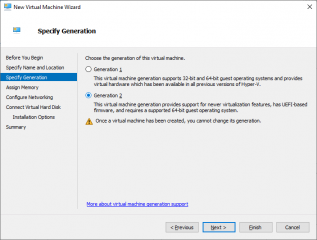
step 4 – Select the option Generation 2 and Press Next
click on picture for better resolution
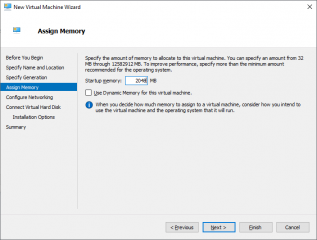
Step 5 – Assign memory to your virtual machine as needed. When done, Press Next
click on picture for better resolution
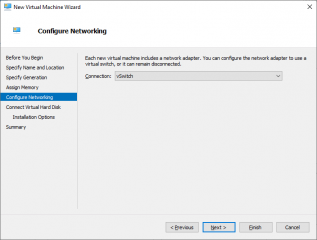
Step 6 – Select the virtual switch that will be used by the virtual machine and Press Next
click on picture for better resolution
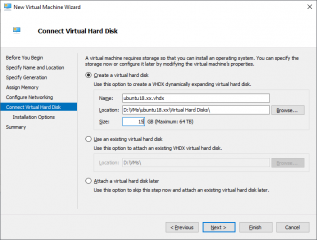
Step 7 – Specify if you want to create a new virtual disk or connect to an existing one. When you have done your choice, Press Next
click on picture for better resolution
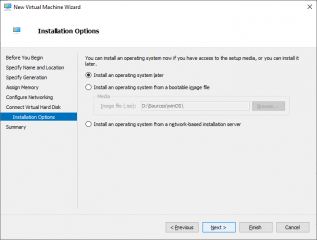
Step 8 – Select if you want to mount the Ubuntu iso file right away or not. Press Next when ready
click on picture for better resolution
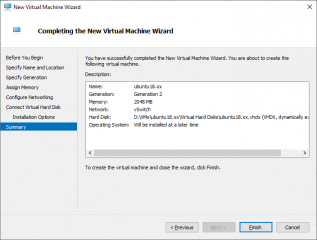
Step 9 – In the summary page, review your settings and when ready Press Next
click on picture for better resolution
Configuring your Ubuntu Gen 2 virtual machine
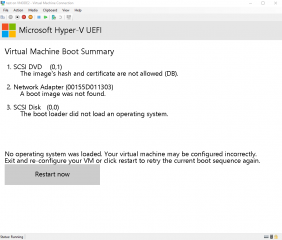
At this stage, you have a ready to use virtual machine generation 2 and this configuration will work for sure if you want to install Windows operating system. If you are planning to install Ubuntu 18.10 as operating system, before proceeding, you would need to modify the settings of the virtual machine. If you try to boot your virtual machine and trying to boot from Ubuntu iso, you should see something similar to this
click on picture for better resolution
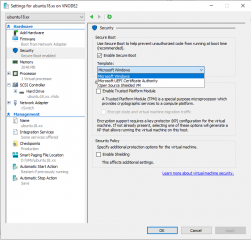
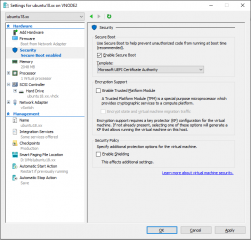
To make it works, you will need to edit the settings of the virtual machine, go to the security node and change the template used by the Virtual machine
click on picture for better resolution
So, you have to ensure that the option Microsoft UEFI Certificate Authority is selected in the VM settings before proceeding…..
click on picture for better resolution
Note :
If you do not see the Template option, please check the next section which explains how to do this using PowerShell Commands…..
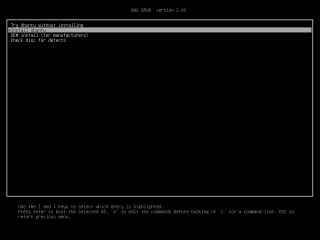
As soon as you have made the change and try to restart the installation process, you should see something like this asking you to proceed with your Ubuntu installation.
click on picture for better resolution
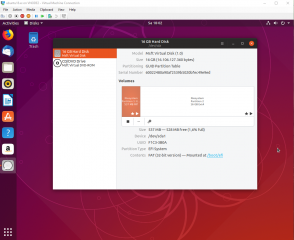
When the installation is completed, you will have a perfectly running Ubuntu machine using Generation 2 features which are Secure Boot enabled and UEFI Support. The screenshot below shows that indeed Ubuntu 18.10 has been installed and configured and that a EFI partition exists.
click on picture for better resolution
And voila, we are done…..
If you do not see the Template Settings in the GUI….
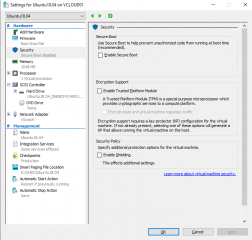
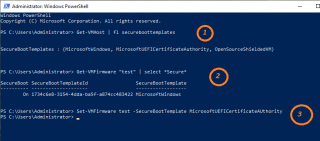
Depending the Build version of Windows 2016 or Windows 2019 you are running, you might not see the option templates in the Virtual machine settings Dialog Box. The screenshot below has been taken on Windows 2019 build 17444 (if I remember) and as you can see there is no Template option. So, how can we set the correct settings if not visible….. You can use Powershell to configure the additional settings on your virtual machine
click on picture for better resolution
As shown on the screenshot below, you first need to check which certificates templates are available on your machine. To do that, you execute the following command
get-vmhpst | fl *SecurebootTemplates*
click on picture for better resolution
Then you can check what settings have been already configured on your virtual machine. To do that, you simply issue the following command
get-vmfirmware -name <%VM NAME%> | Select *Secure*
Finally, to set the proper template for your virtual machine, you will issue the following command
set-vmfirmware -name <%VM NAME%> -SecureBootTemplate MicrosoftUEFICertificateAuthority
Now, when trying to boot your Ubuntu virtual machine Generation 2, you should be able to proceed with installation and when completed start working with it
Final Notes
This is it for this post !
Since Windows 10 and Windows 2016 release, more support is provided to Linux Operating system and Hyper-v is basically improving with each new release. This post has shown that’s actually possible to create a Ubuntu Virtual machine Generation 2 that can boot and run on top of the Hyper-v virtualization platform. This shows in a way that Ubuntu is not anymore a second league operating system player. People and organization are relying on Ubuntu and more generally speaking on Linux operating system.
I hope you had fun with this post….
Till next time
See ya
