Hello World,
Ubuntu 17.10 release has introduced a lot of changes and make this release an exciting one for a lot of people. As you have noticed, lately, we have been writing posts about Ubuntu 17.10 topic. One of the reason behind is the fact that Canonical has moved away from Unity and switched back to Gnome Desktop. This move has introduced a lot of changes in the way of working with Ubuntu 17.10.
All in all, Canonical has done a good job in the transition process and they provide a similar experience to Unity with their new Desktop environment. The only thing that a lot of people complain is the fact that the login background cannot be changed easily. In previous version of Ubuntu, the Lightdm was used as login manager. When you were changing desktop background, this change was reflected immediately at the login screen. This was a killer feature especially for companies where corporate identity can be really important.
The beta version of Ubuntu 17.10 shipped with the default grey login page. Then Ubuntu team worked on it and provided some visual changes in the login screen. The current login screen will show up with a purple background. This shows that it’s possible to customize the gdm login background… Reading through a lot of forum, web sites, technical gdm page and some blogs, we actually found the way to change the login screen background. The good news here is that really easy to perform…
Let’s have a look on how to do this….
Manually Changing the GDM login screen
Assumptions
For this post, we have performed the following assumptions
- The Ubuntu 17.10 final release will be used
- At time of writing, all available updates were installed on the Ubuntu machine
- No alternative Desktop will be used. Default Ubuntu Gnome desktop will be the default desktop accessible via the xrdp session
- Ubuntu machine has been installed as virtual machine using Virtualbox software
- Default session used is Wayland (it’s supported in Virtualbox)
- Internet connection is available so you can download any necessary software packages, scripts or wallpaper images….
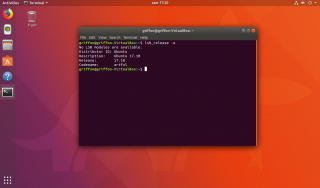
The following screenshot shows the current version of Ubuntu we are using…
Click on picture for better Resolution
Customize Lock screen and background in Ubuntu
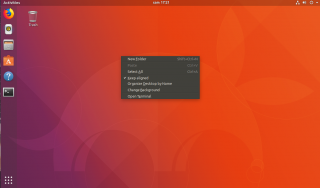
In this step, we will perform the basic customization actions that can be performed on Ubuntu in order to change the desktop wallpaper and to change the lock screen image…In Ubuntu, it’s really easy to customize the desktop background and the lock screen image. To perform such customization, you can simply right-click on the desktop and select the option Change background..
Click on picture for better Resolution
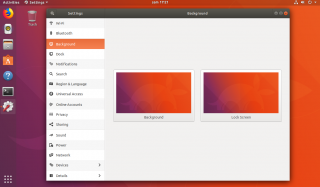
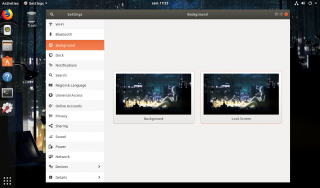
The following screen is then displayed. In this screen, you can choose a new image to be used for the background and the lock screen…
Click on picture for better Resolution
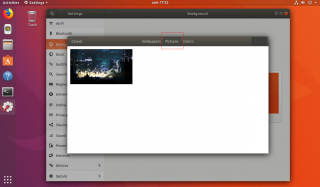
In our scenario, we have downloaded an image from internet, saved into the Pictures Folder and we have selected this image to be used as background image and lock screen image as shown in the screenshot below
Click on picture for better Resolution
Click on picture for better Resolution
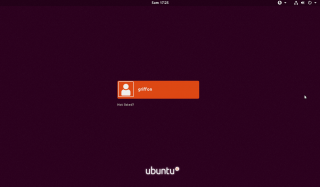
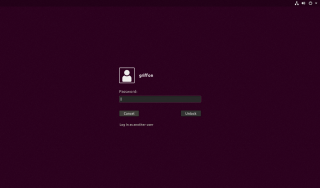
After these changes, we can see that the gdm login screen is not changed and the default Ubuntu Theme (purple color) is still present at the login page.
Click on picture for better Resolution
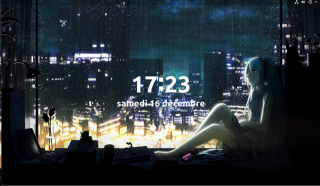
If we lock the screen, the lock screen image is set to the selected background image
Click on picture for better Resolution
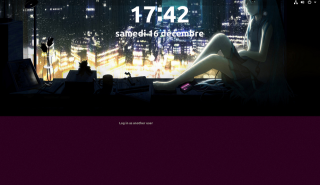
However, as soon, as you slide up the picture to access the login page, again you can see that the Ubuntu theme is present….
Click on picture for better Resolution
Click on picture for better Resolution
So, you see not really a consistent login/lock/unlock user experience….And we want to change that…..
Customize login screen page in Ubuntu 17.10
Initially, when searching for a way to change the login screen, we thought that the process would be really complicated because we would needed to extract resource from the gdm theme and “recompile” a version with the new image. Further investigations showed up that an easier way could be used. Actually, the gdm login page layout is controlled through a file located in the following location
/etc/alternatives/gdm3.css
Actually, this file (gdm3.css) is a symbolic link to the file located under /usr/share/gnome-shell/theme and called ubuntu.css. Because we have encountered some issues when modifying the gdm3.css file, we will be modifying the /usr/share/gnome-shell/theme/ubuntu.css directly.
Note :
To be able to modify the file, you need to open it with admin privileges. In Ubuntu 17.10, executing the command sudo gedit is not working anymore. To achieve the same functionality, you need to type the following command
xhost +localhost:
sudo gedit  /usr/share/gnome-shell/theme/ubuntu.css
If you edit the file and locate the line 1787, you should see the following section starting with
#lockDialogGroup {
 background: #2c001e url(resource:///org/gnome/shell/theme/noise-texture.png);
 background-repeat: repeat;
}
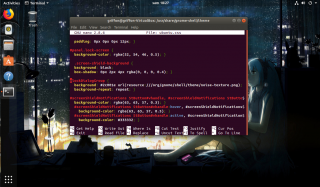
The following screenshot shows the section of the css file that needs to be modified in order to change the login screen background image…
Click on picture for better Resolution
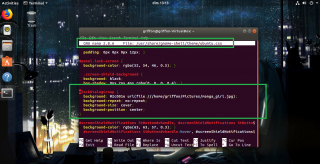
Changing this section with the following one
#lockDialogGroup {
  background: #2c001e url(file:///Path_to_your_image);
  background-repeat: no-repeat;
  background-size: cover;
  background-position: center;
}
Note that you have to replace the word resource by the word file in the modified css file. The file can be located anywhere but best practices would recommend you to place in under /usr/shares/backgrounds
Click on picture for better Resolution
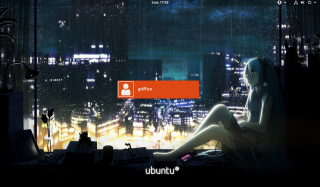
When the change has been performed, you will need to reboot the machine in order to see the changes to your system
Click on picture for better Resolution
Final Notes
As this post has shown, it’s possible to customize the login GDM screen and set a custom background image. The process is really not complex in Ubuntu and maybe in the future someone will create a small utility to ease even more the process. One drawback in gdm login background customization process is that whenever new updates are installed on the computer, the settings might be overwritten and you will need to re-apply the custom image on your computer.
In part II, we will provide a quick and dirty script that can be used to implement the GDM customization in an easy way. The script can be run after any Ubuntu updates in order to re-apply the customization settings you have decided to implement
Stay tuned
Till next time
See ya
References : http://ubuntuhandbook.org/index.php/2017/10/change-login-screen-background-ubuntu-17-10/
Thanks for these instructions. I guess this is valid for a single-display setup only, right? In my case I have an external display besides the built-in in my laptop. I couldn’t make the background image to fit correctly any of the displays, even after playing with the size and position CSS atributes of the background. either the image is cropped (like a big zoom in) or half of it is displayed in one screen and the other half in the other screen.
@Roger,
We didn’t test this scenario (which is quite interesting). so we do not know if this would work yes or no..
We would assume that this should be working and indeed changing the css code and provide an appropriate image size would work….but we do not know and we will need to test that. don’t ask me when because again really busy with work right now 🙁
Thank for your visit and your comments….
Till next time
See ya
It works!!!! Great!!!! Thank you for share this….
Thanks, that detail “file” did the job 😀
@ohdiego,
Thank you for visiting our blog and for the positive feedback
Till next time
See ya
Thanks for the info – I did it and it works.
FYI, if you are using vi as your editor, you can jump straight to the block in the file with:
vi +/lockDialogGroup /usr/share/gnome-shell/theme/ubuntu.css
@Paul,
Thank you for feedback and sharing the information about vi…We will try to improve this when time permit
Thank you for the visit
Till next time
see ya