Hello world,
Today, we will be discussing about Ubuntu 18.04 and login screen manager. Since Ubuntu 17.10, Canonical has modified the Ubuntu Desktop road map slightly. Since Ubuntu 17.10, Canonical has dropped Unity Desktop interface and has decided to use the Gnome Desktop environment. The Desktop interface has been tweaked (quite well) to ease the transition from Unity Desktop to Gnome Desktop.
Another important element that has been replaced in Ubuntu 17.10 is the login manager. Before Ubuntu 17.10, lightdm was the preferred one. Since Canonical has switched to Gnome Desktop, the GDM3 login manager becomes the default one. Lightdm was offering a unique style to Ubuntu. It was the first time that an nice looking login interface was offered which was also easy to customize. Lightdm was (and still is) that make Ubuntu look really sexy
GDM 3 is a clean login but offers limited customization options and actually looks a little bit boring. However, we have demonstrated that some basic customization could be achieved with GDM 3 (see this post). GDM 3 also bring new challenges especially in making VNC connection to work (see this post). Because of all of these reasons (and many others), some customers, colleagues and readers have asked if it was possible to have lightdm back on Ubuntu 18.04
To answer to this question, we have decided to write this post…. So, let’s check if this could work…..
Overview
Assumptions
Obviously, we assume that the following conditions are met before starting the installation of lightdm on your system
- You are running Ubuntu 18.04 (with the latest updates installed)
- You have a internet connection (needed to download the lightdm package).
Installing lightdm on your system
Note : Use this procedure at your own risk
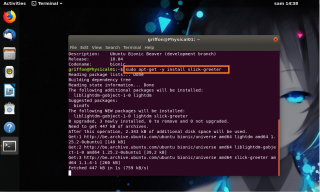
To install the lightdm login manager on your Ubuntu 18.04 system, you will need to run the following command in a terminal console
sudo apt-get -y install slick-greeter
You will be prompted for a password. Provide the password and proceed
Click on Picture for better Resolution
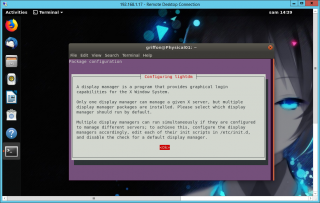
You will then be presented with the following screen. Press OK
Click on Picture for better Resolution
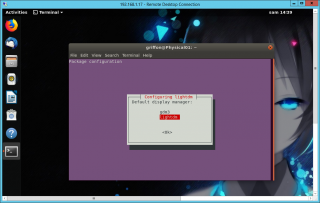
Then, in the next screen, Select lightdm option and press OK.
Click on Picture for better Resolution
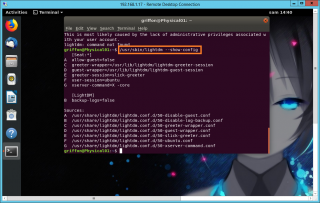
You can check your lightdm installation configuration by executing the following command
lightdm --show-config
Click on Picture for better Resolution
Reboot your machine and normally you should see the lightdm display manager on your screen….
Click on Picture for better Resolution
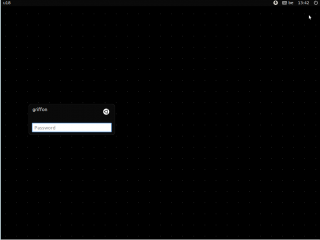
As you can see, lightdm is back but there is not configuration or no pictures in the login screen. You simply get a black screen. There is still some work to be done to have a sexy login manager interface back into the system….
Configuring lightdm on your system
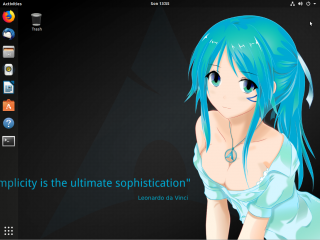
So, Lightdm (actually the new slick-greeter) has been installed but it does not really look sexy like it used to be. In previous Ubuntu version, changing the desktop background image would changed the login background interface image. With slick-greeter software (out-of-the-box), simply changing the background wallpaper will not automatically change the login background image. As you can see we have changed our desktop but performing a logoff leave the login screen simply black…
Click on Picture for better Resolution
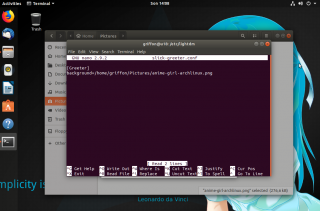
If you want to configure a login picture for the system, you will need to create a file under /etc/lightdm directory
Call the file /etc/lightdm/slick-greeter.conf and put the following lines
[Greeter]

background=<%location of the image to be used%>
Click on Picture for better Resolution
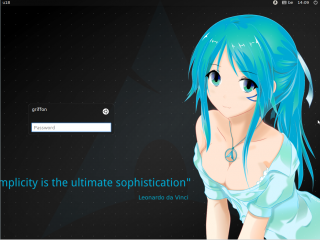
Logoff from your system and you should see the wallpaper you have just selected.
Click on Picture for better Resolution
Note :
It’s possible to use a GUI that can perform some customization of the Slick-greeter. The tool is called lightdm-settings and you can install it by issuing the following command
sudo apt-get install lightdm-settings
Reverting Back to GDM
To revert back to GDM login manager, you simply need to issue the following command in a terminal session
sudo dpkg-reconfigure lightdm
You will be presented again with the following windows
Click on Picture for better Resolution
Then, in the next screen, Select gdm3 option and press OK.
Click on Picture for better Resolution
Reboot your system and you should have the gdm login page available again
Limitation of LightDM on Ubuntu 18.04
In this configuration, you can basically set a corporate login image on the Ubuntu 18.04 system. This image will be the same for all the users. If a user change background, this change will not modify the background image at the login page.
Final Notes
As we have seen, it’s quite easy to install and configure the lightdm login manager on an Ubuntu 18.04. You basically need to install two packages and perform the needed configuration changes to display a nice picture in the login screen.
Why would you want to have lightdm login manager back on Ubuntu 18.04 ? First reason I can imagine is that some customers might want to keep the same look ‘n feel as Ubuntu 16.04 but still use the latest version of the operating system. At desktop level, Ubuntu 18.04 ship with gnome desktop that mimic quite well the Unity Desktop. Keeping the lightdm in Ubuntu 18.04 would make the transition easier for their users. GDM login manager can be customized as well and a new corporate background can be implemented.
The other reason where lightdm might be needed is to support VNC service at startup. So far, with GDM login manager, we managed to have vnc starting at boot but after login into the system only a black screen is displayed. The user needs to initiate a second connection to access the desktop (see this post ). By using lightdm, we can re-use an existing script and/or procedure (see http://c-nergy.be/blog/?p=10426) and a user will be able to perform vnc connection even if nobody is logged into the system…
Lightdm is really a cool login manager but based on Canonical decision, GDM login manager and gnome desktop will be there for a while. It might be time to consider them as default choice and have your users used to it. Moreover, Gnome Desktop team is thinking of improving the login manager and trying to make it sexier. We will see what the future brings….
Till next time
See ya
Thanks!
@Agrawal,
No problem 🙂 This is the beauty of Linux you can choose your login manager
Till next time
See ya
For some reason, I found that the wallpaper cannot be located anywhere in the home folder (permissions??)
I place my wallpaper in /usr/share/wallpapers and follow this tutorial and the wallpaper appears!
@Gethro2K,
Ah, we didn’t encountered this issue… We might need to come back on this topic and see if indeed there are some specific permissions needed
We will try to revisit this post in the future but this might take some time as we are really really busy right now…
Thanks for sharing the info with us and for visiting our blog..
Till next time
See ya