Hello World,
Recently, a lot of our readers have encountered issues when performing the custom installation of xRDP on Ubuntu 16.04.3 version as described here. In this post, a script to automate the custom installation process (version 1.9) was provided and used to work on Ubuntu 16.04.2 release….until now. After some digging and after receiving some feedback from some of our followers (thank you Brian ! ), it appears that something has changed in the Ubuntu 16.04.3 that has broken the xrdp custom installation process. There is a small bug that prevent the script to complete the installation. In this short post, we will quickly explain the problem and try to provide some solutions and workarounds.
As we have been travelling abroad and as we have been working on a lot of different projects, we didn’t got time to have a close look into this issue. We have been really surprised and pleased to see that some readers have reacted and provided positive feedback and useful info about this issue. We would like to thanks the people that have reported either issues, people that have been testing the install process that helped identify the issue and people who have filed a bug to Ubuntu so a fix could have been provided… Thank to all of you 🙂
Problem Description
In our previous posts, we have described the process to perform a custom installation of xRDP based on the information made available by the team behind xRDP software. In order to automate the installation, we have been providing for some time now, a nice little script that perform the installation for you. The latest version of the script is set to 1.9 (install-xrdp-1.9.sh). However, people trying to run the script on Ubuntu 16.04.3 release will find out that the installation did not proceed as expected and that the xRDP solution does not work for them.
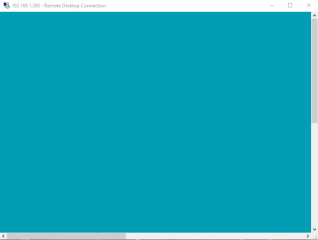
Indeed, if you leave your system unattended during the installation, your system will reboot and you would assume that the installation has been completed and successfully performed. When you connect through your remote desktop client to your Ubuntu 16.04.3 machine, you will see the xRDP login prompt. After putting your credentials and pressing the OK button, you will be only presented a green desktop and you will never see your Unity Desktop interface.
Click on Picture for Better Resolution
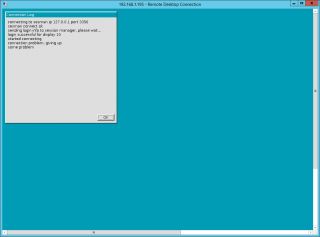
You will be either disconnected after some time or you might see the following error dialog box….
Click on Picture for Better Resolution
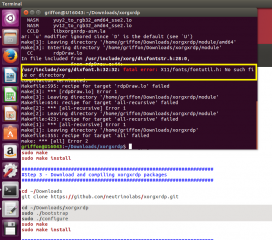
When you run the install script we have provided, if you monitor the installation, when the xorgxrdp package is in the process of being compiled, a fatal error occur which terminate the compilation process and the xorgxrdp component is basically not installed. The error is the following
fatal error : X11/fonts/fontutil.h No such file or directory
compilation terminated
Click on Picture for Better Resolution
Because the installation process cannot find this file, the installation has not proceeded successfully and this is why you see this green desktop in front of you and you cannot access the remote session using the xorg option with xRDP software…
Solution & Workarounds
Obviously, this small bug has detected by multiple person and we have been notified that a fix was available. Actually, you can fix the “compilation” problem in two different ways.
Make fontutil.h file available
Because the compilation process is complaining about a missing file, to overcome the situation, you could simply manually create the file or obtain a copy of the file and place it in the correct directory on your system.
If you want to manually create the file, perform the following actions.
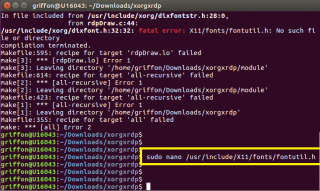
From a terminal, issue the following command
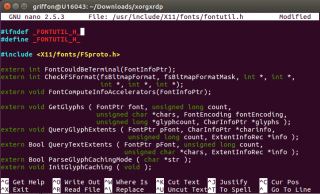
sudo nano /usr/include/X11/fonts/fontutil.h
Click on Picture for Better Resolution
Then, open the file (using sudo) and copy the following text inside the file and save it
#ifndef _FONTUTIL_H_
#define _FONTUTIL_H_

#include <X11/fonts/FSproto.h>

extern int FontCouldBeTerminal(FontInfoPtr);
extern int CheckFSFormat(fsBitmapFormat, fsBitmapFormatMask, int *, int *,
			 int *, int *, int *);
extern void FontComputeInfoAccelerators(FontInfoPtr);

extern void GetGlyphs ( FontPtr font, unsigned long count,
			unsigned char *chars, FontEncoding fontEncoding,
			unsigned long *glyphcount, CharInfoPtr *glyphs );
extern void QueryGlyphExtents ( FontPtr pFont, CharInfoPtr *charinfo,
				unsigned long count, ExtentInfoRec *info );
extern Bool QueryTextExtents ( FontPtr pFont, unsigned long count,
			       unsigned char *chars, ExtentInfoRec *info );
extern Bool ParseGlyphCachingMode ( char *str );
extern void InitGlyphCaching ( void );
extern void SetGlyphCachingMode ( int newmode );
extern int add_range ( fsRange *newrange, int *nranges, fsRange **range,
		       Bool charset_subset );

#endif /* _FONTUTIL_H_ */
Click on Picture for Better Resolution
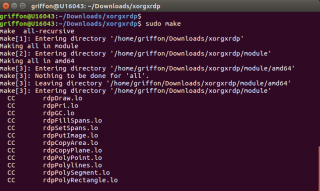
When the file is place in the /usr/include/X11/fonts directory and properly populated, you can run the custom installation script and you should see that the compilation process simply go through (see screenshot no more fatal error message)
Click on Picture for Better Resolution
Enabling Ubuntu proposed repository
The other option would consist of enabling on your Ubuntu system, the proposed repository option. Since some users have reported the issue to xRDP and Ubuntu team, see the following links
- https://bugs.launchpad.net/ubuntu/+source/libxfont/+bug/1707691)
- https://github.com/neutrinolabs/xorgxrdp/issues/100
a quick fix package has been made available but it’s not available by default. To be able to compile xrdp, you will need to enable Developer Options Ubuntu package download.
You can enable this option via the GUI or via the command line. So, let’s first see how to perform this action through the GUI
Enable Pre-Release Updates via GUI
To do this, perform the following actions
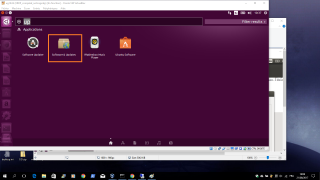
- click on the Dash and search for software Updates. In the result page, click on the icon Software & Updates icon
Click on Picture for Better Resolution
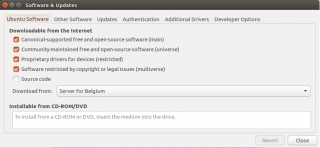
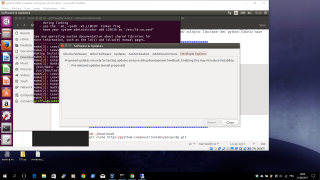
- The Software and Updates dialog box is displayed
Click on Picture for Better Resolution
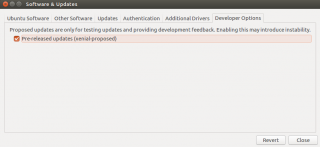
- Click on the Developer Option tab and tick the checkbox next to the Enable Pre-release Updates. You might be prompted for a password in order to enable this feature
Click on Picture for Better Resolution
Click on Picture for Better Resolution
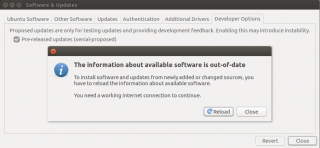
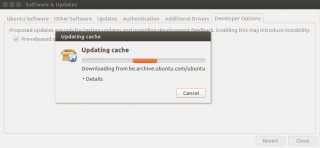
- Press close button and you will be informed that info about software is out-to-date. Press the reload button and wait for the process to complete.
Click on Picture for Better Resolution
Click on Picture for Better Resolution
Enable Pre-Release Updates via command line
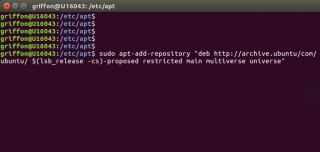
If you prefer to perform the same actions via a command line, you simply need to issue the following commands in a terminal console
sudo add-apt-repository “deb http://archive.ubuntu.com/ubuntu/ $(lsb_release -cs)-proposed restricted main multiverse universe”
sudo apt-get update
Click on Picture for Better Resolution
You should be then ready to proceed with your custom installation either using the custom installation script or perform your manual compilation process
Final Notes
This is for this post ! As you can see, changes in Ubuntu can break your xRDP installation. The small bug detected recently has shown that a simple missing file can break the compilation process. The custom installation script remains valid as long as you perform the correct actions to either create your fontutil.h file or if you enable the proposed repository. We wanted to describe both options as in some environment, deploying developer options packages might not be a good idea.
Now, while investigating and documenting this issue, we have discovered some additional issues with Ubuntu 16.04.3 and xRDP. We will address these other issues in separate posts and we will probably updated the custom install script as well to ensure that you can perform the installation in an automated way
Stay Tuned
Till next time
See ya
Prob should update this now it’s fixed:
https://bugs.launchpad.net/ubuntu/+source/xorg-server/+bug/1707691
@Brendan,
Thank you for sharing the info with us and for your visit.. We will try to take this into account in our next posts about xrdp
Till next time
see ya
Thanks for the instructions. Tried it out today. The workaround seems not to be needed any more.
fontutils.h is there. Still I get a black screen and an error message after a while
@Wolfgang,
Have you checked your log files to see what the problem can be ?
Have you checked this post (see http://c-nergy.be/blog/?p=11043) ?
Have you checked this post (http://c-nergy.be/blog/?p=11061) ?
Black screen can be anything…. provide more info so we might be able to troubleshoot and help you
Til next time
See ya
@Griffon,
many thanks for providing this support to get xrdp running on Ubuntu!
I went through the articles (fontutil.h was already fixed, allowed_users changed to anybody).
But I still got a “black” screen (not a green one, but a real black one).
The only thing I configured on my Ubuntu machine “abnormaly” was to use the proprietary nvidia graphics driver. After changing back to the open source drivers I was able to connect via xrdp ….
But actually the open source drivers are not an valid option for me to run my physical machine.
Any idea how to get xrdp running with the proprietary nvidia graphics driver?
@Markus,
we are aware of the fact that NVIDIA drivers have issues with XRDP.. Some people found some workaround in the past…At this stage, as we are not working with NVIDIA Graphic cards, we never had the issue and we never really further investigate….. IF time permit, we might want to have a look into this additional xrdp challenge…but might take some times….
Till next time
See ya
Hello Griffon,
First of all I would really like to thank you. I learned a lot from all your blogs. with that information I know were to look now.
second, if I comment on the wrong post I’m sorry, I’ve read them all from you on this topic maybe you could move it then.
Currently the desktop I am using was on Unbuntu 16.04.04 And I couldn’t get it working in the beginning. But now it seems I found a solution. This is what I did.
installed another repo;
sudo add-apt-repository ppa:hermlnx/xrdp
sudo apt-get update
sudo apt-get install xrdp
source (installs the 9.3 version I think now):
https://netdevops.me/2017/installing-xrdp-0.9.1-on-ubuntu-16.04-xenial/
https://launchpad.net/~hermlnx/+archive/ubuntu/xrdp
After that I was able to log in but you can only open a terminal. So after that I installed the MATE desktop as you described from your blog:
sudo apt-get install mate-core mate-desktop-environment mate-notification-daemon
And then added with sed the two lines as described in you blog:
sudo sed -i.bak ‘/fi/a #xrdp multiple users configuration \n mate-session \n’ /etc/xrdp/startwm.sh
And then rebooted.
And what do you know. It works…. at least for me.
I hope I can help somebody else with this info
@Wouter
Thank you for sharing the information…There are multiple way to compile or generate deb files and we think that they are all valid. We have preferred a scripted approach because of the flexibility of the solution which can be adapted easily. By the way, we have also written a post on how to generate a deb file from the compilation (check http://c-nergy.be/blog/?p=11480)
Thank you for the visit and posivite feedback
Till next time
see ya
Hello, thank you for all your work and information.
Had a problem to get rdp working on a rented VPS with the Ubuntu 16.04.4 LTS (GNU/Linux 4.4.0-124-generic x86_64), LXDE, and thought to share what helped me. Connecting failed with this info in /var/log/xrdp-sesman.log:
[20180510-15:59:06] [INFO ] starting Xvnc session…
[20180510-15:59:06] [CORE ] error starting X server – user XXXXXXX – pid 1591
[20180510-15:59:06] [DEBUG] errno: 2, description: No such file or directory
[20180510-15:59:06] [DEBUG] execve parameter list: 16
[20180510-15:59:06] [DEBUG] argv[0] = Xvnc
…
[20180510-15:59:06] [DEBUG] argv[15] = (null)
[20180510-15:59:16] [ERROR] X server for display 10 startup timeout
[20180510-15:59:16] [INFO ] starting xrdp-sessvc – xpid=1591 – wmpid=1590
[20180510-15:59:16] [ERROR] X server for display 10 startup timeout
[20180510-15:59:16] [ERROR] another Xserver is already active on display 10
[20180510-15:59:16] [DEBUG] aborting connection…
Found this post with a description (no fonts available in /usr/share/fonts/X11) and solution (install the fonts):
http://jim-st.blogspot.nl/2017/08/xrdp-failure-log-message-connecting-to.html
After doing ‘sudo apt-get install xfonts-base’ it worked.
@Peter,
Thank you for sharing this great info. indeed, some people encountered the situation and we never looked/found a solution for them… Great Tip
Thank for the feedback and for visiting our blog….
Till next time
See ya
Hi
I installed xrdp from script and without any problem. But after installation and rebooting the system , OS get stack at login page with disabled mouse and keyboard and i can do nothing at all.
what is the problem???
@Amir,
First, you should have used the following version of the script (which is the latest for Ubuntu 16.04) – see this post http://c-nergy.be/blog/?p=11719
In this post, we have mentioned in the issues detected section that the input (mouse/keyboard might not work as expected…. so, the script checks if additional packages are needed
Possibly to solve your problem, try to execute the following command to re-install input drivers on your system and see if this is working
sudo apt-get -y install xserver-xorg-input-all
Hope this help
Till next time
See ya