Hello World,
As you probably know, Windows 8 server is on its way and it’s time for us to see what new feature come with it. If you remember, in a previous post, we talked about the possibility to convert a Windows 2008 R2 Server into an ISCSI server and this for free. To achieve this, you would need to download an additional software component (i.e. Microsoft software ISCSI Target 3.3. )
With Windows 8, the iscsi functionality is builtin in the operating system. You will not need to download any additional component but you will need to add a feature to your server. The implementation of ISCSI capabilities within Windows 8 seems even easier than the previous iteration.
Let’s describe how to install this feature on Windows 8……Ready….
Adding the ISCSI feature on Windows 8
In this stage, you will simply add the iscsi feature on your Windows 8 server. We assume that you have already it installed and that you have enough disk space to store the iscsi targets. To install the iscsi feature, perform the following actions :
-
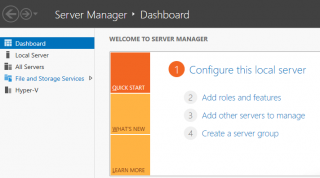
Open the Server Manager Console, in the Dashboard click on Add Role and featuresClick on picture for better resolution
-
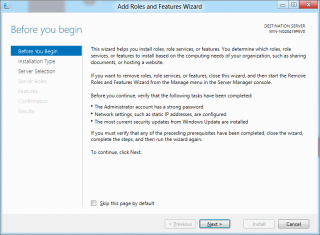
The Add Role and feature wizard starts. Press NextClick on picture for better resolution
-
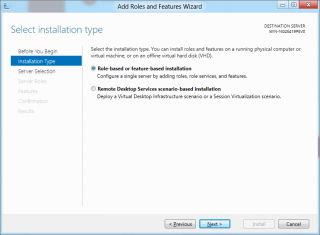
In the Select Installation Type, select the Role-based or feature-based installation and Press NextClick on picture for better resolution
-
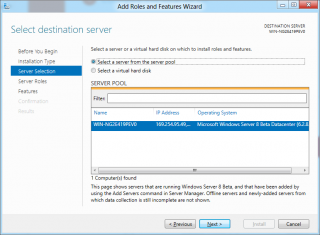
In the Destination server page, select the server where the service will be installed. Press NextClick on picture for better resolution
-
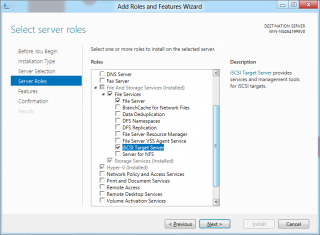
In the server role page, click on File and Storage Service > File Services > iScsi Target ServerClick on picture for better resolution
-
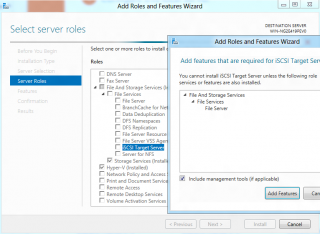
You might see a popup box asking you to install additional features needed by the iscsi target server feature. Press Add featuresClick on picture for better resolution
-
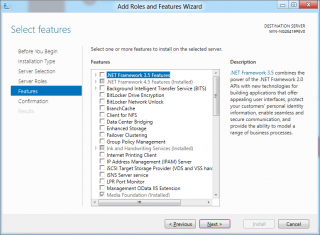
In the Server feature page, check that the components are selected and Press NextClick on picture for better resolution
-
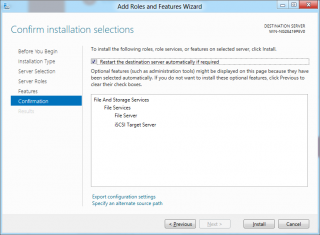
In the Confirm page, review your settings. and Press InstallClick on picture for better resolution
-
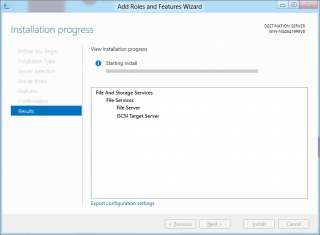
In the Installation progress page, you can monitor the progress of the installation. You might need to restart your server in order to apply the changes. You will be prompted for a reboot if it’s needed
Configuring your iscsi target server
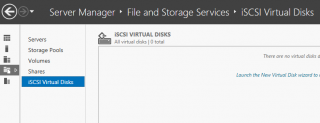
When the installation of the feature is complete, if you open your server manager console, and click on the File and Storage Services left menu, the sub-menu will be displayed. Click on the Iscsi virtual disk link. In the right pane, you can click on the “Launch the new virtual disk Wizard” link or in the task button and select the option new Virtual Disk
Click on picture for better resolution
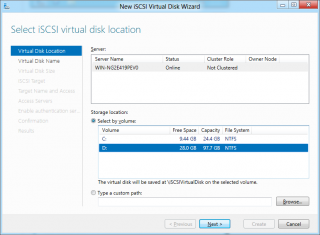
The Virtual Disk wizard starts. In the select storage location box, select which partition should host these virtual disks. The partition should have enough free space to hold the iscsi target files (which are basically vhd files)
Click on picture for better resolution
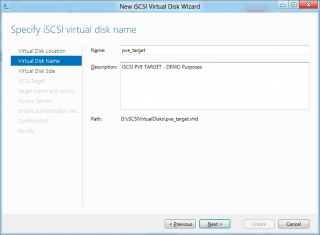
In the specify virtual disk name, Provide the required information and press Next
Click on picture for better resolution
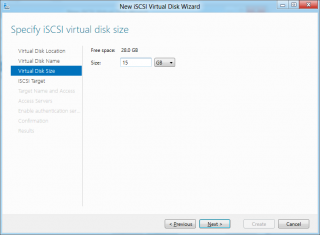
In the virtual disk size page, provide the size of the disk to be created and Press Next
Click on picture for better resolution
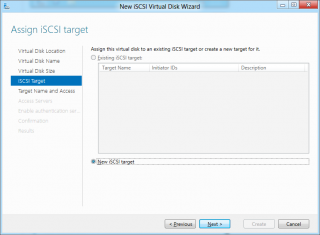
In the iscsi target page, select create a new iscsi target. Press Next
Click on picture for better resolution
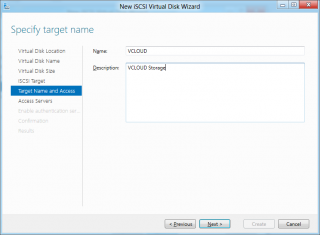
In the target name and Access page, provide the requested information and Press Next
Click on picture for better resolution
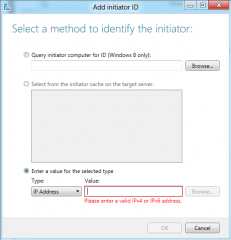
In the Access server page, you define which hosts will be able to access the targets. You can select different ways to identity the initiatiors. In our example; we have used the IP address. When Done, Press OK
Click on picture for better resolution
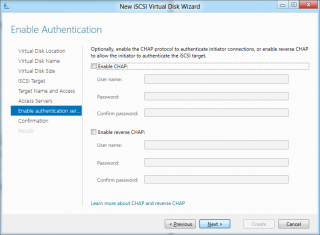
In the Authentication page, select if needed the Enable CHAP Authentication. We have simply accepted the default in our example. Press Next
Click on picture for better resolution
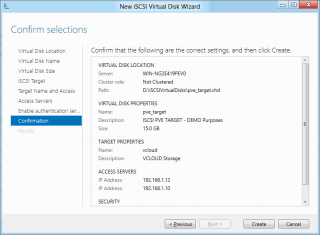
In the confirmation page, review your settings and Press Create
Click on picture for better resolution
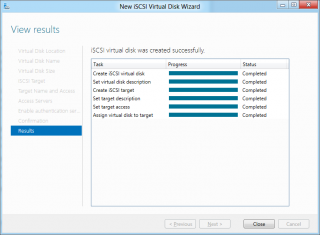
In the progress page, you can see the operation performed by the wizard. If everything went fine, you will see a page similar to this one. Press Close
Click on picture for better resolution
Managing ISCSI Target
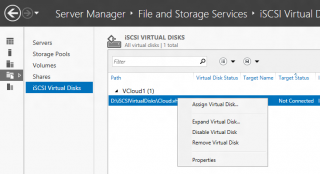
Windows 8 iscsi service provides you some flexibility. If you need to change something, simply go back to the iscsi virtual disk section (in the Server Manager console), select the virtual disk and perform the needed operation
If you right-click on the disk you want to modify, you can see the contextual menu that appears
Click on picture for better resolution
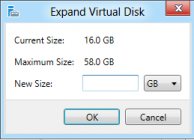
the most interesting option would be the expand disk size. Yes, indeed, If needed, you can expand on the fly the virtual disk you have create. And as you can see the process is straight forward. simply provide the new size and you are done
Click on picture for better resolution
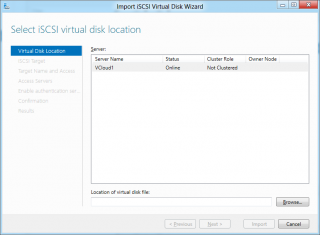
If you right-click anywhere on the box (or if yo click on tasks button), you will see that you have also the possibility to import vhd files and make them available as iscsi target…
Connecting ISCSI Target from windows client
To connect to the iscsi target from a windows client, it’s also really easy as long as the iscsi initiator is installed on the client. This component is installed by default on Windows 2008 and later. To see how to connect to the iscsi target, please refer to this post
Final Notes
Windows 8 is bringing more features in its operating system. To be honest, I think that for the iscsi service Microsoft has made a really nice job. The installation is really easy and intuitive and you can quickly setup your own iscsi appliance running Windows 8.
The iscsi target is just one part of the new features brought to you by Windows 8. Some new features such as deduplication and new new filesystem might be also of interest to some users….
If we have time, we might discuss these new features as well…..
Till next time
See ya
I cant install Initiator in Windows 8 client. Do you have any tip???
Hello Roberto
Sorry for the late answer.. Got some problems. Can you provide me a little bit more info about what you are trying to do. On windows 8 client, you normally do not need to install initiators because it part of the OS (like in windows 7/Windows 2008 R2). Do you have problems connecting to your iscsi disks from Windows 8 client ? Have you configured the iscsi target correctly (meaning do you allow your Windows 8 client to connect to the iscsi disk you’ve created?
If you provide me a little bit more info, i might be able to help you
See ya
I was also interested in the next scenario:
Windows 8 Hyper-V with iSCSI target installed on the same machine for learning/testing purpuses.
Some time ago I successfully installed StarWind free iSCSI target software but it was a little too much overhead for my computer.
Will try again in connection with the new Windows 8.1 hyper-v.