Hello World,
Today, I want to show you how you can create a custom Splash screen on your Proxmox VE system. Customizing the Splash screen is a way for me to personlize an installation of the Proxmox VE software and I can add additional information in the Splash Screen such as contact for support or simply mentioning the name of the company I’m working for. With this tip, people will remember you and might call you back for some additional works.
So, let’s start and having some fun with our Proxmox software installation.
Create Custom Splash Image
Note: This scenario is based on Proxmox VE 2.0 Beta
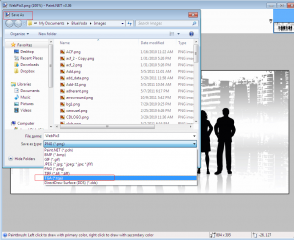
Because I was working on a Windows machine, I’ve used Paint.net software to create my custom Splash image. I’ve opened an image that I coud use and check the size attribute of the machine. You can create images with different formats (640×480,800×600,1024×768…). You can perform any changes on the image. When your image is ready, you can save it. Paint.net supports the *.tga extension. This is exactly the format we need in order to have a working Splash Screen on Proxmox VE.
Click on image for better resolution
Upload your Custom Splash Image onto Proxmox VE Box
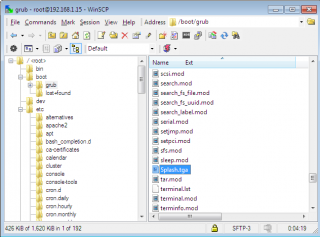
When the image is ready, you can copy this file under the /boot/grub directory. That’s it. You just need to copy the file to a location when the Proxmox VE grub loader will be able to access the image
Click on image for better resolution
Modify the Grub Configuration File
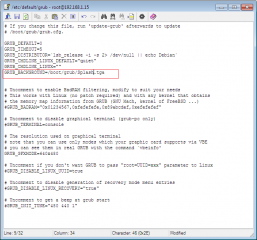
At this stage, you have to edit the /etc/default/grub file. In this file, you have to add a line that will direct the Grub Loader system to load an image. You will have to add the following line :
GRUB_BACKGROUND=/boot/grub/Splash.tga
Click on image for better resolution
If you want, you can also change the font color on the menu. To modify these settings, you will need to edit the file /etc/grub.d/05_debian_theme. Locate the following line (somewhere near the end of the file)
- set_background_image "${GRUB_BACKGROUND}" "white/black" "light-red/black" || set_default_theme
The “white/black” is defining the “Color_Normal” attribute and the light-red/black would be the color when a selection is highlighted.
If you are happy with your changes, you can save the file and you need to update grub before seeing the changes applied. To update the grub, on the console, you simply type the following command
- update-grub
View your newly customized boot loader sequence
Now, you can simply reboot your server and check that the splash screen and font color combination are working for you. If you need to modify some settings, just go back and perform the required modification.
Click on image for better resolution
Final Notes
This post has shown you that even with Proxmox vE 2.0 you can have time to time some fun. Yes, you can personalize your installation and have customers remembering you through this small Splash screen modification. Because Proxmox VE is based on debian distribution, I’ve simply used the same process to customize the Splash screen.
The result is amazing…..
Till next time
See ya


