Hello World,
We are back on the Nextcloud topic. If you remember, we have provided 2 ways to perform the installation of Nextcloud app on top of your Ubuntu machine.
- You can either use the snap package (see this post )and installation is really straightforward or;
- you can decide to go for a traditional deb package installation and you have some more steps to go through (see this post )
In the post covering the traditional installation approach, we have so far described the initial setup of the Nextcloud instance. This is a good start to evaluate and play around with the software solution. However, if you are planning to use it on a daily base, you will probably need to perform some post configuration actions on your Nextcloud install…
This post will quickly provide some information about these post configuration steps… Let’s go
Overview
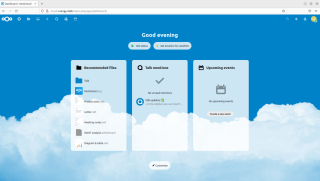
In our previous post, we have completed the initial setup and if everything is ok, you are able to login into the application and you can access the main dashboard (see screenshot below)
Click on picture for better resolution
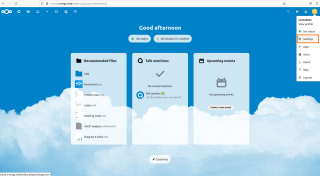
You can play around and click right and left in order to become familiar with the product. When you have done that, it’s time to complete the setup and configure the system as required. To do that, the software offers you a system health page that provide some information about the status of your system and some best practices recommendations. In order to access this page, you will click on right top corner round icon and select the option settings
Click on picture for better resolution
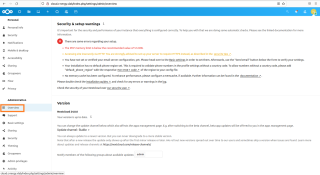
In the Settings Page, on the left menu, Click on the Overview Link and you will see a page similar to the screenshot below that will inform you about some additional settings to be configured
Click on picture for better resolution
We have basically the following points that require our attention
- PHP Memory settings should be changed
- We are accessing our NextCloud instance in an insecure way (no HTTPS protocol in use)
- Email server setttings are not yet configured
- No regional Phone zone has been defined
- No Memory Cache has been configured
We will tackle the first two points as they are the most important ones…
PHP Memory Size Settings
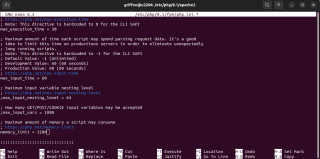
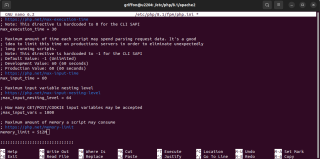
This is one is quite easy to fix. You will need to edit the file located at /etc/php/8.1./fpm/php.ini and modify the php memory parameter accordingly. To do that, you issue the following command
sudo nano /etc/php/8.1/fpm/php.ini
Click on picture for better resolution
In the file, you have to locate the line memory_limit = 128M
Click on picture for better resolution
Change the value from 128M to 512M as recommended by the message from Nextcloud overview page
Click on picture for better resolution
When this is done, you will need to restart the php-fpm service in order to reflect the changes you have just applied. You do this by issuing the following command
sudo systemctl restart php8.1-fpm
Click on picture for better resolution
Implement SSL Protocol
To solve this issue, you basically need to obtain a SSL certificate. You have multiple choices here. You can try to obtain free ssl certificates from Let’s Encrypt or you can try to use self signed certificates. Since our system is not connected to internet, we will go with Self signed certificate
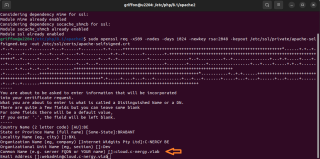
To generate a self-signed certificate, you will need to issue the following command from a Terminal Session
sudo openssl req -x509 -nodes -days 365 -newkey rsa:2048 -keyout /etc/ssl/private/apache-selfsigned.key -out /etc/ssl/certs/apache-selfsigned.crt
Click on picture for better resolution
While executing, you will be prompted for some information as shown in the screenshot below. The most important information that will need to provide is the common Name. The Common name should match the FQDN of your computer
Click on picture for better resolution
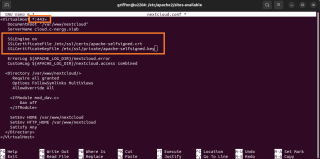
You have to modify your apache configuration file to specify that the ssl certificate will be used. Based on our previous post, we have used the file /etc/apache2/sites-available/nextcloud.conf. So, we will need to modify this file specifically…. From a command prompt, we will open this file by issuing the following command
sudo nano /etc/apache2/sites-available/nextcloud.conf
In the file, you will need to change the port from 80 to 443 (see screenshot) and you will also need to add the following code
SSLEngine On
SSLCertificateFile  /etc/ssl/certs/apache-selfsigned.cert
SSLCertificateKeyFile /etc/ssl/private/apache-selfsigned.key
Note:
Adapt the path and code to reflect your infrastructure
Click on picture for better resolution
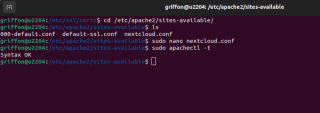
You can check your configuration by issuing the following command
sudo apachectl -t
Click on picture for better resolution
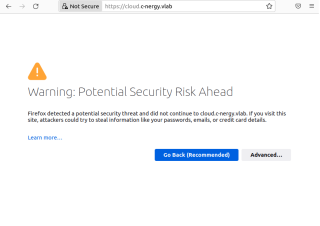
If you see a message that everything is ok, you can open your browser and use the https protocol to access your Nextcloud server. Since we are using a self-signed certificate, you will probably end up with a warning page (see screenshot). Click on advanced and accept the risk and you will be presented with the NextCloud login page.
Click on picture for better resolution
Strict Transport Security Header
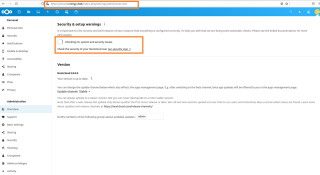
You can go back to the Settings > Overview page after having enabled the SSL protocol. You will see that the system will be re-evaluate again (see screenshot)
Click on picture for better resolution
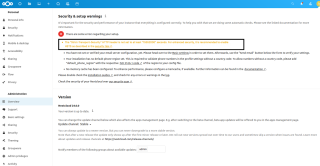
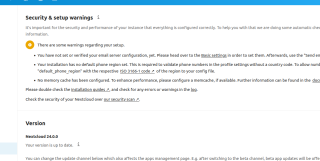
After evaluation, you will see again some issues/warnings and errors. In our case/scenario, after enabling SSL, we have seen one additional error related the the strict-transport-security settings (see screenshot below)
Click on picture for better resolution
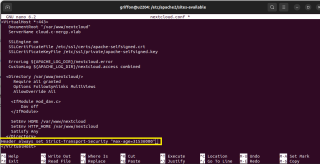
To fix this issue, you have to modify again the /etc/apache2/sites-available/nextcloud.conf. To modify the file, you issue the following command
sudo nano /etc/apache2/sites-available/nextcloud.conf
and you add the following line just after the </Directory> section
Header always set Strict-Transport-Security "max-age=31536000
Click on picture for better resolution
Final Situation (in our Scenario)
After making all these changes, we have ended up with a few warnings…We have tried to fix the memory cache warning message but we didn’t succeed (yet). We will review the documentation about that and we will try to update this post at a later stage. The two others warning messages can be ignored or can be fixed if you have a mail server ready to use within your organization
Click on picture for better resolution
NextCloud Office Configuration Incomplete
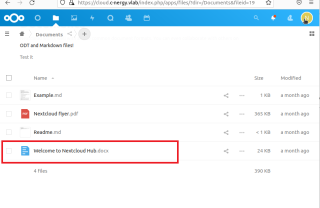
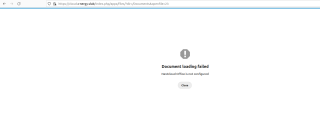
We have performed most of the post configuration settings on our Nextcloud server. We should have a stable and performant server. At this stage, you would try to open/edit and work on some office documents. Text files and pdf files can be opened and viewed no problem. However, when we tried to open an office document (more specifically a word document), from the Nextcloud Document page, we have been surprised by the fact that an error message would be displayed instead of the office document
Click on picture for better resolution
Looking into the error message displayed, it seems that our NextCloud office configuration is not completed. This means that some additional configuration is needed in order to open, view, edit office documents in Nextcloud interface…..
Click on picture for better resolution
We will tackle this additional configuration in our next posts…..
Final Notes
This is it for this post !
We have performed some additional post configuration on our NextCloud server and we have an almost ready to use solution. However, our journey is not over. Indeed, after performing all the necessary configuration at the server level, it seems that there is an additional configuration step that is needed in order to fully benefit from the NextCloud Office solution. The Office solution would allow users to edit Office files directly from the browser (something similar to SharePoint or Microsoft Office Online).
We will tackle the Nextcloud office configuration in our next post
Stay tuned
Till next time
See ya

