Hello World,
In this post, we will explain how to install Nextcloud software solution on top of your Ubuntu computer. A lot of people would compare Nextcloud to solution like Dropbox. Nextcloud is indeed a free open-source self hosted storage solution but nowadays offers much more options and features. Nextcloud solution has evolved into a collaborative solution that could be used on premise and can be self hosted.
Nextcloud can be used indeed to store/uploads documents and files but you can also edit these documents from a simple browser. Nextcloud solution also offers some collaborative tools like mail capabilities, Calendaring, real time communication and other plugins that can be used to extend functionality of the solution…. Cloud based solutions are really nice, cool, easy to use but some people might have concerns about privacy and would prefer to store their data on their own infrastructure. Choice is up to you between cloud based solution versus on premises solution…. We are not here to tell you which solution to use…
So, let’s proceed…!
Overview
Installation Options
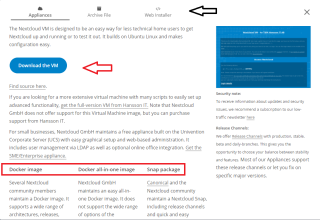
Nextcloud offer multiple options when it comes to installation method. When you go to the Nextcloud website and you want to download the software, you will see that you have the following options
- Virtual Machines
- Docker images
- Snap Images
- Archive Files
- Web installer Files
Click on picture for better resolution
In this post series about Nextcloud, we will get our focus on two installation methods
- Snap package and,
- archive package
Since we are working a lot with Ubuntu 22.04, we wanted to perform the installation on top of Ubuntu 22.04 Release. However, if you are checking the software pre-requisites for Nextcloud, Ubuntu 22.04 is not yet supported. Moreover, Nextcloud software is supported (at time of writing) php version 8.0
Software Requirements
| Platform | Options |
|---|---|
| Operating System |
|
| Database |
|
| Webserver |
|
| PHP Runtime |
|
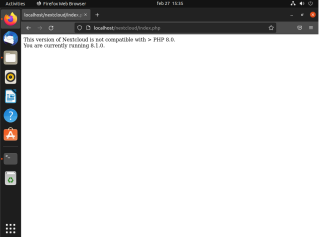
So, if you want to use the traditional installation method on Ubuntu 22.04, you need to be aware that this release is shipping with PHP version 8.1 which is not supported again by Nextcloud software. You can perform the Nextcloud installation on Ubuntu 22.04 but you will probably receive the following error message when trying to finalize your installation
Click on picture for better resolution
Note that it might be possible to bypass this check and proceed with the installation and get your Nextcloud instance up and running. However, this would be an unsupported setup and probably some features or apps would not work as expected since they have not been validated against PHP 8.1
Note :
On May 3, 2022, a new Nextcloud version has been released (version 24) which include support for php 8.1. However, we think that it might be interesting to show how the snap version installation can be performed….Hence, we have written this post….:)
Because of all these reasons (Ubuntu 22.04, php 8.1), this post will focus on the Snap package. In a nutshell, Snap is a technology developed by Canonical that bundle applications and its dependencies into a single package. The Snap package can be compared to AppImage or flatpak package. All these technologies tend to simplify application installation on Linux machines. The Snap package will make the Nextcloud installation really easy. The Nextcloud Snap package consist of
- Nextcloud 22
- Apache 2.4
- PHP 8.0
- MySQL 8
- Redis 6
- mDNS for network discovery
As you can see, the version shipped with Snap package is not the latest version of the software. The advantage of the snap package is that you can install the Nextcloud software solution also on Ubuntu 22.04 (still in development). The Snap technology offers an easy way to test an application and if the test is not providing expected results, you can remove the software easily in a clean way.
Not everybody is a big fan of the Snap technology. Some criticism are related to the technology itself such as an Snap apps load slower than a traditional application or that installation files are bigger than traditional installation packages. There is also a philosophic issue with Snap technology and Snap Store. Canonical is controlling the Snap store and the Snap client will work only with the Ubuntu Snap Store. No other Snap Store can be created which seems to be the proprietary approach to deliver software. The store lockdown issue also does not allow audit, patch or software modification. Linux Mint is not shipping Snap because of these reasons…..
Again, we are not here to tell you which software to use or which technology to use. We are simply providing information about the technology and software solution than can be used with your Ubuntu or any other Linux distributions.
Step by Step Installation Process – Snap Package
This section will provide a quick installation guide on how to install Nextcloud on Ubuntu using the Snap Package version (officially maintained and provided by Nextcloud Team).
Note : If you want to use this approach on a non Ubuntu distribution, you will first need to get the Snap software installed on your system….
Installing Nextcloud using Snap Package
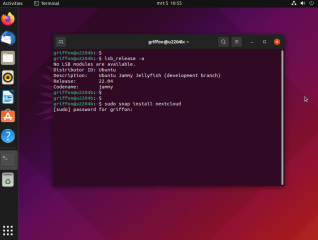
To install Nextcloud Snap package on Ubuntu 20.04 or later, you will need to issue the following command in your Terminal console
sudo snap install nextcloud
From the screenshot below, you can see that we are actually installing Nextcloud on Ubuntu 22.04 (still in development and thus not ready for production yet !)
Click on picture for better resolution
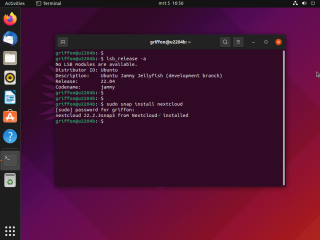
Wait for the installation to complete and when done you will see that the package Nextcloud is installed
Click on picture for better resolution
You can also check that the package has been installed by issuing the following command
snap list
Configuring Nextcloud
When snap installation process is done, the Nextcloud and all the dependencies will be ready to use on your system. You will need to finalize the installation process. To do that, you will need to open your favorite browser and issue the following url
http://localhost or http://<%hostname%>
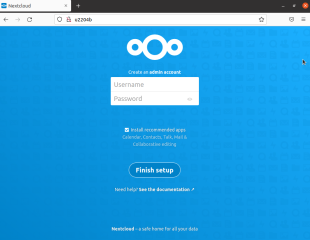
On the computer where you have performed the installation of Nextcloud, and after providing the url in your Browser, you will see the following page
Click on picture for better resolution
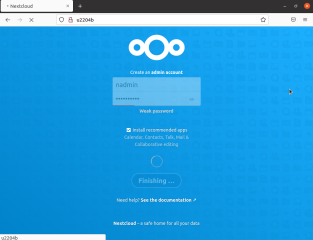
Define the user account and the password and Press Finish button
Click on picture for better resolution
Wait for the process to complete
Click on picture for better resolution
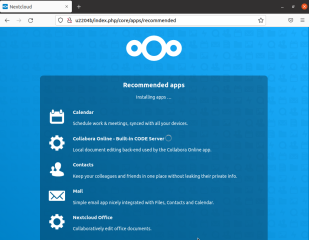
When the user account is created, you will be presented with a Review page where you can see the actions that are performed by the Nextcloud Wizard
Click on picture for better resolution
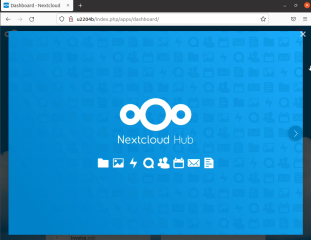
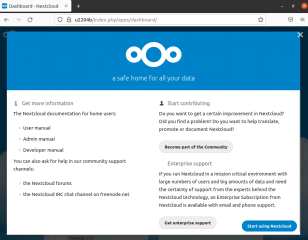
When the installation is completed, a small wizard will be displayed. You can go through the slide show to get more information or click on the white cross on the right top corner
Click on picture for better resolution
If you went through the slideshow, you can also click on the button start using Nextcloud
Click on picture for better resolution
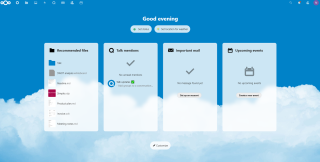
If everything went fine, you will reach the Nextcloud Dashboard
Additional Nextcloud configuration – Untrusted site
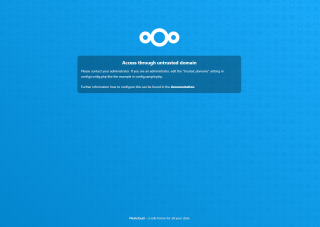
So far, we have performed all the configurations activities from the computer where the Nextcloud software has been installed. Now, if you try to access the Nextcloud web page from another computer on your network, you might end up with the following error
Access through Untrusted Domain
Click on picture for better resolution
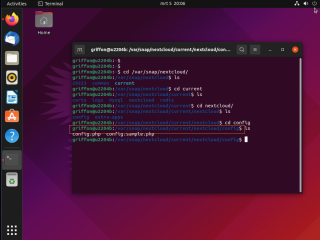
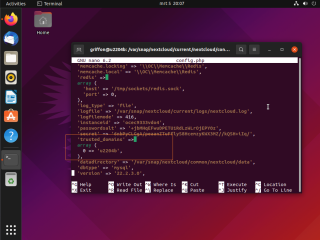
To fix this issue, you have to modify a configuration file and add the alias, ip address you want to use to access the Nextcloud login page. Since we are using Snap package, the location of the configuration file to be modified is located at
/var/snap/nextcloud/current/nextcloud/config/config.php
Click on picture for better resolution
Edit the file (with admin rights) and located the section trusted_domains. To edit the file, use the following command line
sudo nano /var/snap/nextcloud/current/nextcloud/config/config.php
Click on picture for better resolution
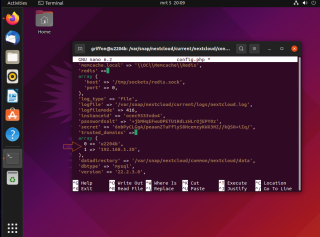
Add the necessary information into the file using the proper syntax (as shown in the screen below). In our case, we have added the ip address in the trusted_domains entry
Click on picture for better resolution
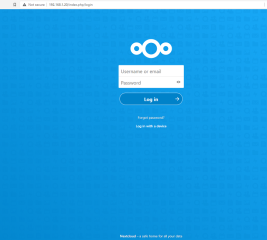
Save the config file and try again to access from a remote computer, the login page of Nextcloud software. If your configuration change is correct, you will see the login page loading accordingly
Click on picture for better resolution
Final Notes
Voila ! This is it for this post….
We have quickly explained how to install and perform a basic configuration of the Nextcloud software solution on Top of your Ubuntu computer. This post was focused on the Snap package installation since we have performed the installation on an unsupported version of Ubuntu (i.e. Ubuntu 22.04 which is still under development). We have to say that the Snap installation was really straight forward compared to the traditional installation. All in all the Nextcloud software solution is working as expected and collaboration or self-host cloud based storage functionality is working pretty well
In the future, we might want to describe the traditional installation process. We might also want to play a little bit more with the Software itself and see if this can be really a tool that we would use in some of our projects
Hope you enjoyed this post
Till next time
See ya

