Hello World,
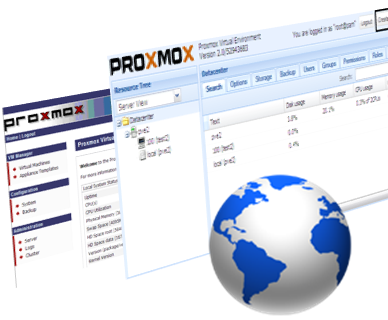
If you do not know yet, the Proxmox VE 2.0 beta has been released a few days ago. In a previous post, we have already described how to perform an installation from a usb stick ( a new feature of version 2.0 ). With this post, we will quickly have a look on the new management web interface. This new interface is based on Ext js 4 framework. The new management interface looks more professional and some settings are comparable to other management tools such as vCenter.
I see some improvements with this new interface but also some small inconvienences.
Let’s start our journey !
New Interface Layout
The “old” Proxmox VE interface was based on a simple design and was quite easy to use. The screenshots below shows you the appearence/layout of the current proxmox ve version (prior 2.0).


Click on the image to increase resolution
The new management interface has changed completely and based on the ext js 4 framework script. This seems to be a solid base for programming web applications. The new management interface looks more professional and uses same approach/logic/layout as other management tools such as vCenter or vSphere client.
If you have been working with Proxmox VE in the past, you know that to access the management interface, you simply need to open a browser an digit the name (or ip address) of the PVE host. With the new interface, when you will try to connect to the management interface, you will be presented with the following login box.

Click on the image to increase resolution
You will notice immediately the changes in the layout and appearance with the new interface. Another noticeable change is the addition of the realm option (in the login box). The Proxmox VE 2.0 will indeed allow you to authenticate against multiple sources such as Ldap or Active Directory realms. With the beta version, you can only choose the LINUX PAM standard authentication option. (We cannot yet configure other authentication mechanism through the web interface. )
After a successful login, you will be presented with a page view divided in 2 parts. On the left side, you will have a treeview where each node can represent different objects. Based on the node of the treeview you have selected, you will have on the right pane a number of options available through tab structure.

Click on the image to increase resolution
On the left pane, you can select from 3 different views: Server view, Folder view or storage view. This feature reminds me the option available with the vCenter management console. Based on the task you are performing, you might be switching between these views.

Click on the image to increase resolution
Datacenter Node
The default view will be the Server View. When this view is selected, you can see that the treeview top level is called Datacenter. If you select that level, you will be able to manage global settings of your PVE Infrastructure. The following screenshots shows you the options available within the new management interface.
Click on the images below


As you can see from the screenshots, some features are simply not implemented yet. At this stage, using the PVE 2.0 beta, you cannot manage
- authentication options,
- Roles Options
- Permissions Options
- Backup Options (can be done through Command line though)
These features will be probably become available when the proxmox ve 2.0 will be finally ready for release.
PVE Host Level Node
If you click on one of the PVE Host node, you will get different configuration options on the right pane. I do not want to go into too much details for the moment. Just remember that at this level, you can configure the following settings
- Network interface
- DNS settings
- Time settings
- Stop/start Services
- Check the Syslog files
- Check Task History
- Stop/reboot your PVE Server
I’ve added here some screenshots of the configuration options available at that node.


Click on the image to increase resolution
2 new interesting features need to be outlined. The first would be the Task History option. From this tab, you can basically have a log of all actions performed on a host. This can help you in tracking changes in the configuration of your system and identify the user that performed this action.
The other interesting option is the ability to perform console connection from the web management interface. Yes, as you can see in the screenshot below, you have at the menu bar level a new button called “Shell” that will basically allow you to perform remote connection console to the host and issue your commands without using any other tools or utilities such as putty.exe. This is really a nice improvement 🙂

Click on the image to increase resolution
Creating Virtual Machines from the new Interface
Now, you are probably wondering from where you can create Virtual machines from this new interface. We have seen the main nodes but still no virtual machines “section” or node. With the new Proxmox VE 2.0, you can create virtual machines at any level you are located in the tree. On the following screenshot, you can see that you have 2 buttons available: one will allow you to create a KVM virtual machine, the other one will allow you to create OpenVz Container

Click on the image to increase resolution
These buttons are always available whatever the page or node level you are located. If you click on the button Create CT, you will basically start the OpenVz Container Creation Wizard. In the Beta version, this feature is not yet implemented (see screenshot)
Click on the image to increase resolution
If you click on “Create VM” Button, you will start the KVM virtual machine creation Wizard. A dialog box with multiple tab will popup and you will need to fill in the required information. You can find hereafter the screenshots of the wizard. effective creation of virtual machine and settings will be explained in a coming post.


Click on the image to increase resolution
At the end of the procedure, you will have your virtual machine listed in the treeview. It might be cleaner to switch to the folder view when you have to work mainly on virtual machines and you do not need to perform global changes.

Click on the image to increase resolution
At this stage, if you click on the virtual machine, you can change the settings or make a console connection (meaning launching a vnc session to your virtual machine.) As the screenshot below shows you, you can modify the hardware configuration of the virtual machine as you would in the previous version of Proxmox VE

Click on the image to increase resolution
A nice addition is the console tab where you can interact with your virtual machine from your browser within a single browser window. This feature is similar to the console option found with Vmware products.

Click on the image to increase resolution
Note finally that again, at this stage, backup options and permissions feature at the virtual machine level have not been implemented yet
Final Notes
This post has tried to provide a quick tour of the new web management interface of Proxmox VE 2.0. As you can see the Management interface has changed completely. This new interface looks more professional (a little bit more complex to use but not much). The layout/appearance of the new interface reminds me a little bit the vSphere Client, vCenter software.
The look of the management tool might have changed drastically, the concepts and techniques used in previous version have been kept. This means that people currently using Proxmox VE 1.9 and prior will become familiar quite quickly with the new interface.
The only thing that bother me (for the moment) is the fact that if you need to change multiple settings, you will have to each time select the item to be changed and double-click on it, modify it and save it. In the previous versions, the interface was more based on an editable form where changes could be performed more quickly. I’ll be probably get use to that as well in a near future
That’s is for this post
Till next time
See ya
Excellent post, thanks