Hello World,
Note : This post is based on the Proxmox VE 2.0 – Beta Version
As you know the PVE 2.0 (Beta) has been out since 2-3 days. I’ve already started playing a little bit with the software (but not too much because busy busy busy…). In a previous post, based on the information released by Proxmox VE team, I was already mentioning that an installation from an usb stick was possible with this release.
From the Proxmox VE web site, you can read that the installation media has been released as an hybrid ISO image. This simply means that you can decide to burn the ISO image into a physical media and perform the installation from it or to write the image directly into a usb stick.
Get the PVE 2.0 ISO image and the Usb image writer utility
You will first need to download the
- Proxmox VE 2.0 beta iso image from the Proxmox Web site (http://www.proxmox.com/downloads/proxmox-ve/17-iso-images).
- You should then download the Suse Studio ImageWriter Software from this location. The software work under Windows or Linux. This post will be using the Windows version.
With the previous versions of Proxmox VE, in order to perform the installation, you would have followed these instructions and used a utility such as unetbootin.exe or universal USB-Installer to create the bootable usb stick. The drawback of these utilities was that it took some time to create the bootable usb media. (You could used syslinux to create your bootable device but the idea was to provide a simple procedure for majority of the users). The new format of the media makes it really easy to create the bootable usb device from which you can perform a fast installation as well. It didn’t take more than 5 minutes to create the PVE bootable usb stick which would be used to perform my first PVE 2.0 installation.
Note: You need a USB stick of minimum 512 Mb in order to perform this procedure.
Creating the Bootable USB Stick
Note: I’m performing this operation from a Windows Machine. If you are using linux machine, you need to download the linux version of the tool/utility
Step 1 – Renaming the proxmox ve iso file
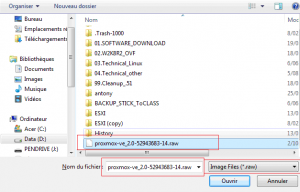
After downloading the PVE 2.0 ISO image file, you will need to change the extension of the file. Instead of using the *.iso extension, you will need to change it to *.raw. So, if you have downloaded a file proxmox-ve-2.0.iso, you have to rename it into proxmox-ve-2.0.raw
Step 2 – Launch the image writer tool
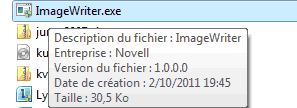
Plug in your usb device into your computer. Browse to the location where you have downloaded the Suse Studio ImageWriter and simply double-click the imagewrite.exe self-executable file
Click on image
You will be presented with a really simple dialog box. Simply Press the “Select” button
Click on image
Locate the PVE 2.0 source *.raw file and select it.
Click on image
The utility will also display the list of available usb devices. If you have only one usb device connected, you can select this one. If you have multiple ones, ensure that you select the correct usb device.
Click on image
When you are ready, simply press the copy Button. You will get a warning. Press OK in order to proceed and create your bootable usb stick.
Click on image
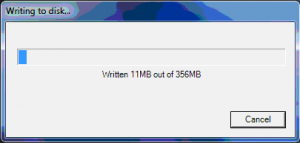
After click on Yes in the confirm dialog box, you will see the dialog box with the progress bar and in a few minutes, you will get your bootable usb stick from which you will be able to perform the installation on your system.
Click on image
Perform the Installation from your Usb Stick
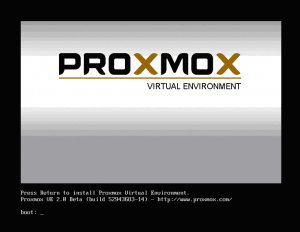
At this stage, you can simply walk to the machine where you are about to install the PVE 2.0 software, plug in your stick (check that you are booting for the usb device), and the PVE Installer Wizard will simply start.
Click on image
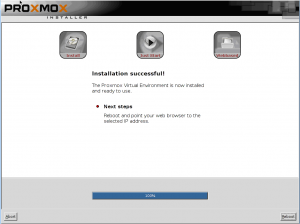
The installation process has not changed compared to the previous versions. You can still use the installation procedure as described in the post Setup your ProxMox VE Infrastructure – Part 1. You will however noticed that some small esthetic changes have been made in the PVE Installer ( new splash screen, new header in the installer section as shown in the screenshot below)
Click on image
Final Notes
As we have seen, the Proxmox VE Team has finally included the possibility to install PVE from a usb stick natively. The new hybrid iso image format make it a breeze to create such bootable usb device. Another good point is that the installer has not changed drastically. I hope that in the future they might change the installer layout and appearance to make it even more friendly.
As a special bonus, I’ll post here some screenshots of the new PVE management interface (based on ext js 4 javascript framework). This is a big change compared to the previous web interface. I see improvements but also some inconveniences in this new management interface. This will be for the next post.
Till then see ya
Bonus – Screenshots New interface
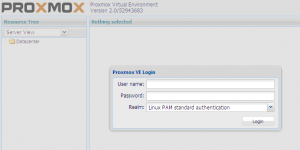
New Login Screen
Click on image for better resolution
New Interface with some new feature Roles, permissions, users,Groups…
Click on image for better resolution
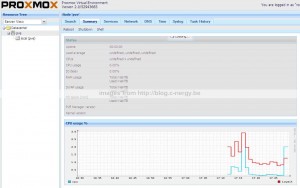
New Interface used to manage PVE HOSTS
Click on image for better resolution
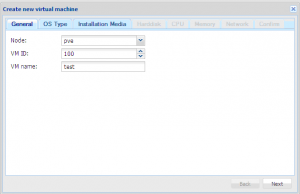
New Wizard based interface to create KVM Virtual machines
Click on image for better resolution




the tool doesnt see my usb stick in windows tryed alot how did u do it?
Euh nothing special. Which version of Windows are you using ? Check that the .NET Framework is installed on your machine. Do you see the usb from Windows Explorer ? Do you see a Drive Letter within Windows Explorer ? Have you tried to format the stick using FAT32 for best compatibility
I’ve tried this procedure a couple of times with no success.
The system boots but after the first booting, when the installation starts it aborts with a message of “cannot execute binary file”. It happens when the installation script calls a command -I don’t remember it right now- from /usr/bin. I’ve tried the comand manually and got the same error, I’ve also tried a few more commands from /usr/bin with the same result.
I thought it was because my CPU was not 64 bit capable (it is, it’s a core I3), but I tried burning a CD with the very ISO I used with my pen-drive and it worked like a charm.
I puzzles me not having found any reference to this problem on the net, I really don’t like burning CDs nor booting them so I’m going to investigate a little more.
Problem solved!
Finally I’ve tried with a different pendrive and it has worked.
I cannot understand what in a determinate pendrive can produce such kind of errors.
Sorry for my late answer….
But I see that your problem is solved….
So, all good….
See ya around
Hello,
Simplest way for linux users just type in terminal:
sudo dd if=[/home/mzabik/temp/proxmox-ve_2.1-f9b0f63a-26.iso] of=[/dev/sdc]
replacing [/home/mzabik/temp/proxmox-ve_2.1-f9b0f63a-26.iso] to proper path to iso image and [/dev/sdc] to your usb drive
Hello there,
Thank you for sharing this information…..I have not try it yet… but I will given that I’m using more and more linux machines
See you : -)
For some reason it doesn’t install any bootloader in my case…. 3-5 minutes easy installation my ass…
yeah ok, it’s not working for you…. can’t really help you you do not describe what you have done precisly and what’s your problem exactly…
Till next time
@Griffon, i have used Proxmox 2.3 with MultiBootISOs-2.1.5.1.exe. since Suse Studio ImageWriter doesn’t display the list of available usb devices on its dropdown box.
Proxmox 2.3 with MultiBootISOs-2.1.5.1.exe installed successfully, but when i click the reboot button at the end of Proxmox 2.3 installation, it doesn’t boot. all i can see is a black screen with a white blinking cursor.
thanks
Hello Mark,
I’m having a look at it…Give me 1 or two days before I come back to you…. I have to do some test
Till next time
See ya
Hello Mark,
I have tested PVE 2.3 install from Usb stick and they all worked for me. I even tried install on Virtual box virtual machine and went through..
Could you try to perform the installation of Proxmox v3.0 (the latest version) and see if this fix your issue
hope this help
Till next time
See ya
i have used another HDD, which is SATA, it installs and works perfectly, my previous HDD is IDE, i think the HDD is the problem, i will now try to install it on another unit with an IDE HDD. this site is very useful. more power
Aaaaah
Good news finally. Install from USB Stick is working 🙂
Hi dear am trying to instal proxmox on Laptop my laptop model is HP Probook its looks complete instalaation but not booting from proxmmox can you please sugesst me why its not booting my sysem..
Regards
Suleman Shaikh
Hello Suleman,
I have no clue because you do not provide enough info. In the past, we tried to install proxmox on a laptop and it worked. Which kind of error are you getting, is the hardware meetings the requirements (x64/intel-VT or AMD-V). During installation, can you confirm that you format the disk and you can see the disk selected is the one used to boot from…
You can try to boot from usb stick and see if this is working or not as a workaround
Hope this help
Till next time