Hello World,
In this post, we will quickly explain how to add, deploy and activate the ESU MAK Keys you paid for in order to get extra support for your legacy operating system (i.e. Windows7 or Windows 2008/R2). The activation process is basically the final action that you would need to perform in order to detect the critical updates that would be made available by Microsoft for these operating systems. However, because the ESU MAK Key program is a yearly based program, your organization will need ,every year, to obtain new ESU MAK keys, distribute them and activate them again.
Let’s move forward and try to close this topic…..
To obtain more information and follow up this series about ESU Program, please read the previous parts at
- ESU for Windows 7 and Windows 2008/R2 – Part I – Prepare the Infra
- ESU for Windows 7 and Windows 2008/R2 – Part II – Installing VAMT
- ESU for Windows 7 and Windows 2008/R2 – Part III – Finalizing VAMT
- ESU for Windows 7 and Windows 2008/R2 – Part IV – Patching VAMT 3.1
- ESU for Windows 7 and Windows 2008/R2 – Part V – Discover Products
Overview
All the actions that needs to be performed at this stage should be normally performed from the VAMT server and the VAMT console. In the previous post, we have seen how to use the VAMT Tool to identify and make an inventory of machines running legacy operating system. Based on this information, you will be able to buy the necessary ESU MAK Key. As a reminder, the ESU MAK Key will be unique to your organization but you will be using exactly the same key on all the machines running the legacy operating system.
Add Product Keys in VAMT
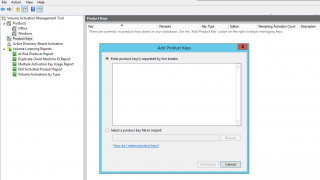
When you have received or retrieved your ESU MAK Key, you will need to add it into the VAMT Tool. To do this, you will need to fire up your VAMT tool, expand the node and select the Product Key node. Right-click on the product key and select Add Product Keys. The following dialog box is displayed
Click on Picture for Better Resolution
Enter your product key and Press Add Keys. If everything is ok, you will see that you ESU MAK product key will be added in your console
Click on Picture for Better Resolution
Note :
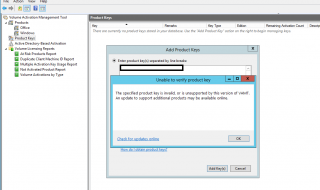
If you receive a message that the key cannot be verified or validated (as shown in the screenshot below), please ensure that you have patched your VAMT server as described here
Click on Picture for Better Resolution
Deploy Product Keys through VAMT Interface
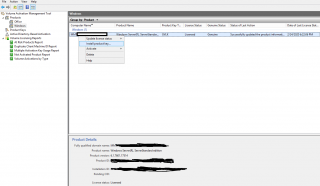
Since the product key has been added to your VAMT infrastructure, it’s time for you to distribute this key to your computers running legacy software. In this example, we have added a single Windows 2008 R2 server that needs to receive ESU MAK Key. In VAMT console, Expand the nodes and select Volume Activation Management Tool>Products>Windows, select the machine where to deploy the key, right-click on it and select the option “Install Product Key”.
Click on Picture for Better Resolution
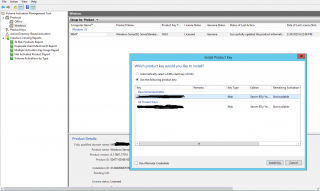
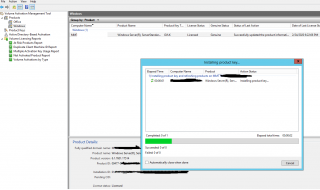
The Install Product Key Dialog Box is displayed. From this dialog box, select the MAK Key to be distributed and press the Install Key Button
Click on Picture for Better Resolution
Wait for the progress to complete
Click on Picture for Better Resolution
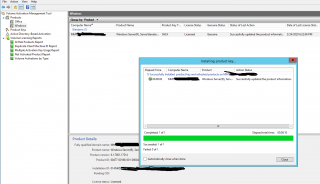
In the summary page, review that the key has been installed accordingly and press Close
Click on Picture for Better Resolution
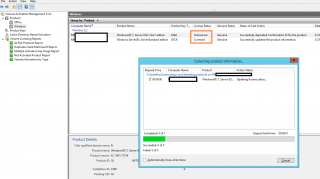
If everything is ok, you will see in your console for the selected machine two lines in your VAMT console. The KMS key for the operating system and the newly added ESU MAK Key as shown in the screenshot below. In this screenshot, you can see that the status of the MAK key is still unlicensed
Click on Picture for Better Resolution
Online Activation through VAMT Interface
Now, you would need to activate the product key. Based on your network and connectivity to internet, you will be able to perform online activation or proxy activation. If the VAMT server and the client computers have internet access, activation can be performed online. If your client computers have no internet access but VAMT has internet access, we can perform the proxy activation. Finally, if you have a totally isolated network, you can also use the Proxy Activation approach.
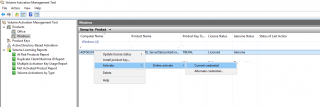
Let’s assume that you perform a online activation. Right-click on the MAK Product key, select Active > Online Activation > Current Credentials
Click on Picture for Better Resolution
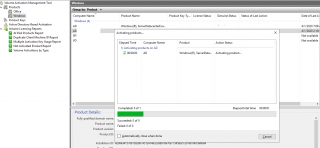
You will see the Activating product windows. Wait for completion and success…Click Close
Click on Picture for Better Resolution
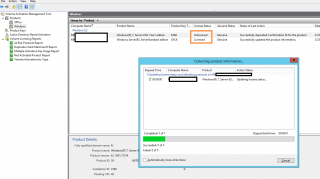
Right-click again on the MAK Key for the machine to be protected and select the option Update License status.
Click on Picture for Better Resolution
Again, wait for completion and success. Press Close
Click on Picture for Better Resolution
Finally, (whatever activation method you have selected), you should see in your VAMT console that the MAK Key License status is Licensed
Click on Picture for Better Resolution
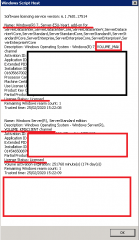
If you go on the computer running the legacy software, if you run from command line, the following command
slmgr /dlv
You can see the Licensing information for this machine. Your computer will list two license key : The MAK Key which is licensed and the KMK key which is also licensed.
Click on Picture for Better Resolution
Proxy Activation through VAMT Interface
If your network has no internet connection, it’s still possible to perform “offline” activation or proxy activation. To perform this proxy activation, you will need to have a VAMT server that has access to the internet. This simply means that you will need to install two VAMT servers : one VAMT server on the isolated network and one VAMT having access to Internet. To provide Licensing information between isolated network and connected VAMT server, we will need to export information from the VAMT server located the isolated network
Exporting List
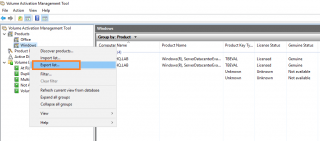
Open the VAMT console, browse the nodes “Volume Activation Management tool>Products>Windows”, right-click it and select the option Export list
Click on Picture for Better Resolution
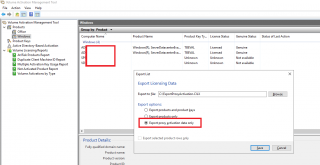
In the export dialog box, Select your option. We usually choose the Export Proxy activation data only. Press Save
Click on Picture for Better Resolution
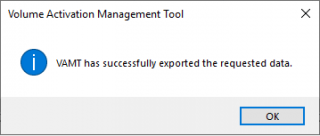
If everything is ok, you will get the confirmation that the export file has been created
Click on Picture for Better Resolution
Transfer and Import List
Copy the export file and transfer it to the VAMT machine that has access to internet
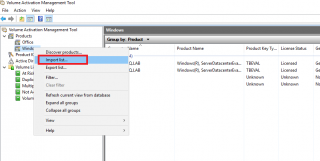
On the network that internet access, go to the VAMT computer and Import the file that you have transferred from the isolated network
Click on Picture for Better Resolution
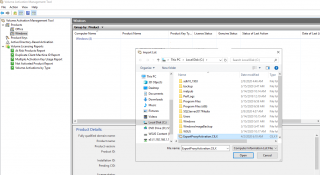
Retrieve the export list file, select it and press OK
Click on Picture for Better Resolution
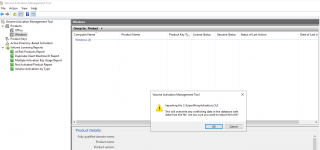
In the warning dialog box, confirm that you will overwrite the existing configuration and Press OK
Click on Picture for Better Resolution
Proxy Activation
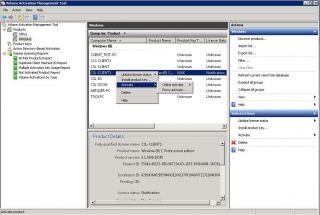
The VAMT should display list of computers that needs to be activated. So, it’s time to Activate these computers. Select the computer(s) right-click and select the option Proxy Activation
Click on Picture for Better Resolution
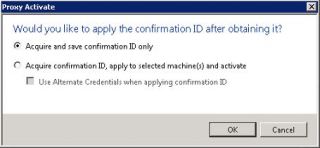
In the dialog box, select the first option, “Acquire and Save confirmation ID only” as we will need to copy the info on the isolated network
Click on Picture for Better Resolution
Export Back to isolated Network
since you have performed the proxy activation, the confirmation id are stored in the export file you have just performed, it’s time to transfer this file to the isolated network. You can use exactly the same process as the one described above
Acquire the license ID
In the VAMT console, select the root node, right-click and select the option “Acquire Confirmation ID for CLIX”.
Click on Picture for Better Resolution
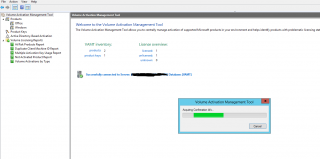
Select the file you have transferred from the other network, Wait for the process to complete
Click on Picture for Better Resolution
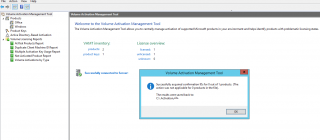
Wait for confirmation and press OK
Click on Picture for Better Resolution
Activating
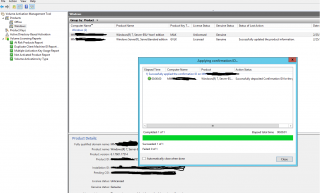
Now, we are really reaching the final line. Select the machine or machines that needs to be activated. Right-click on it, Select Activate, then Apply Confirmation ID, current Credential
Click on Picture for Better Resolution
Wait for completion of the process
Click on Picture for Better Resolution
When done, again, we have to update the status for the discovered products by right-clicking on them and select update status
Click on Picture for Better Resolution
Wait for completion
Click on Picture for Better Resolution
And you can see that finally the MAK key has been activated
Click on Picture for Better Resolution
Final Notes
This is it for this post !
With this series of post about ESU and activation process, we have explained in details how to benefit from the ESU Program. Based on your network configuration, the deployment and activation process should be quite straight forward. If you are working with disconnected networks, there are a little bit more actions that needs to be performed. All the posts of this serie have been explained the technical approach recommended by Microsoft. We have used the VAMT Infrastructure to centrally manage and configure these ESU MAK keys.
There are some alternatives options that can be used to deploy and activate ESU MAK key but we have no time to investigate these other options (which seems quite interesting in fact)
Hope you enjoy this serie
Till next time
See ya
