Hello World,
Today, we are proceeding with our quick investigation of Windows 2019 Server and what’s new on this release. In the two previous posts, we have been through a standard installation of Windows 2019 Server. The previous posts has described the simple installation process of the operating system. The next logical step in a Windows environment is to setup an Active Directory. We are not expecting too many changes in the process but we wanted to have a quick look. So this post will quickly describe how to setup an Active Directory on top of Windows 2019 Server
Let’s go !
Overview
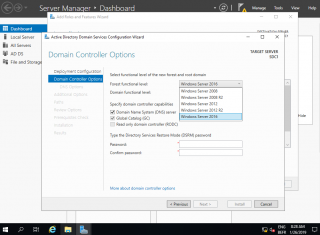
After having installed Windows 2019 Operating system, the next logical step is to promote your first domain controller in your new domain or add the domain controller into your existing domain. The process is quite similar to the one used in Windows 2012 and later. Windows 2019 Server does not introduce any forest or domain functional levels. So, as you will see, the highest forest level and domain level is Windows 2016.
In order to have a Windows 2019 server promoted as Domain controller, the existing Active Directory infrastructure needs to run Windows 2008 R2 functional level and the DFS-R needs to be present as well. (for more information, have a look here)
Installing the Active directory Service Role
As mentioned earlier, the process has not changed much. To promote a server into a Domain Controller, you will need to first install the Active Directory Service role and then we will need to perform the promotion operation.
Installing the Role
In the server Manager, click on Add Roles and Features link
Click on picture for Better Resolution
The wizard starts. In the Before you begin page, press Next
Click on picture for Better Resolution
In the installation type, select the first option install role and features and press Next
Click on picture for Better Resolution
In the Select server Page, specify the server where the role needs to be installed. Press Next
Click on picture for Better Resolution
In the Select Server Role Page, Select the option Active directory Domain Services. In the dialog box prompt, accept the settings and Press OK
Click on picture for Better Resolution
In the feature page, you can leave like this or do like me and select the .Net 3.5 option cause some applications are still relying on this one…
Click on picture for Better Resolution
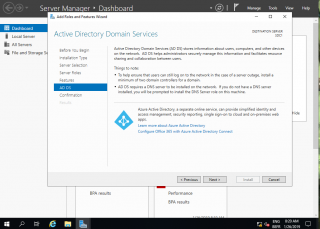
In the AD DS page, review the information and Press Next
Click on picture for Better Resolution
In the confirmation page, review your settings and press Install
P.S.: If you have selected the option .NET 3.5, do not forget to specify the alternate path
Click on picture for Better Resolution
Wait for the installation to proceed
Click on picture for Better Resolution
Promoting a server to a Domain controller
When completed, you will see a small link that ask you to promote this server to a Domain controller
Click on picture for Better Resolution
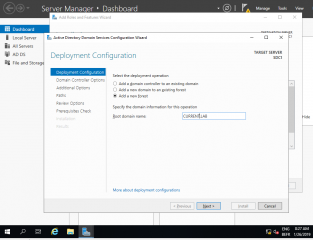
The AD Service Configuration Wizard starts and you can start the promotion process. In the Deployment page, choose your configuration. In our case, we are setting up a brand new Forest based on Windows 2019 Server.
Click on picture for Better Resolution
In the domain controller page, select the forest level and domain level. As mentioned earlier, the highest functional level found here is Windows 2016. Provide also the DSRM password and Press Next when Done
Click on picture for Better Resolution
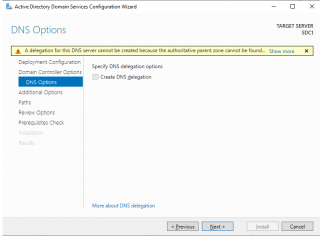
In the DNS Option page, select your options as required and Press Next
Click on picture for Better Resolution
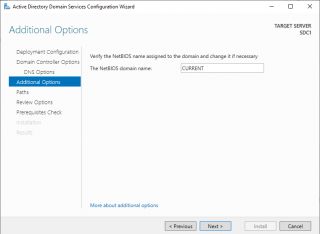
In the Additional Page, the wizard will check the NetBios name. When done and if everything is ok, Press Next
Click on picture for Better Resolution
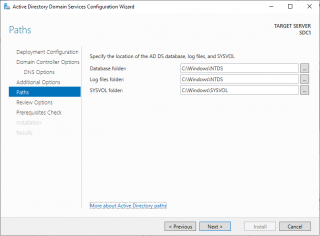
In the Paths Page, specify where to store your AD files. Please review the best practices for knowing where to store them accordingly. Press Next
Click on picture for Better Resolution
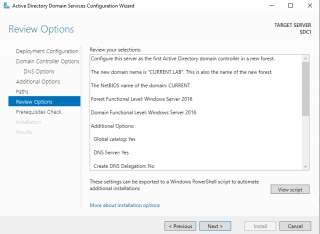
In the Review Page, Review your settings and optionally, you could click on the view script button so you can have the command line that can be used to automate the DCPromo operation. Press Next
Click on picture for Better Resolution
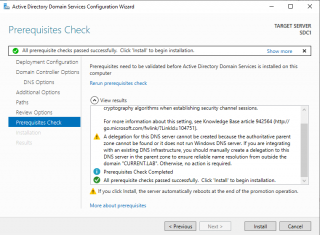
In the Prerequistes Page, if everything is ok, you should see a green check box and you would be able to press the Install Button
Click on picture for Better Resolution
Wait for the installation to proceed
Click on picture for Better Resolution
When done, review the summary page and you should be ready to go. Press Close and Start working with Active Directory and your domain….
Click on picture for Better Resolution
Final Notes
Voila ! This is done for this post. As we can see, there is basically not a lot of changes in the Active directory service installation in Windows 2019 Server. In this post, we have performed the installation from a Windows 2019 Server where the GUI was available and installed.
If you have installed the Core version and you want to promote the server to a domain controller, it’s possible and there are basically multiple options.
- Option 1 – You log on locally on the Core Server and you execute all the necessary Powershell command to have the domain controller installed;
- Option 2 – You can use Remote Powershell to connect to the core server and execute the necessary Powershell commands
- Option 3 – From another Server, you can launch the Server Manager, add the future domain controller into the console and perform the DCPromo operation remotely
- Option 4 – You can possibly use the new Windows Admin Center to perform the DCPromo. Actually, we have tried this and we were able to promote a Core Server. However, the installation was not that straight forward through The Windows Admin Center.
As Microsoft is promoting Core Server, we might want to look further in DCpromo operations on Core Server. In a future post, we will probably describe how to perform the installation on the core edition and see how the Windows Admin Center could be used to perform the installation and if this is worth the effort….
Till next time
See ya
