Hello World;
In our previous post, we have seen how to configure an Ubuntu Gnome 17.04 to have x11vnc service started at boot time. At the end of the post, we have demonstrated that a vnc connection was possible but after passing the credentials, only a black display is presented to the user. In this post, we will present workarounds to still be able to access the desktop through vnc protocol. We will not look further for a better or final solution. So, if someone wants to have a deeper look into this topic, he or she is welcome to do so and possibly share findings with us.
So, this being said..it’s time to look at the workaround.
Workarounds
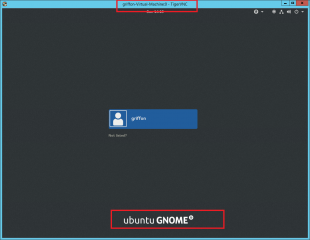
So, in the previous post, we have seen that a vnc connection could be made to Ubuntu Gnome to the GDM login page.
Click on picture for better resolution
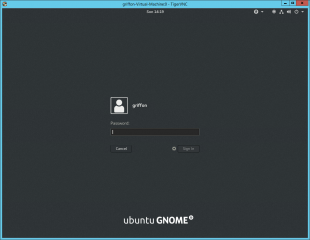
You should be able to provide your credentials through your vnc session…
Click on picture for better resolution
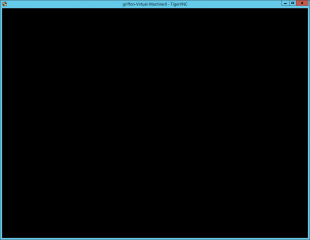
However, after login into the system, your vnc screen will be displaying only a black screen and you cannot do much about this…….
Click on picture for better resolution
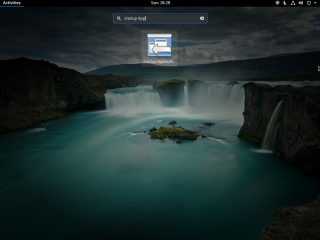
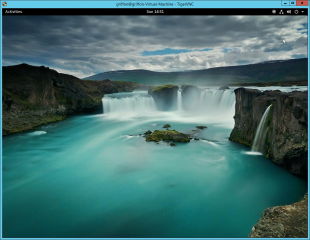
If we look at the Ubuntu Console, we can see that we are effectively logged in and the Gnome desktop is ready to be used. However, the vnc protocol (and the way it has been configured) does not allow us to view this desktop. So the workaround to us seems quite clear, we need to be able to start a new vnc session on top of the gdm vnc session. So, how can we achieve this ? The easiest way would be to start the vnc process at login.
Let’s explain…
Workaround 1 – Startup Applications
Startup Apps Configuration
So, we know that we can login into the system through vnc but we have a black screen. If we configure the startup applications to start a new vnc session, the user can then perform an second vnc connection and have access to the desktop and start working on it. This configuration is needed on a per user base.
To configure the startup applications, perform the following steps
Click on activities and search for startup applications. You should see the following icon. Click on it
Click on picture for better resolution
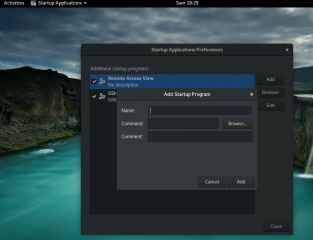
The Startup applications dialog box opens, click on the Add button and provide the requested information
Click on picture for better resolution
- So in the name field, type something like “Remote Access View”
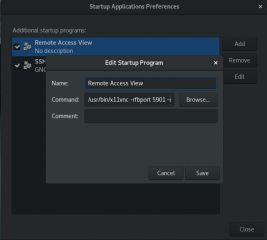
- In the Command Filed, type the following command /usr/bin/x11vnc -rfbport 5901 -rfbauth /etc/x11vnc.pass
- Description field can be left blank or provide your own comment
So, you should have something similar to the following screenshot
Click on picture for better resolution
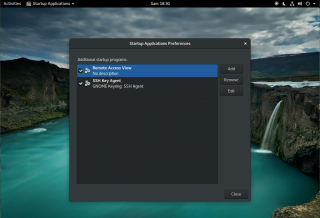
So, the Startup Applications window should look like this now…
Click on picture for better resolution
Making the vnc connection
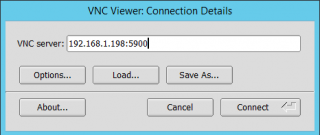
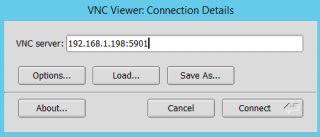
The first time you make your connection, you will be connecting to the GDM login screen. So in your vnc viewer, you would use the following notation hostname:5900 or ip address:5900
Click on picture for better resolution
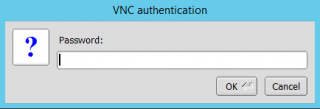
You provide the password for the vnc connection
Click on picture for better resolution
Finally, you login into the Ubuntu gnome system providing your credentials
Click on picture for better resolution
When reaching the black screen, you close this vnc viewer session and you can start a new vnc session but this time providing the following notation hostname:5901 or ip address:5901
Click on picture for better resolution
Click on picture for better resolution
Workaround 2 – Vino server
Configuring Sharing Screen feature
This workaround is using the same principle. However, instead of configuring startup applications we can use the default vino server available in Ubuntu Gnome 17.04. To configure the sharing screen capabilities in Ubuntu, perform the following steps
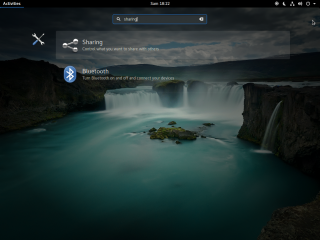
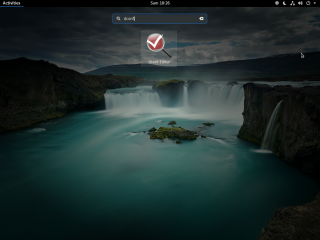
Click on activities and search for sharing. You should see the following icon. Click on it
Click on picture for better resolution
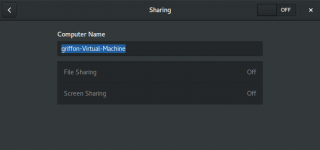
This opens the sharing window. On top right of the window, slide the button so it shows ON. then click on the screen sharing zone
Click on picture for better resolution
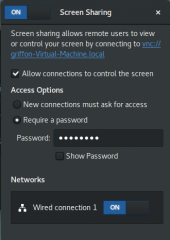
As demonstrated on the screenshot, ensure that you allow connection control (check box) and you provide a password to protect your connection. Ensure that the status is set to on on wired network.
Click on picture for better resolution
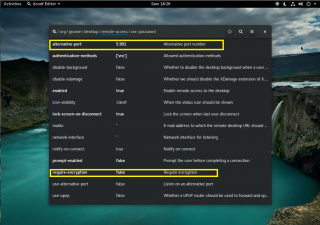
Because we have configured the x11vnc service at boot time to use port 5900, we need to change the default configuration of Vino server and specify a different port. We also need to remove encryption as a lot of vnc client does not support it. To perform this configuration, again, click on Activities and look for dconf, you should see the following screen
Click on picture for better resolution
Click on the icon and the dconf editor will open. You will be prompted with a warning popup. Accept the risk and go to the following node /org/gnome/desktop/remote-access. As shown in the screenshot, you have to update the port value to be used (here 5901) and you need to disable the encryption settings.
Click on picture for better resolution
When done, close the windows, restart your system and try to connect as described above
Making the vnc connection
The first time you make your connection, you will be connecting to the GDM login screen. So in your vnc viewer, you would use the following notation hostname:5900 or ip address:5900
Click on picture for better resolution
You provide the password for the vnc connection
Click on picture for better resolution
Finally, you login into the Ubuntu gnome system providing your credentials
Click on picture for better resolution
When reaching the black screen, you close this vnc viewer session and you can start a new vnc session but this time providing the following notation hostname:5901 or ip address:5901
Click on picture for better resolution
Click on picture for better resolution
Workaround 3 – Use XRDP solution
Nowadays, xRDP package is quite solid and you can perform remote connection using RDP protocol to the Gnome Desktop with no issues. You can find a full step by step guide at this location. The advantage of the xRDP package is that the service will start at boot time and the user will just need to perform a single connection and he will be able to work remotely on the system in a easy and comfortable way.
Final Notes
We have demonstrated how it was possible to perform a vnc connection to a system even when no user were logged into the system. The solution provided in this two part posts (check part I here) is not optimal as we have to implement some workarounds in order to effectively access the Gnome Desktop. The solution provided here assume that the users would need to perform 2 VNC connections in order to be able to work.
As mentioned in the beginning of the article, we will not investigate further on this topic. The reason behind is that the next version of Ubuntu will be using Wayland display server which at the moment cannot use remote session solutions. Actually, you can if you can fallback into a X11 session. We hope to see new solutions or existing solution like xRDP to move forward and provide support for Wayland.
Future seems bright and challenging at the same time
Till next time
See ya
This method working for me.
Install Lightdm login manager by guide http://c-nergy.be/blog/?p=11767
gedit /lib/systemd/system/x11vnc.service
[Unit]
Description=Start x11vnc at startup.
After=multi-user.target
[Service]
Type=simple
ExecStart=/usr/bin/x11vnc -auth /var/run/lightdm/root/:0 -display :0 -o /var/log/x11vnc.log -loop -forever -bg -rfbport 5900 -xkb -noxrecord -noxfixes -noxdamage -shared -norc -rfbauth /etc/x11vnc.pass
[Install]
WantedBy=multi-user.target
@Alexandr,
Thank you for the visit and the feedback. This is indeed a possible approach to simplify the vnc startup at boot time
Thank you for sharing this with us
Till next time
See ya