Hello World,
As requested by some readers, this post will cover the possibility to have vnc service started at boot time on Ubuntu Gnome 17.04 Edition. A step by step guide exists for “Default” Ubuntu 17.04 (which include Unity Interface). However, there is not a lot of information about having this configuration working on Ubuntu Gnome edition. This post will try to provide some information about this challenging topic.
So, let’start our journey…..
Overview
Canonical has made it clear that the future of the Desktop Edition would be the Gnome Desktop Interface. However, Gnome desktop is introducing some new features and new challenges that Unity users are not familiar with. Because of this decision, Gnome Desktop is getting a lot of attention and new questions about how to perform certain configurations are popping up. Ubuntu Gnome is definitely different than the traditional Ubuntu/Unity operating system we were used to work with. This post will show you that a different configuration is needed to have vnc service configured accordingly.
Assumptions
This procedure has been tested only within a specific scenario. These are the following assumptions that needs to be met in order to reproduce this configuration
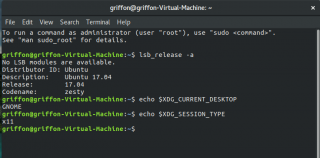
- This configuration has been tested only on Ubuntu Gnome 17.04 edition (and not any other flavors or later editions!!!!)
- We have performed the test on a Virtual Machine running on Hyper-V Server
- The X11vnc server package has been used to provide vnc server capabilities
- No Wayland display server is used and we are using the standard X11 session type
Click on picture for better resolution
Step by Step Guide
Step 1 – Installing X11VNC package
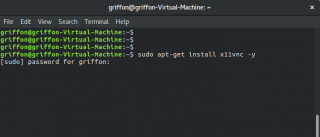
The first step in this guide consists of installing a vnc server software. For regular readers of this blog, it would not be a surprise that our choices goes to X11vnc server package. This software is available in the Ubuntu repository by default and can be easily installed and configured. To install the x11vnc component, you simply issue the following command.
sudo apt-get install x11vnc -y
you might get prompted for a password. Enter it and wait for the installation to complete.
Click on picture for better resolution
Step 2 – Securing VNC connection through password usage
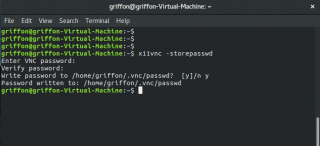
To protect vnc sessions, it’s usually recommended to protect the remote desktop access through a password usage. To configure your x11vnc to request password when connecting through the vnc protocol, the following command should be executed. As you can see on the screenshot, you will be asked to provide a password and confirm it. Proceed and wait for completion of the operation.
sudo x11vnc -storepasswd
Click on picture for better resolution
This will store the password file into the profile folder of the user executing this command.
Step 4 – Test your configuration by manually starting the x11vnc server
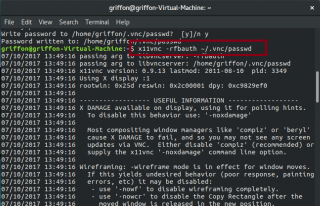
To check that your configuration is working properly, you can manually start your x11vnc server and try to access the machine through any vncviewer you like. To manually start the X11vnc server, you can simply issue the following command in a terminal console
x11vnc
or if you want to be prompted for a password before connecting to the remote session using the following syntax
x11vnc -rfbauth <%location of the x11vnc.pass file %> (so in our case; it would be x11vnc ~/.vnc/passwd)
Click on picture for better resolution
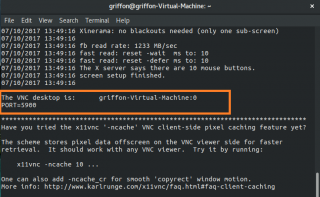
You can see in the terminal that the service has started and you can connect to port 5900
Click on picture for better resolution
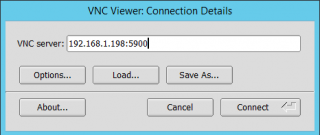
Finally, to test that everything is ok, open your vncviewer, provide the ip address/hostname of the remote machine and the port to connect and press enter
Click on picture for better resolution
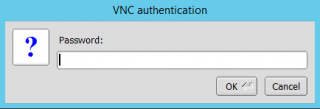
You should be prompted for a password if you have started x11vnc with the -rfbauth parameters
Click on picture for better resolution
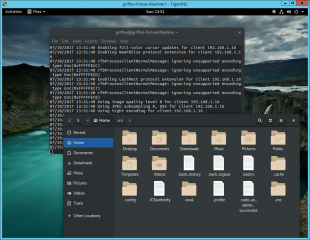
If the password can be read and valid, you should see that you have indeed access to your Ubuntu Gnome Desktop through vnc technology….
Click on picture for better resolution
Step 3 – Automatically start the x11vnc service
This is the challenging part. We need to make it start at boot time. As described in some previous posts,we will need to create a unit file and configure the systemd process to make this happening. The content of the service Unit file is a little bit different than the classical one used with Ubuntu and Unity. To configure your system to start vnc service automatically at boot, please perform the following actions
3.1. Create a vnc password file accessible to other users
As mentioned above, it’s possible to configure vnc to prompt for a password before connecting to the remote desktop. If you execute the command with no parameters, the password file would be stored in the user profile. Because we want to have the service started at boot time, it’s probably better to store the password file in a more appropriate location and make it accessible to other users as well.
To achieve this, we will execute the following command
x11vnc -storepasswd /etc/x11vnc.pass
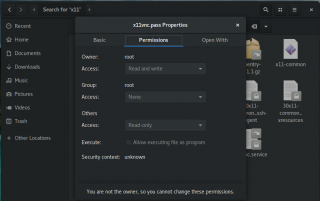
The command above will store the password file into the /etc/ directory to make accessible to multiple users. To ensure that this file is readable by other people than root, the permissions on this file will be changed as shown in the following picture
Click on picture for better resolution
The location of the password file is important to know as this information will be used in the service Unit File that will be created in order to make the service start at boot time….
3.2. Create the Service Unit File
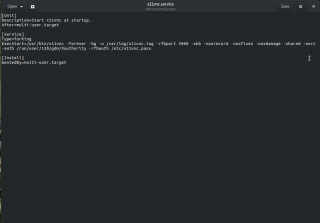
The content of the file should look like the following
Click on picture for better resolution
So, you have to create a new text file called x11vnc.service in the following directory /lib/systemd/system/ and this file should include the following content
[Unit]
Description=Start x11vnc at startup.
After=multi-user.target

[Service]
Type=simple
ExecStart=/usr/bin/x11vnc -forever -bg -rfbport 5900 -xkb -noxrecord -noxfixes -noxdamage -shared -norc
-auth /run/user/120/gdm/Xauthority -rfbauth /etc/x11vnc.pass

[Install]
WantedBy=multi-user.target
The important part here is the -auth parameter. In Ubuntu Gnome, the -auth guess option is not working and we had to find the Xauthority file used by gdm. To find this one, you can simply try to execute the following command
ps ax | grep xauth
This command will list the different xauthority file available and their location. if you look for gdm keyword, you will be able to see that directory path to be used in the service unit file.
So far, the default path is /run/user/120/gdm/Xauthority. I only had one situation where the gdm user had the id 121.... So, it always better to check this path….
3.3. Create and configure the Service
Final step in the process in having the service starting automatically is enabling it and starting it. You will use the systemctl commands (within the Terminal console) below to have your system starting these processes at startup
sudo systemctl enable x11vnc.service
sudo systemctl daemon-reload
sudo systemctl start x11vnc.service
At this stage, you are ready to reboot your machine and give it try…
3.4. Try a connection
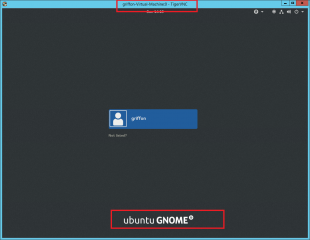
If everything is ok, you should be able to perform a vnc connection to your Ubuntu gnome machine and get access to the login page. You can restart the machine multiple times to ensure that the vnc service is indeed starting at boot time and that you can connect to your machine.
Click on picture for better resolution
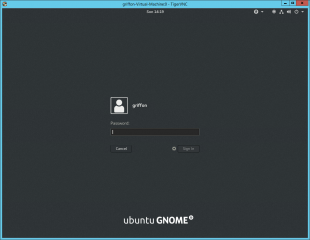
You should be able to provide your credentials through your vnc session…
Click on picture for better resolution
However, after login into the system, your vnc screen will be displaying only a black screen and you cannot do much about this…….
Click on picture for better resolution
Final notes
So in this post, we have seen that Ubuntu Gnome is a different beast and that a specific configuration is needed in order to have vnc service starting at boot time. In this post, we have seen that there is a way to configure the X11vnc service started at boot time on Ubuntu Gnome edition but after making the connection only a black screen is presented to us. We could look for a workaround or we could try to fix this behavior.
In the part II of this post, we will present some workarounds to bypass this black screen.
Till next time
See ya

Not working for me on 17.10 using gnome. I can run the service from the command line just fine, but when I try to start it using the systemctl command no process is started though the command does not return any error.
systemctl status -l x11vnc
● x11vnc.service – Start x11vnc at startup.
Loaded: loaded (/lib/systemd/system/x11vnc.service; enabled; vendor preset: e
Active: inactive (dead) since Mon 2018-05-28 21:05:56 CEST; 9s ago
@Stefano,
Apparently, since Ubuntu 17.10, x11vnc and GDM3 does not seem to work as expected. We are looking into this but we are not sure we will spend a lot of time on it
In your x11vnc.service file, could you add the -loop option and see if this is working for you
Ensure that the gdm account is set to 120 and not to 121 or 122
Hope this help
till next time
See ya
@Stefano,
a new post describing the process will be published in a few days… this post should be valid for Ubuntu 17.10 and later edition
till next time
See ya