|
|
The script hereafter is outdated and has been replaced by a newer version. Please Check the Download page for latest version |
Hello world,
As you probably know, Ubuntu 19.10 has been officially released a few days ago. Usually, we release the standard xrdp installation script that can be used to automate and post-configure an Ubuntu system and enable the Remote Desktop connection feature against a Linux machine. Then, we usually release the custom installation script (i.e. compilation from sources) and our work is done for Ubuntu 19.10.
However, this time, we will not release these two additional scripts. As mentioned in a previous posts (here and here) , we have been working on consolidating the standard and custom installation script into a single script that can be used to automate the xrdp installation against multiple Ubuntu releases. Originally, the script would have been released with the next LTS Release of Ubuntu (i.e. 20.04). However, in order to detect any possible issues and bugs in the script, it has been decided to released in conjunction of Ubuntu 19.10 release which will basically serve as test-bed. This will ensure that the script would be ready to use against Ubuntu 20.04…
So, let’s see how it works….
The Script – xrdp-installer-1.0.sh
Overview
The consolidated script will replace any previous version of the xrdp installation scripts provided so far (standard and custom scripts). The new script will be called xrdp-installer-xx.sh (where xx will be the script version)
A preview version has been made available for people to test and play around (check here). Based on the feedback received, the changes introduced in Ubuntu 18.04.x and other issues detected (i.e. authentication popup for updating system source, cannot install software within remote session,….), we have been revisiting the script and we have included some modifications in order to have a workable solution. The script is still under work in progress (but stable) so there are some limitations that you need to be aware of
Script version & Supported Ubuntu Version
The consolidated script will be named xrdp-installer and version number will be set to 1.0. The xrdp-installer-1.0.sh will support the following Ubuntu operating system version
- Ubuntu 16.04.x
- Ubuntu 18.04.x
- Ubuntu 19.04
- Ubuntu 19.10
The script will be updated based on the Ubuntu release life cycle. In other words, when an interim release reaches end of support, he script will be updated and will remove the retired release version. LTS releases will be supported under standard support life cycle (i.e. 5 years). This is why Ubuntu 16.04 has been included as supported Operating System.
Prerequisites and assumptions
The following conditions should be met in order to have the best results while using the script
- We assume that your machine is connected to internet while performing the installation. This is needed as additional packages and software needs to be downloaded and installed on your Ubuntu machine
- The script runs against a supported Operating system (Ubuntu 16.04.x, Ubuntu 18.04.x,Ubuntu 19.04, Ubuntu 19.10)
- The Official Ubuntu distribution needs to be used (we do not support other Ubuntu flavors – so far !!)
- No additional Desktop interface is used ( xRDP session will be showing Ubuntu Gnome Desktop with the Dock menu)
- Sound functionality is present on the computers if you sound feature is available as well
The Script
The consolidated script is shown hereafter and integrates a bunch of new fixes and features. The final release release candidate (compared to the Preview version) has been re-worked quite a lot in order to include new xrdp packages for Ubuntu 18.04.3 and to fix some additional minor annoyances related to polkit technology. Some switch parameters have been removed or re-worked as well… So, please read instructions carefully !
Important Note :
If you copy/paste the script, you might encounter some issues because font formatting might be not maintained during the copy/paste operation. Please ensure that format is accurate before launching the script. A downloadable version of the script is available at the bottom of the post
Disclaimer : As usual, use this at your own risk !!
#!/bin/bash ##################################################################################################### # Script_Name : xrdp-installer-1.0.sh(Release Candidate)# Description : Perform xRDP installation on Ubuntu 16.04,18.04,19.04,19.10 and perform # additional post configuration to improve end user experience # Date : October 2019 # written by : Griffon # WebSite :http://www.c-nergy.be - http://www.c-nergy.be/blog # Version : 1.0 # History : 1.0 - Added remove option + Final optimization +Release Candidate# : 0.9 - updated compile section to use checkinstall # : 0.8 - Updated the fix_theme function to add support for Ubuntu 16.04 # : 0.7 - Updated prereqs function to add support for Ubuntu 16.04 # : 0.6 - Adding logic to detect Ubuntu version for U16.04 # : 0.5 - Adding env variable Fix # : 0.4 - Adding SSL Fix # : 0.3 - Adding custom login screen option # : 0.2 - Adding new code for passing parameters # : 0.1 - Initial Script (merging custom & Std) # Disclaimer : Script provided AS IS. Use it at your own risk.... # You can use this script and distribute it as long as credits are kept # in place and unchanged #################################################################################################### #--------------------------------------------------------------------------# # -----------------------Function Section - DO NOT MODIFY -----------------# #--------------------------------------------------------------------------# ############################################################################ # DEFAULT INSTALLATION MODE : STANDARD INSTALLATION ############################################################################ #---------------------------------------------------# # Function 1 - check xserver-xorg-core package.... #---------------------------------------------------# check_hwe() { echo /bin/echo -e "\e[1;33m |-| Detecting xserver-xorg-core package installed \e[0m" xorgver=$(dpkg-query -W -f ='${Status}\n' xserver-xorg-core | awk {'print $3'}) if [[ "$xorgver" = *not-installed* ]]; then # - hwe version is installed on the system /bin/echo -e "\e[1;32m |-| xorg package version: xserver-xorg-core-hwe \e[0m" HWE="yes" else /bin/echo -e "\e[1;32m |-| xorg package version: xserver-xorg-core \e[0m" HWE="no" fi } #---------------------------------------------------# # Function 2 - Install xRDP Software.... #---------------------------------------------------# install_xrdp() { echo /bin/echo -e "\e[1;33m !---------------------------------------------!\e[0m" /bin/echo -e "\e[1;33m ! Installing XRDP Packages...Proceeding... !\e[0m" /bin/echo -e "\e[1;33m !---------------------------------------------!\e[0m" echo if [[ $HWE = "yes" ]] && [[ "$version" = *"Ubuntu 18.04"* ]]; then sudo apt-get install xrdp -y sudo apt-get install xorgxrdp-hwe-18.04 else sudo apt-get install xrdp -y fi } ############################################################################ # ADVANCED INSTALLATION MODE : CUSTOM INSTALLATION ############################################################################ #---------------------------------------------------# # Function 0 - Install Prereqs... #---------------------------------------------------# install_prereqs() { echo Release=$(lsb_release -sr) /bin/echo -e "\e[1;33m !---------------------------------------------!\e[0m" /bin/echo -e "\e[1;33m ! Installing PreReqs packages..Proceeding. ! \e[0m" /bin/echo -e "\e[1;33m !---------------------------------------------!\e[0m" echo sudo apt-get -y install libx11-dev libxfixes-dev libssl-dev libpam0g-dev libtool libjpeg-dev flex bison gettext autoconf libxml-parser-perl libfuse-dev xsltproc libxrandr-dev python-libxml2 nasm fuse pkg-config git intltool checkinstall echo if [ $HWE = "yes" ]; then # - xorg-hwe-* to be installed /bin/echo -e "\e[1;32m |-| xorg package version: xserver-xorg-core-hwe-$Release \e[0m" sudo apt-get install -y xserver-xorg-dev-hwe-$Release xserver-xorg-core-hwe-$Release else #-no-hwe /bin/echo -e "\e[1;32m |-| xorg package version: xserver-xorg-core \e[0m" echo sudo apt-get install -y xserver-xorg-dev xserver-xorg-core fi } #---------------------------------------------------# # Function 1 - Download XRDP Binaries... #---------------------------------------------------# get_binaries() { echo /bin/echo -e "\e[1;33m !---------------------------------------------!\e[0m" /bin/echo -e "\e[1;33m ! Download xRDP Binaries.......Proceeding. ! \e[0m" /bin/echo -e "\e[1;33m !---------------------------------------------!\e[0m" echo cd ~/Downloads ## -- Download the xrdp latest files echo /bin/echo -e "\e[1;32m !---------------------------------------------!\e[0m" /bin/echo -e "\e[1;32m ! Preparing download xrdp package !\e[0m" /bin/echo -e "\e[1;32m !---------------------------------------------!\e[0m" echo git clone https://github.com/neutrinolabs/xrdp.git echo /bin/echo -e "\e[1;32m !---------------------------------------------!\e[0m" /bin/echo -e "\e[1;32m ! Preparing download xorgxrdp package !\e[0m" /bin/echo -e "\e[1;32m !---------------------------------------------!\e[0m" echo git clone https://github.com/neutrinolabs/xorgxrdp.git } #---------------------------------------------------# # Function 2 - compiling xrdp... #---------------------------------------------------# compile_source() { echo /bin/echo -e "\e[1;33m !---------------------------------------------!\e[0m" /bin/echo -e "\e[1;33m ! Compile xRDP packages .......Proceeding. ! \e[0m" /bin/echo -e "\e[1;33m !---------------------------------------------!\e[0m" echo cd ~/Downloads/xrdp sudo ./bootstrap sudo ./configure --enable-fuse --enable-jpeg --enable-rfxcodec sudo make #-- check if no error during compilation if [ $? -eq 0 ] then /bin/echo -e "\e[1;33m |-| Make Operation Completed successfully \e[0m" else echo echo /bin/echo -e "\e[1;31m !---------------------------------------------!\e[0m" /bin/echo -e "\e[1;31m ! Error while Executing make !\e[0m" /bin/echo -e "\e[1;31m ! The Script is exiting.... !\e[0m" /bin/echo -e "\e[1;31m !---------------------------------------------!\e[0m" exit fi sudo checkinstall -y #xorgxrdp package compilation echo /bin/echo -e "\e[1;33m !---------------------------------------------!\e[0m" /bin/echo -e "\e[1;33m ! Compile xorgxrdp packages....Proceeding. ! \e[0m" /bin/echo -e "\e[1;33m !---------------------------------------------!\e[0m" echo cd ~/Downloads/xorgxrdp sudo ./bootstrap sudo ./configure sudo make # check if no error during compilation if [ $? -eq 0 ] then echo /bin/echo -e "\e[1;33m |-| Make Operation Completed successfully \e[0m" echo else echo /bin/echo -e "\e[1;31m !---------------------------------------------!\e[0m" /bin/echo -e "\e[1;31m ! Error while Executing make !\e[0m" /bin/echo -e "\e[1;31m ! The Script is exiting.... !\e[0m" /bin/echo -e "\e[1;31m !---------------------------------------------!\e[0m" exit fi sudo checkinstall -y } #---------------------------------------------------# # Function 3 - create services .... #---------------------------------------------------# enable_service() { echo /bin/echo -e "\e[1;33m !---------------------------------------------!\e[0m" /bin/echo -e "\e[1;33m ! Creating xRDP services.......Proceeding. ! \e[0m" /bin/echo -e "\e[1;33m !---------------------------------------------!\e[0m" echo sudo systemctl daemon-reload sudo systemctl enable xrdp.service sudo systemctl enable xrdp-sesman.service sudo systemctl start xrdp } ############################################################################ # COMMON FUNCTIONS - WHATEVER INSTALLATION MODE ############################################################################ #---------------------------------------------------# # Function 0 - Install Gnome Tweak Tool.... #---------------------------------------------------# install_tweak() { echo /bin/echo -e "\e[1;33m !---------------------------------------------!\e[0m" /bin/echo -e "\e[1;33m ! Installing Gnome Tweak...Proceeding... !\e[0m" /bin/echo -e "\e[1;33m !---------------------------------------------!\e[0m" echo sudo apt-get install gnome-tweak-tool -y } #--------------------------------------------------------------------# # Fucntion 1 - Allow console Access ....(seems optional in u18.04) #--------------------------------------------------------------------# allow_console() { echo /bin/echo -e "\e[1;33m !---------------------------------------------!\e[0m" /bin/echo -e "\e[1;33m ! Granting Console Access...Proceeding... !\e[0m" /bin/echo -e "\e[1;33m !---------------------------------------------!\e[0m" echo sudo sed -i 's/allowed_users=console/allowed_users=anybody/' /etc/X11/Xwrapper.config } #---------------------------------------------------# # Function 2 - create policies exceptions .... #---------------------------------------------------# create_polkit() { echo /bin/echo -e "\e[1;33m !---------------------------------------------!\e[0m" /bin/echo -e "\e[1;33m ! Creating Polkit File...Proceeding... !\e[0m" /bin/echo -e "\e[1;33m !---------------------------------------------!\e[0m" echo #All Ubuntu version sudo bash -c "cat >/etc/polkit-1/localauthority/50-local.d/45-allow.colord.pkla" <<EOF [Allow Colord all Users] Identity=unix-user:* Action=org.freedesktop.color-manager.create-device;org.freedesktop.color-manager.create-profile;org.freedesktop.color-manager.delete-device;org.freedesktop.color-manager.delete-profile;org.freedesktop.color-manager.modify-device;org.freedesktop.color-manager.modify-profile ResultAny=no ResultInactive=no ResultActive=yes EOF #Specific Versions if [[ "$version" = *"Ubuntu 19.04"* ]] || [[ "$version" = *"Ubuntu 19.10"* ]] ; then sudo bash -c "cat >/etc/polkit-1/localauthority/50-local.d/46-allow-update-repo.pkla" <<EOF [Allow Package Management all Users] Identity=unix-user:* Action=org.freedesktop.packagekit.system-sources-refresh ResultAny=yes ResultInactive=yes ResultActive=yes EOF fi } #---------------------------------------------------# # Function 3 - Fixing Theme and Extensions .... #---------------------------------------------------# fix_theme() { echo /bin/echo -e "\e[1;33m !---------------------------------------------!\e[0m" /bin/echo -e "\e[1;33m ! Fix Theme and extensions...Proceeding... !\e[0m" /bin/echo -e "\e[1;33m !---------------------------------------------!\e[0m" # Checking if script has run already if [ -f /etc/xrdp/startwm.sh.griffon ] then sudo rm /etc/xrdp/startwm.sh sudo mv /etc/xrdp/startwm.sh.griffon /etc/xrdp/startwm.sh fi #Backup the file before modifying it sudo cp /etc/xrdp/startwm.sh /etc/xrdp/startwm.sh.griffon if [[ "$version" = *"Ubuntu 16.04"* ]]; then echo sudo sed -i "/# auth /a cat >~/.xsession << EOF\n#Unity Xrdp multi-users \n/usr/lib/gnome-session/gnome-session-binary --session=ubuntu &\n/usr/lib/x86_64-linux-gnu/unity/unity-panel-service &\n/usr/lib/unity-settings-daemon/unity-settings-daemon &\nfor indicator in /usr/lib/x86_64-linux-gnu/indicator-*;\ndo\nbasename='basename \\\\\${indicator}'\ndirname='dirname \\\\\${indicator}'\nservice=\\\\\${dirname}/\\\\\${basename}/\\\\\${basename}-service\n\\\\\${service} &\ndone\nunity\nEOF" /etc/xrdp/startwm.sh echo else echo sudo sed -i "4 a #Improved Look n Feel Method\ncat <<EOF > ~/.xsessionrc\nexport GNOME_SHELL_SESSION_MODE=ubuntu\nexport XDG_CURRENT_DESKTOP=ubuntu:GNOME\nexport XDG_CONFIG_DIRS=/etc/xdg/xdg-ubuntu:/etc/xdg\nEOF\n" /etc/xrdp/startwm.sh echo fi } #---------------------------------------------------# # Function 4 - Enable Sound Redirection .... #---------------------------------------------------# enable_sound() { echo /bin/echo -e "\e[1;33m !---------------------------------------------!\e[0m" /bin/echo -e "\e[1;33m ! Enabling Sound Redirection... !\e[0m" /bin/echo -e "\e[1;33m !---------------------------------------------!\e[0m" echo # Step 1 - Enable Source Code Repository sudo apt-add-repository -s 'deb http://be.archive.ubuntu.com/ubuntu/ '$codename' main restricted' sudo apt-add-repository -s 'deb http://be.archive.ubuntu.com/ubuntu/ '$codename' restricted universe main multiverse' sudo apt-add-repository -s 'deb http://be.archive.ubuntu.com/ubuntu/ '$codename'-updates restricted universe main multiverse' sudo apt-add-repository -s 'deb http://be.archive.ubuntu.com/ubuntu/ '$codename'-backports main restricted universe multiverse' sudo apt-add-repository -s 'deb http://be.archive.ubuntu.com/ubuntu/ '$codename'-security main restricted universe main multiverse' sudo apt-get update # Step 2 - Install Some PreReqs sudo apt-get install git libpulse-dev autoconf m4 intltool build-essential dpkg-dev libtool libsndfile-dev libcap-dev -y sudo apt build-dep pulseaudio -y # Step 3 - Download pulseaudio source in /tmp directory - Do not forget to enable source repositories cd /tmp sudo apt source pulseaudio # Step 4 - Compile pulsever=$(pulseaudio --version | awk '{print $2}') cd /tmp/pulseaudio-$pulsever sudo ./configure # step 5 - Create xrdp sound modules sudo git clone https://github.com/neutrinolabs/pulseaudio-module-xrdp.git cd pulseaudio-module-xrdp sudo ./bootstrap sudo ./configure PULSE_DIR="/tmp/pulseaudio-$pulsever" sudo make #Step 6 copy files to correct location (as defined in /etc/xrdp/pulse/default.pa) cd /tmp/pulseaudio-$pulsever/pulseaudio-module-xrdp/src/.libs sudo install -t "/var/lib/xrdp-pulseaudio-installer" -D -m 644 *.so sudo install -t "/usr/lib/pulse-$pulsever/modules" -D -m 644 *.so echo } #---------------------------------------------------# # Function 5 - Custom xRDP Login Screen .... #---------------------------------------------------# custom_login() { echo /bin/echo -e "\e[1;33m !---------------------------------------------!\e[0m" /bin/echo -e "\e[1;33m ! Customizing xRDP login screen !\e[0m" /bin/echo -e "\e[1;33m !---------------------------------------------!\e[0m" echo cd ~/Downloads wget http://www.c-nergy.be/downloads/griffon_logo_xrdp.bmp #Check if script has run once... if [ -f /etc/xrdp/xrdp.ini.griffon ] then sudo rm /etc/xrdp/xrdp.ini sudo mv /etc/xrdp/xrdp.ini.griffon /etc/xrdp/xrdp.ini fi #Backup file sudo cp /etc/xrdp/xrdp.ini /etc/xrdp/xrdp.ini.griffon if [[ "$adv" = "yes" ]] || [[ "$version" = *"Ubuntu 16.04"* ]]; then sudo cp griffon_logo_xrdp.bmp /usr/local/share/xrdp sudo sed -i 's/ls_logo_filename=/ls_logo_filename=\/usr\/local\/share\/xrdp\/griffon_logo_xrdp.bmp/g' /etc/xrdp/xrdp.ini else sudo cp griffon_logo_xrdp.bmp /usr/share/xrdp sudo sed -i 's/ls_logo_filename=/ls_logo_filename=\/usr\/share\/xrdp\/griffon_logo_xrdp.bmp/g' /etc/xrdp/xrdp.ini fi sudo sed -i 's/blue=009cb5/blue=dedede/' /etc/xrdp/xrdp.ini sudo sed -i 's/#white=ffffff/white=dedede/' /etc/xrdp/xrdp.ini sudo sed -i 's/#ls_title=My Login Title/ls_title=Remote Desktop for Linux/' /etc/xrdp/xrdp.ini sudo sed -i 's/ls_top_window_bg_color=009cb5/ls_top_window_bg_color=2c001e/' /etc/xrdp/xrdp.ini sudo sed -i 's/ls_bg_color=dedede/ls_bg_color=ffffff/' /etc/xrdp/xrdp.ini sudo sed -i 's/ls_logo_x_pos=55/ls_logo_x_pos=0/' /etc/xrdp/xrdp.ini sudo sed -i 's/ls_logo_y_pos=50/ls_logo_y_pos=5/' /etc/xrdp/xrdp.ini } #---------------------------------------------------# # Function 6 - Fix SSL Minor Issue .... #---------------------------------------------------# fix_ssl() { echo /bin/echo -e "\e[1;33m !---------------------------------------------!\e[0m" /bin/echo -e "\e[1;33m ! Fixing SSL Cert Issue ... !\e[0m" /bin/echo -e "\e[1;33m !---------------------------------------------!\e[0m" echo sudo adduser xrdp ssl-cert } #---------------------------------------------------# # Function 7 - Fixing env variables in XRDP .... #---------------------------------------------------# fix_env() { #Add this line to /etc/pam.d/xrdp-sesman if not present if grep -Fxq "session required pam_env.so readenv=1 user_readenv=0" /etc/pam.d/xrdp-sesman then echo "Env settings already set" else sudo sed -i '1 a session required pam_env.so readenv=1 user_readenv=0' /etc/pam.d/xrdp-sesman fi } #---------------------------------------------------# # Function 8 - Removing XRDP Packages .... #---------------------------------------------------# remove_xrdp() { echo /bin/echo -e "\e[1;33m !---------------------------------------------!\e[0m" /bin/echo -e "\e[1;33m ! Removing xRDP Packages... !\e[0m" /bin/echo -e "\e[1;33m !---------------------------------------------!\e[0m" echo #remove xrdp package sudo systemctl stop xrdp sudo systemctl disable xrdp sudo apt-get autoremove xrdp -y sudo apt-get purge xrdp -y #remove xorgxrdp sudo systemctl stop xorgxrdp sudo systemctl disable xorgxrdp sudo apt-get autoremove xorgxrdp -y sudo apt-get purge xorgxrdp -y } sh_credits() { echo /bin/echo -e "\e[1;36m !----------------------------------------------------------------!\e[0m" /bin/echo -e "\e[1;36m ! Installation Completed...Please test your xRDP configuration !\e[0m" /bin/echo -e "\e[1;36m ! If Sound option selected, shutdown your machine completely !\e[0m" /bin/echo -e "\e[1;36m ! start it again to have sound working as expected !\e[0m" /bin/echo -e "\e[1;36m ! !\e[0m" /bin/echo -e "\e[1;36m ! Credits : Written by Griffon - October 2019 !\e[0m" /bin/echo -e "\e[1;36m ! www.c-nergy.be -xrdp-installer-v1.0.sh - ver 1.0 !\e[0m" /bin/echo -e "\e[1;36m !----------------------------------------------------------------!\e[0m" echo } #---------------------------------------------------# # SECTION FOR OPTIMIZING CODE USAGE... # #---------------------------------------------------# install_common() { allow_console create_polkit fix_theme fix_ssl fix_env } install_custom() { install_prereqs get_binaries compile_source enable_service } #--------------------------------------------------------------------------# # -----------------------END Function Section -----------------# #--------------------------------------------------------------------------# #--------------------------------------------------------------------------# #------------ MAIN SCRIPT SECTION -------------------# #--------------------------------------------------------------------------# #---------------------------------------------------# # Script Version information Displayed # #---------------------------------------------------# echo /bin/echo -e "\e[1;36m !-------------------------------------------------------------!\e[0m" /bin/echo -e "\e[1;36m ! xrdp-installer-1.0 Script !\e[0m" /bin/echo -e "\e[1;36m ! Support U16.04/18.04/19.04/19.10 !\e[0m" /bin/echo -e "\e[1;36m ! Written by Griffon - October 2019 - www.c-nergy.be !\e[0m" /bin/echo -e "\e[1;36m ! !\e[0m" /bin/echo -e "\e[1;36m ! For Help and Syntax, type ./xrdp-installer-1.0.sh -h !\e[0m" /bin/echo -e "\e[1;36m ! !\e[0m" /bin/echo -e "\e[1;36m !-------------------------------------------------------------!\e[0m" echo #----------------------------------------------------------------------- #Step 2 - checking for additional Settings - xorg-xserver-core version #---------------------------------------------------------------------- #Create the log file touch ~/.xrdp-installer-check.log #----------------------------------------------------------# # Step 0 -Detecting if Parameters passed to script .... # #----------------------------------------------------------# for arg in "$@" do #Help Menu Requested if [ "$arg" == "--help" ] || [ "$arg" == "-h" ] then echo "Usage Syntax and Examples" echo echo " --custom or -c custom xRDP install (compilation from sources)" echo " --loginscreen or -l customize xRDP login screen" echo " --remove or -r removing xRDP packages" echo " --sound or -s enable sound redirection in xRDP" echo echo "example " echo echo " ./xrdp-installer-1.0.sh -c -s custom install with sound redirection" echo " ./xrdp-installer-1.0.sh -l standard install with custom login screen" echo " ./xrdp-installer-1.0.sh standard install no additional features" echo exit fi if [ "$arg" == "--sound" ] || [ "$arg" == "-s" ] then fixSound="yes" fi if [ "$arg" == "--loginscreen" ] || [ "$arg" == "-l" ] then fixlogin="yes" fi if [ "$arg" == "--custom" ] || [ "$arg" == "-c" ] then adv="yes" fi if [ "$arg" == "--remove" ] || [ "$arg" == "-r" ] then removal="yes" fi done #--------------------------------------------------------------------------------# #-- Step 0 - Check that the script is run as normal user and not as root.... #-------------------------------------------------------------------------------# if [[ $EUID -ne 0 ]]; then /bin/echo -e "\e[1;36m !-------------------------------------------------------------!\e[0m" /bin/echo -e "\e[1;36m ! Standard user detected....Proceeding.... !\e[0m" /bin/echo -e "\e[1;36m !-------------------------------------------------------------!\e[0m" else echo /bin/echo -e "\e[1;31m !-------------------------------------------------------------!\e[0m" /bin/echo -e "\e[1;31m ! Script running with admin priveleges. The script should be !\e[0m" /bin/echo -e "\e[1;31m ! run under a standard user account. sudo privileges will be !\e[0m" /bin/echo -e "\e[1;31m ! prompted during execution !\e[0m" /bin/echo -e "\e[1;31m !-------------------------------------------------------------!\e[0m" echo sh_credits exit fi #----------------------------------------------------------------------- #Step 2 - checking for additional Settings - xorg-xserver-core version #---------------------------------------------------------------------- check_hwe #---------------------------------------------------# #-- Step 1 - Try to Detect Ubuntu Version.... #---------------------------------------------------# version=$(lsb_release -sd) codename=$(lsb_release -sc) echo /bin/echo -e "\e[1;33m |-| Detecting Ubuntu version \e[0m" if [[ "$version" = *"Ubuntu 16.04"* ]]; then /bin/echo -e "\e[1;32m |-| Ubuntu Version : $version\e[0m" echo elif [[ "$version" = *"Ubuntu 18.04"* ]]; then /bin/echo -e "\e[1;32m |-| Ubuntu Version : $version\e[0m" echo elif [[ "$version" = *"Ubuntu 19.04"* ]]; then /bin/echo -e "\e[1;32m |-| Ubuntu Version : $version\e[0m" echo elif [[ "$version" = *"Ubuntu 19.10"* ]]; then /bin/echo -e "\e[1;32m |-| Ubuntu Version : $version\e[0m" echo else /bin/echo -e "\e[1;31m !--------------------------------------------------------------!\e[0m" /bin/echo -e "\e[1;31m ! Your system is not running a supported version !\e[0m" /bin/echo -e "\e[1;31m ! The script has been tested only on the following versions !\e[0m" /bin/echo -e "\e[1;31m ! U16.04.x/18.04.x/19.04.x/19.10 !\e[0m" /bin/echo -e "\e[1;31m ! The script is exiting... !\e[0m" /bin/echo -e "\e[1;31m !--------------------------------------------------------------!\e[0m" echo exit fi #--------------------------------------------------------------------------------# #-- Step 3 - Check if Removal Option Selected #--------------------------------------------------------------------------------# if [ "$removal" = "yes" ]; then remove_xrdp #delete xrdp-installer-check.log file (or empty it) echo sh_credits exit fi #--------------------------------------------------------------------------------# #-- Step 3 - PLACE HOLDER - FUTURE FEATURES #--------------------------------------------------------------------------------# # TO BE CONSTRUCTED #---------------------------------------------------------# # Step 4 - Executing the installation & config tasks .... # #---------------------------------------------------------# #------------------------------------------------------------------- #- If Ubuntu 16.04 detected, we always perform a custom installation #------------------------------------------------------------------- if [[ "$version" = *"Ubuntu 16.04"* ]]; then echo /bin/echo -e "\e[1;36m !-------------------------------------------------------------!\e[0m" /bin/echo -e "\e[1;36m ! Custom Installation for Ubuntu 16.04.x !\e[0m" /bin/echo -e "\e[1;36m !-------------------------------------------------------------!\e[0m" echo install_custom install_common echo "legacy" >> ~/.xrdp-installer-check.log fi #--------------------------------------------------------------------------------------- #- If custom option detected, additional check for U16.04 so skipped #---------------------------------------------------------------------------------------- if [[ "$version" != *"Ubuntu 16.04"* ]]; then if [ "$adv" = "yes" ]; then echo /bin/echo -e "\e[1;36m !-------------------------------------------------------------!\e[0m" /bin/echo -e "\e[1;36m ! Custom Installation Option Selected..... !\e[0m" /bin/echo -e "\e[1;36m !-------------------------------------------------------------!\e[0m" echo install_custom install_tweak install_common echo "custom" >> ~/.xrdp-installer-check.log else echo /bin/echo -e "\e[1;36m !-------------------------------------------------------------!\e[0m" /bin/echo -e "\e[1;36m ! Standard Installation Mode Selected - U18.04 and later !\e[0m" /bin/echo -e "\e[1;36m !-------------------------------------------------------------!\e[0m" echo install_xrdp install_tweak install_common echo "std" >> ~/.xrdp-installer-check.log fi #end if Adv option fi # end if version check not like U16.04 #--------------------------------------------------------------------------------------- #- Check for Additional Options selected #---------------------------------------------------------------------------------------- if [ "$fixSound" = "yes" ]; then enable_sound echo "fixSound" >> ~/.xrdp-installer-check.log fi if [ "$fixlogin" = "yes" ]; then echo custom_login echo "fixlogin" >> ~/.xrdp-installer-check.log fi #--------------------------------------------------------------------------------------- #- show Credits and finishing script #--------------------------------------------------------------------------------------- sh_credits
How to Use the Script
The xrdp-installer-1.0 script will work in a similar way as the previous versions. First, we will need to set the execute permission on the script. Then, you will need to choose between standard and custom installation. Finally, you would need to decide if additional options would be enabled or not… So, let’s see how this would be working….
Step 1 – Set Execute Right on the script
Download the xrdp-installer-1.0.sh script to your system, extract content and mark it as executable . To do this, perform the following action in a terminal console
chmod +x ~/Downloads/xrdp-installer-1.0.sh
Note : Adjust the path where the xrdp-Installer-1.0.sh script to reflect your environment
Step 2 – Run as normal user
The script needs to be run as a normal user. The script will start running and will prompt you for password when sudo actions are initiated. If you run the script as root or using sudo command, the Download folder does not exist for the root user and the script fails to run as expected. To overcome this situation, the script also check which user is executing the script. If the script is run under sudo or root accounts, a warning message will be displayed and the script will not execute
Step 3 – Switches and parameters
The xrdp-installer-1.0.sh script can be executed as is (with no parameters or switches). This will perform a standard (and basic) installation of xRDP. No sound or custom xrdp login script will be made available. However, remote desktop, drive redirection and clipboard redirection would be available with this installation mode.
The xrdp-installer-1.0.sh script accept also some additional parameters that will help customize the xrdp installation and enable additional features. The script provides the following parameters
--help or -h          => will display a basic help menu
--sound or -s         => will enable sound redirection
--loginscreen or -l   => will customize the xRDP login screen
--remove or -r        => will remove the xrdp package
--custom or -c        => will perform a custom installation (i.e. compiled from sources)
Step 4 – Perform xRDP installation using the script
The following sections will provide some examples and scenario on how you can use the script…..
Standard Installation – No Parameter
As mentioned above, you can decide to use the default xrdp package available in the Ubuntu repository and perform a basic installation which will provide you remote desktop capability and will also customize the remote sesssion. The script will ensure that the same look n’ feel will be maintained when the user logs on locally or remotely.
To perform a standard installation, you execute the script with no parameters. Open a Terminal console, browse to the location where the script has been downloaded and issue the following command
./xrdp-installer-1.0.sh
When the xrdp installation package will start, you be requested to enter your password. Provide the password and proceed with the installation. Wait for completion of the script. The machine will not reboot automatically when done so you can review the actions performed by the script….
Important Notes
If you are running the script on Ubuntu 16.04.x, the custom installation will always be performed even if you have not specified any parameters. This is because Ubuntu 16.04.x ships with a really old xrdp package (version 0.6) and does not provides all needed features. The custom installation provide drive redirection,clipboard and access to Unity Desktop
Standard Installation with Parameters
The script can be used to perform a standard installation and still passes some parameters to get the most of the xRDP packages and their features. For all the Ubuntu versions, we could use the following combination of parameters
./xrdp-installer-1.0.sh -s      (this would enable the sound redirection)
./xrdp-installer-1.0.sh -l      (this would customize the xrdp login screen -see here)
Obviously, you can combine the switches (any order) to have more features enabled
./xrdp-installer-1.0.sh -s -l (this would enable the sound redirection and customize the xrdp login screen)
Important Notes
The script is not really designed to run multiple time on the same machine. You can initially run the command with no switches. If you change your mind, you can re-rerun the script with the additional options you want to enable. This is only valid for the standard installation mode. Future versions will include better support for such scenarios…..
Custom Installation – Default Installation
Custom installation script is really flexible and help avoiding issues like we have encountered in Ubuntu 18.04.x (see here,here and here). Custom installation means that the script will compile the xrdp package from the source binaries. The custom installation script always uses the latest xrdp package version available
To perform a custom installation, you will need at minimum to pass one parameter. The following command line shows you how to perform a custom installation
./xrdp-installer-1.0.sh -c (this would perform a custom installation but will not enabled adv features like sound redirection or custom login screen)
Important Notes
If you are running the script on Ubuntu 16.04.x, the -c switch will be ignored and a custom installation process will be performed. This is because Ubuntu 16.04.x ships with a really old xrdp package (version 0.6) and does not provides all needed features. The custom installation provide drive redirection,clipboard and access to Unity Desktop
Custom Installation – Additional Options
If a user wants to enable additional features, you will pass some additional parameters as shown in the following examples
./xrdp-installer-1.0.sh -c -s     (this would perform a custom install and enable sound redirection)
./xrdp-installer-1.0.sh -c -l     (this would perform a custom install and customize xrdp login screen)
./xrdp-installer-1.0.sh -c -l -s  (this would perform a custom install, enable sound and customize login screen)
Important Notes
The script is not really designed to run multiple time on the same machine. If you change your mind and you want to enable additional features (sound,login screen), you should remove the xrdp installation (see below) and re-run the script specifying all the parameters you need. This process should be followed for any new switches you want to use. Future versions will include better support for such scenarios…..
Remove Installation option
This version of the script also ship with the option to remove xRDP package. The removal option should be only used if you have uses this version of the script to perform the installation. To remove the xrdp package, you would simply execute the following command
./xrdp-installer-1.0.sh -r (to remove the xrdp packages)
Step 5 – Test your configuration
After the script has run and after the reboot/shutdown and start process, it’s time to test and see if you can indeed perform a smooth remote connection to your Ubuntu machine. Remember that a user can either be logged on locally or logged on remotely on the machine when working with xRDP solution. If the user, performing the remote connection, is logged into the system locally the remote connection will start but will be terminated immediately. This is the way it works nowadays.
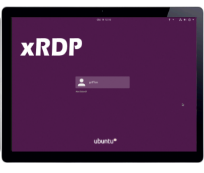
So, ensure that the user performing the test is not locally logged on, start your favorite remote desktop client and perform your connection. Based on your options, you will be presented either with the green xrdp login screen or with the custom login screen (purple background). Simply enter your credentials and start testing your installation. If everything is ok, you will see a similar Desktop interface where Gnome Desktop is used and the Dock is visible.
Known issues and limitations
Known Issues
If the Sound redirection option has been selected, rebooting the Ubuntu system is not enough and the sound redirection might not work. if the sound redirection option has been selected, you will have to shutdown your Ubuntu machine and then start it again in order to ensure that the sound redirection feature would work as expected.
Sound redirection is not working as expected on Ubuntu 19.10. The modules are created and copied to the correct location. However, the xrdp sink modules are never loaded in the remote session or randomly loaded in the remote session. The screenshot below shows a non working xrdp sound configuration.

Click on picture for better resolution
This screenshot shows a working xrdp sound redirection configuration. A workaround exists and we will try to include it in the script. We are actually waiting to see if some Ubuntu updates might be needed to fix this minor issue.

Click on picture for better resolution
Limitations
This version of the script should be run only once on the target machine. If you are performing a standard installation, multiple run of the script should not impact functionality and Look’n feel. Custom installation script should be run only once. If more features needs to be enabled after the script has run, it’s recommended to uninstall and re-run the script with all the necessary switches selected by the user. This should be tackled in the coming version of the script…
Only one session is allowed per user. This means that if a user is logged on locally on the Ubuntu machine, the user will not be able to perform a remote session (the xRDP connection will initiate but will end up immediately). If a user is logged on remotely on the system, it will not be able to login locally (if the user tries to login locally, the login screen will loop and the login screen will be presented again to the user)
Download the Script
The script can be download at this location : xrdp-installer-1.0.zip
Note :
All the xrdp scripts can be found at https://www.c-nergy.be/products.html
Final Notes
This is it for this post !
To test and validate this script took us quite a long time because we are now supporting 4 Ubuntu releases, and we have two installation modes. All in the all the consolidated script seems ready for show time. So far, we have not encountered too many issues (except sound redirection in Ubuntu 19.10 – and workaround already found). So, we are quite happy with the consolidated script.
Now, we need to receive more feedback on the script. Please if you have time or want to help us in creating the ultimate xrdp installer script, download the script and provide constructive feedback. If you find a bug or an issue with the script, let us know as well so we can try to fix it. We might want to hear your feedback about the custom login screen. Should this remain an option or should it be included as default option ?
Till next time
See ya
Do you know the reason of the “Only one session is allowed per user. “?
Is there something workaround trick to attach to the local session from remote?
Thanks!
@Nagy,
I think it’s the technical implementation that guide the one connection only.. There is a workaround which would consist of installing vnc server on the box and connect to the console..
Hope this help
Till next time
See ya
Would this work on raspian os? reason i ask is because i tested Ubuntu 19.08 arm varient and although your script worked on that version of ubuntu it was very very slow in loading a desktop.
@William Rogers,
The script has been specifically designed to work with Ubuntu Operating System. For this reason I would not recommend to use the script…
However, xrdp package can be installed on top of Raspbian OS and you should be able to have basic remote desktop connection… We are not really familiar with raspian o…
Hope this help
Till next time
See ya
Thank you for all the time and effort that was put into this script. It is an amazing piece of work and I’m glad you decided to include support for 16.04 as well, seeing as it is still being used in many corporate environments due to the LTS aspect and due to IT departments not switching to a newer version as quickly as one would like.
Some things I noticed in regards to this new script:
– The link on the products page is invalid (points to xrdp-install-1.0.zip instead of xrdp-installer-1.0.zip)
– The script still contains (Release Candidate) in the header
@Alex,
Thank you for the feedback and the visit…. Good catch about the file name and the header in the script. We will update this information in order to reflect the correct information…
We are so busy that such errors can happens
See you around
Till next time
See ya
I have one remark and one question.
The remark is that you should check if the “Downloads” directory is present. I’m French and the download directory name is “Téléchargements”. The best way to locate the directory is to use the “xdg-user-dir DOWNLOAD” command.
I test the script on an up to date Ubuntu 16.04. After script exec, the rdp connection works fine but slowly against a Windows host.
If you check for updates one security package is available :
xrdp/xenial-updates,xenial-security 0.6.1-2ubuntu0.3 amd64 [pouvant être mis à jour depuis : 0-1]
If I upgrade with this package, even if xrdp config and scripts files are not changed, the rdp is broken.
I have to remove and reinstall for rdp works again.
What the best workaround to avoid this package update and be able to install other upgrades.
Thank you
Olivier
@Olivier,
This is a good point.. We usually working with English Language on our Ubuntu machine. So, yes, we might want to adapt the script so it can run in case you have another language installed.
If you have run the script on Ubuntu 16.04.x (as mentioned in the post), a custom installation will be performed and it will install the latest version of xrdp package (i.e. 0.9.11). This means that you should not isntall the security package xenial-security 0.6.1-2ubuntu0.3 amd64 because it’s not applying to your system (this update is for xrdp version 0.6.1)….
So, now if you have performed the installation through the script and then you have run a simple apt-get update => does this trigger the installation of the xrdp update package ? Theoritically, it should not. However, if it does, you can use apt command to block update packages and this package will not be installed on your machine…. (something like apt-mark hold – need to check if this works…)
Hope this help
Till next time
See ya
A more complete list of upgradable packages :
$ sudo apt list -a –upgradable
xrdp/xenial-updates,xenial-security 0.6.1-2ubuntu0.3 amd64 [pouvant être mis à jour depuis : 0-1]
xrdp/xenial 0.6.1-2 amd64
xrdp/now 0-1 amd64 [installé, pouvant être mis à jour vers : 0.6.1-2ubuntu0.3]
Unfortunately holding xrdp package with apt-mark or with synaptic seems to have no effects on apt update. But Synaptic shows that installed version is 0-1 and the “new” versions is 0.6.1-2ubuntu0.3.
xrdp –version returns 9.11.
Hope this helps,
Olivier
@Oliver,
Ah, now I think I understand what is the problem…. in this version of the script, we are using the checkinstall command and this create a deb package labeled probably 0-1. This is probably why indeed the sudo apt-get update and sudo apt-get upgrade gets this security update for xrdp 0.6-x… we are using the checkinstall to easily remove xrdp package in case of issues… Now, with this new information, we have to either modify the script or mention that this could happen and provide the proper guidance……
Thanks for sharing your findings…
We will work on the script and try to improve a step further the process
Keep in touch
Till next time
See ya
It’s ok if you find the issue.
Yesterday I should be tired.
$ sudo apt-mark hold xrdp
do the job and and the package is no more in the update list.
Then, it’s a possible workaround until a correction of package’s version .
Olivier
How to remove the former version?
@Lucia,
The information has been already published in this blog. The removal process will depend on the installation mode you have used
All information can be found at http://c-nergy.be/blog/?p=11454
Hope this help
Till next time
See ya
@Oliver,
Thank again for the feedback…Version 1.1 of the script will be published soon and should tackle this specific issue you have discovered 🙂
Good to know that the apt-mark hold is working and can be indeed a good workaround in the mean time
Till next time
See ya
I have an other Ubuntu 16.4 virtual machine on which ‘apt-mark hold xrdp’ doesn’t work as expected…
– running ‘apt update’ find an update for xrdp
– running gui ‘update manager’ doesn’t find any update.
Then check ‘update list –upgradable’ before running an ‘apt upgrade’
Olivier
I have two others remarks, always on Ubuntu 16.04 :
– Normally, the active window’s menu in unity sessions is located in desktop or window title bar and appear only when the window is active. In the xdp session, the menu is always active and located under the active windows’title bar.
– To close the rdp session using desktop logout process, I have to execute it twice before session close and rdp disconnect.
Are these behaviours normal ?
Olivier
@Oliver,
Yes, this is kind of expected behavior when using xRDP on Ubuntu 16.04 and Unity Desktop Interface….
Logout has always been an issue in Ubuntu 16.04 (from not working till the more stable situation where indeed, you need to perform two times the logout process…)
Till next time
See ya
On Ubuntu 19.10 eoan, I have used your script, hoping that it will fix the “blank screen” issue. It didn’t…
After a while it generates this error log:
connecting to sesman ip 127.0.0.1 port 3350
sesman connect ok
sending login info to session manager, please wait…
login successful for display 10
started connecting
connection problem, giving up
some problem
See the error from the 19.10
https://pastebin.com/ZdNNHfye
@Sonic67,
Check you check that xrdp service is running ? (should be yes because you see the xrdp login screen 🙂 )
Can you check that the xorgxrdp package is installed ? (if the xorgxrdp version is not correct, this might explain why you cannot connect)
Do you have NVIDIA Graphic cards on your system (known issue with xRDP and Nvidia graphic cards
Check also logs in /var/log/xrdp.log and /var/log/xrdp-sesman.log
Hope this help
Till next time
See ya
The laptop doesn’t have an nvidia card, just the intel integrated video. Connectiong Session is Xorg.
Those are the logs:
xrdp.log: https://pastebin.com/2L5f0D8X
xdrp-sesman.log: https://pastebin.com/m6ZB4iJB
BTW, I have tried with the ufw firewall rules for ports and even disabled and same result.
Looks like IPv6 is the trouble? My IP provider doesn’t have IPv6, don’t know if it matters.
Those are just the last connection attempts with ufw disabled:
https://pastebin.com/mvYtMtu6
@SoNic67,
if you run the command sudo apt-get install xorgxrdp
would it install additional packages or just say that package is already installed ?
look like more an xorg issue
Hope this help
Till next time
See ya
It seems to be up-to-date:
Reading package lists… Done
Building dependency tree
Reading state information… Done
xorgxrdp is already the newest version (1:0.2.9-1).
0 upgraded, 0 newly installed, 0 to remove and 0 not upgraded.
@SoNic67,
Check that the file /etc/X11/Xwrapper.config has been modified accordingly
the following line allowed_user= should like like
allowed_user=anybody
Another important thing ! Ensure that no one is logged on the physical machine and then try to perform your remote connection…xRDP does not support concurrent access (local vs remote) for the same user account
check this post (https://c-nergy.be/blog/?p=10887), to start xrdp in debug mode and see if you can get more detailed info…
till next time
See ya
I did read there too, but nothing seemed to work.
I have the line “allowed_user=anybody”.
I am trying to remote as a different user than the SSH and local logged in. That user is part of the sudoers group.
I don’t know, I guess I don’t need remote graphical that much, I’ll stick with SSL for now.
Thanks for your help!
Black screen again !!
Ok I will install Widows….
@Jacques,
we are sorry that the script didn’t work for you…
We assume that you have read carefully the prereqs and that you have followed the described procedure….
You could still check your xrdp Logs and see if you can find any hints to solve the issue
Thank for the visit and the feedback
Till next time
See ya
Hey,
please delete my first comment, I forgot some text.
Thanks for the script. xrdp is really a PITA in various distributions. SLES is one of them.
I use it on a fresh installation of Ubuntu Server 19.10 on a Raspberry Pi 4.
The image was written to the SD card, the system booted for the first time.
Then I downloaded it with wget and executed it.
The script worked fine, but when I connect via RDP, I get the logon screen.
I type in user and password, then I see a black screen with a mouse pointer.
After that the connection closes itself.
Here are the four logfiles which could be helpful:
xrdp.log
https://pastebin.com/8ETTrYGx
xrdp-sesman.log
https://pastebin.com/rHRHiFBP
syslog
https://pastebin.com/FH7xTkt5
auth.log
https://pastebin.com/9R4AU7y8
Thanks and regards
A.
@A,
Usually, the black screen and disconnect behavior is due to the fact that the same user is logged on locally and the same user is trying to perform a remote desktop connection..A user can either logon locally or perform remote connection…no both. The other problem that can cause this issue would be either a wrong version of xorgxrdp. (some issues have been reported with version 0.2.12). The other reason might be that the xorgxrdp package has not been installed (maybe missing dependencies)… To check that, you have to run dpkg -l | grep xorgxrdp and check the version….
Which mode did you use ? standard mode or custom mode ?
waiting for your feedback
Till next time
See ya
this is one of the best posts, when was the last time you made an article post?
Good article, thanks for sharing, please visit https://ittelkom-sby.ac.id
Hello!
I used the latest script (as of 2021-01-12) to install xRDP. THANK YOU.
However, I have a troublesome issue whose workaround that you published previously was supposedly not needed in this latest installation script – the infamous “Authentication is required to refresh the system repositories.”
The user is not a member of sudousers and the message cannot be dismissed from the screen even after clicking Cancel 100+ times (sic). The only workaround for me right now, without further advice from you, is to reboot; this is sub-optimal.
Any suggestions, please? The platform is Raspberry Pi 4 (aarch64) running Ubuntu 20.10 with update/upgrades applied as of yesterday. Thanks for your guidance.
Kind regards.
@Matha,
Can you tell me which version of Ubuntu are you running ? Ubuntu 20.04 or Ubuntu 20.10 ?
If you are running Ubuntu 20.10, you might be missing the additional pkla file that would fix the issue…..
Can you check if the /etc/polkit-1/localauthority/50-local.d/46-allow-update-repo.pkla file exists
If it’s does not exists, please open a command prompt and execute the following command
sudo bash -c “cat >/etc/polkit-1/localauthority/50-local.d/46-user-admin.pkla” <<EOF
[Allow Package Management all Users]
Identity=unix-user:*
Action=org.freedesktop.packagekit.system-sources-refresh
ResultAny=yes
ResultInactive=yes
ResultActive=yes
EOF
This code will create the missing file and the problem should be fixed…..
Hope this help
Till next time
See ya
Thanks a lot for this script. I scrambled trying to implement some xrdp installation on Ubuntu 16.04.07 LTS running in Hyper-V hosted on Windows 10 and could not get it to work.
Your script made xrdp work right away!
Thanks!
@Thierry,
Thank you for visting our blog and providing feedback. We are happy to see that information provided you helped you
Till next time
See ya
tanks your blog information
@Obat,
Thank you for visiting our blog and providing feedback. Please note that there is a new version of the script. Please always use the latest version of the script which can be found at https://www.c-nergy.be/products.html
Till next time
See ya