Hello World,
In our last post, we quickly discussed about Windows 10 release and all the changes that this release is bringing. Microsoft is really targeting to have windows as a service. Some people might not be happy with the new Microsoft Strategy so some people might want to start looking at alternatives. So, this is why, today, we will have a quick look at the coming release of Ubuntu 15.10.
Note : The current version is still in beta but the final release is coming fast as it will be publicly available end of October 2015.
I will not spend too much time on the installation process because the .10 release does not have long term support and not a lot of people are moving from 15.04 LTS release to 15.10 release (at least it’s my guess). Secondly, because I do not think (or haven’t seen) that there is a lot of changes in this release. This release is really bug fixing and improving a lot of stuff. Nowadays, we have really a stable Ubuntu Desktop solution.
In this post, we will go through our traditional step by step installation guide post for Ubuntu. All the other buntu flavours are also available for downloads (still beta version). I’m sticking to the standard Ubuntu because I got used to the Unity Desktop interface. However, I have to say that there is nothing wrong picking up another flavour of Ubuntu (or any other OS). I’m not trying to push for one OS or a distribution. I do not want to start discussion about which OS/distribution is superior or better. To me they are all good as long as they fit your needs or if your confortable with your pick…
So, Let proceed with the step by step guide….. Ready ?
Step by Step Installation Guide
Fresh Install of Ubuntu 15.10
Note :
This setup guide is based on the Ubuntu 15.10 Beta 1 version. This should not be installed in a production environment as this is still not the final release version. For this guide, we have performed the installation using the virtualbox virtualization software.
Step 0 – Download the iso file that you need from the ubuntu web site. Check this location http://cdimage.ubuntu.com/daily-live/current/
Step 1 – When you have downloaded the iso, you can decide to burn the iso or to perform the install from a usb stick (preferred method) or mound the iso to your hypervisor host machine. When you are ready, you can start your installation process.
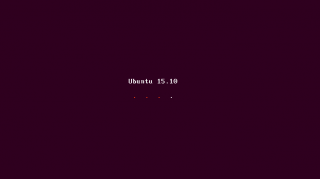
Step 2 – Boot your system from the iso/usb stick/DVD and you should see the following splash screen
Click on picture for better Resolution
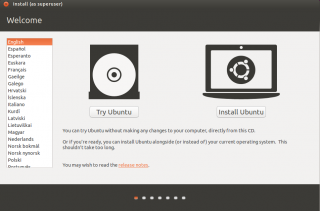
Step 3 – in the Welcome Page, select the install ubuntu option (if you want to install it on the hard drive)
Click on picture for better Resolution
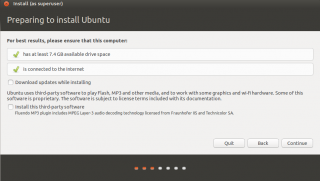
Step 4 – In the preparing to install, you can simply press continue or you can tick the check-boxes to download the updates and codec (if you have internet connectivity)
Click on picture for better Resolution
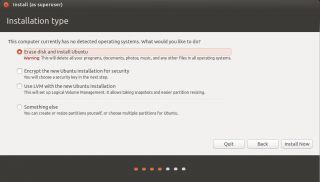
Step 5 – In the installation type, select your installation type. When you have selected your options, Press Continue
Click on picture for better Resolution
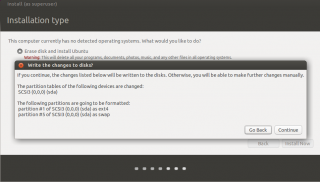
You might need to confirm you choice. Press Continue
Click on picture for better Resolution
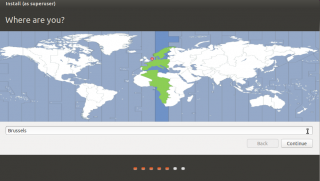
Step 6 – In the Where are you ? page, the wizard will try to detect your location. If this is not correct, locate your location on the map. Press Continue
Click on picture for better Resolution
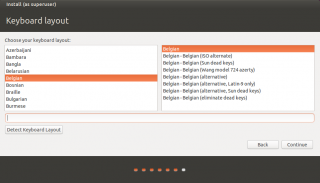
Step 7 – In the keyboard layout, select your keyboard and Press Continue.
Click on picture for better Resolution
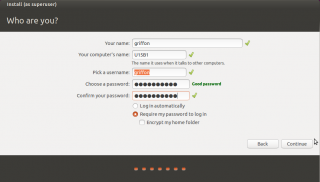
Step 8 – In the Who are you ? page, provide the requested information (computername,username,password). You can also decide to encrypt the disk if needed
Click on picture for better Resolution
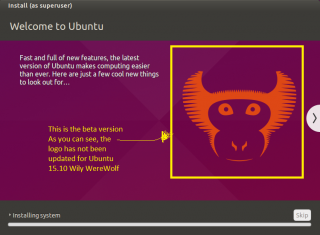
Step 10 – The installation process will start. wait for completion
Note : You can see that i’m using a beta version, the Ubuntu 15.04 mascot (monkey) is still displayed on the dialog box. Canonical should modify that at early stage so this would help people not being confused during beta version installation…..
Click on picture for better Resolution
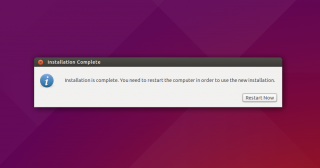
Step 11 – When installation is complete, you will see the prompt asking you to reboot the machine
Click on picture for better Resolution
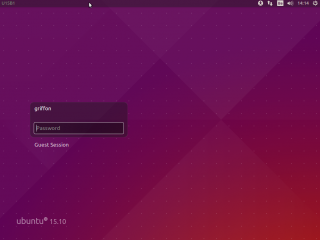
Step 12 – After the reboot, you should see the login page for Ubuntu 15.04
Click on picture for better Resolution
At the bottom of the screen, you can see that the ubuntu version is reported correctly and shows Ubuntu 15.10.
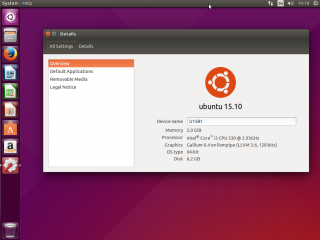
Step 13 – If you login into the machine, you will see that the Unity interface is still there and that the new Unity Next desktop interface is still not ready for show time. From this screenshot; you can also double-check that you have installed the correct version on your system…
Click on picture for better Resolution
Final Notes
Voila ! This is it. In 15 min, you will have a Ubuntu 15.10 machine up and running. If you are an experienced user, there is not change in the installation process. If you are new user, you can see that installation process nowadays is really simple,easy and user friendly.
In the coming months, we might want write some more posts about Ubuntu. Obviously, we will look at the xrdp software installation (this is a popular request/topic). But we would also try to provide some basic information on how to configure and use an Ubuntu machine. How to personalize the computer, which software you might need to install, which alternative to standard Microsoft Software are available out there….
We will see how far we can go with this as we have a lot of work and Microsoft is releasing more and more new releases of their Enteprise products such as Exchange 2012, Windows Server Next, Sharepoint 206,….
Hope you enjoyed this quick post… As you can see we are back on track : -)
Till Next Time
See ya
Copyrights & Credits :
The logo used for this post was created using a picture on google image referring to url coskimo.com. If this picture is copyright, please let us know (in comment section) and we will remove it
