Hello World,
In Part I, we have seen how to perform the installation of the “PROXMOX VE” Solution. In this post, we will quickly go through the web interface. Then we will show you how to build a Clustered PROXMOX VE infrastructure without using any SAN infrastructure. Indeed, PROXMOX VE allows you to implement a Cluster without the need of expensive SAN/NAS infrastructure
So, Let’s Go !!
Centralized Web Interface
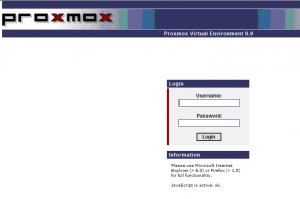
PROXMOX VE is managed through a web interface. To access the management tool, you simply open your favorite browser and type in the url the IP address or hostname of your PROXMOX VE host. You will first need to login into the application.
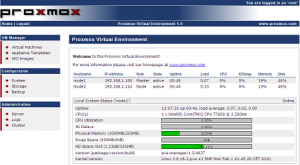
Once you’ve logged in, you will be presented with home page of the application. The home page provide information about your host : Clustering information if you have installed one and resource in use. From this page, you can see the memory and hard disk space used. You can view also CPU usage and I/O Delays metrics.
As you can see, the web interface is divided in 2 panes : on the left side, you have the menu structure and on the right pane, you have the “detail” pane where you can view,set and update your settings.
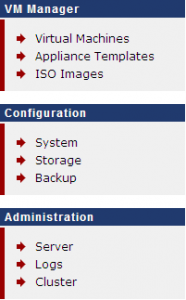
In the navigation menu, we can see 3 distinct sections :
- VM Manager section where you will be able to create your virtual machines, download appliance templates and upload your ISO images on your PROXMOX VE Host.
- Configuration Section where you can view and configure the IP settings of your system, you can also create/managed your storage infrastructure and you can also manage your backup/restore settings
- Administration Section where you can restart/shutdown your PROXMOX VE, managed the services of the Host and check the cluster configuration if you have build one.
As you can see, the web interface is easy to use, well organized and user friendly. You will also notice that the web interface is running smoothly and that response time is really good.
Basic Configuration of the PROXMOX VE
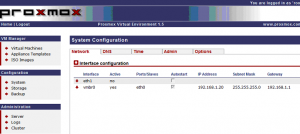
In Part I, you have seen how to perform the basic installation of the PROXMOX VE host. Before jumping into the Cluster Setup, you should check your basic configuration. In order to do that, you will login into the Web interface, go to the configuration section and click on the system link. You will be presented with a screen like this one
Click to enlarge image
Here, you will be able to see your “virtual switch” and see which physical network interface is linked to this virtual switch. You will have also information about the IP address in used. We won’t go into details for the moment. At this stage, simply check that your IP address is correct. If you need to change the IP Address, click on the vmbr0 object and modify the IP address settings.
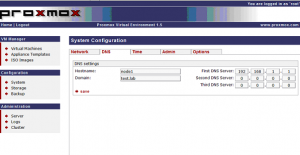
When are done, click on the DNS tab and check that the hostname, domain name and DNS IP settings are set correctly for your infrastructure
Click to enlarge image
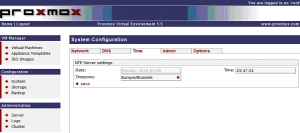
Now, it’s time to check your time settings. On this page, you can only check the time zone you are using the the time in used by the proxmox VE host. From this page, you can change the time zone. You cannot update the Time settings. If you need to change or update this settings, you will need to use command line or modify the /etc/ntp.conf file. We would recommend to use a Time server in order to keep your PROXMOX VE synchronized.
Click to enlarge image
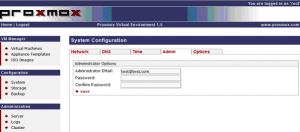
When you are done with the Time settings, you can go the the Admin tab. here you can change the password of the root account and provide the correct email address if you need to
Click to enlarge image
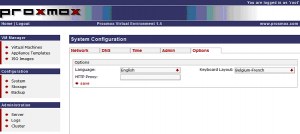
And finally, the last tab,the options tab. Here you can manage keyboard layout, language settings and define a HTTP PROXY in case your network use one.
Click to enlarge image
That’s it for this post ! . As you can see, the initial setup of the PROXMOX VE infrastructure is really not difficult. You can have your virtualization infrastructure running within minutes. You have also notice that you do not need additional software component (such as SCVMM or VirtualCenter) to manage your infrastructure. Everything can be performed from a web browser using the fast and powerful web interfaced provided with the solution.
In Part 3, we will show you how to setup a basic PROXMOX VE Cluster. Then we will finally demonstrate how to create virtual machines(kvm) or containers (OpenVZ). In future posts, we will dive a little bit deeper and have a look at the network model and storage model offered by PROXMOX VE
Till Then
Stay tuned

Click to enlarge does not work
On second post, yes now it does.
Okay,
I’ll try to fix that
thank for noticing
Very nice and precise tutorial which save me a lot of time in setting up such a configuration!
Thanks!
Patrick