Hello World,
Ubuntu 12.04 has been released in April 26th 2010. It time to write the traditional post about how to install ubuntu 12.04.
The process has not changed much since last time. If you check my previous post about installing ubuntu 11.10, you will see the installation process is the same. However, there are some important changes in this release. Ubuntu 12.04 will only install on systems supporting PAE (physical Address Extensions) if you perform the installation via the cdrom. This means that older system will not be able to run ubuntu 12.04
Note, however, that you can perform the installation on non-PAE system by other means…We will explain that later in this post.
Let’s do this.
How To Install Ubuntu 12.04 (on PAE systems)
Get the Software
The Ubuntu 12.04 installer is basically the same and has not changed since the previous version. You will need to perform the following steps before starting your installation.
- Step 1 : Download the iso file at http://www.ubuntu.com/download/ubuntu/download
- Step 2 : Burn the iso or mount the iso into your virtual machine or create a bootable usb installation media. That’s up to you. When you ready, you boot the target machine where you want to install Ubuntu and you ensure that you boot from the cdrom or usb stick from your physical or virtual machine.
Start your intallation
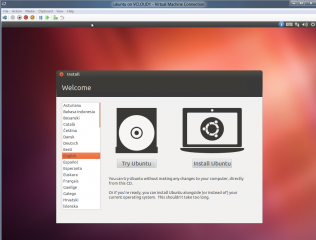
When your system boots, the Ubuntu Installer should start and you will see the install page. We want to install it so we choose Install option
Click on picture for better resolution
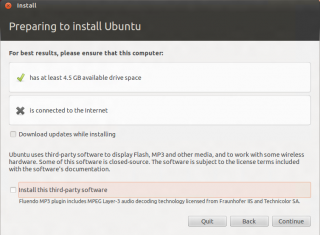
In the preparing the install, the installer will check some settings. I was not connected to internet at that time. However, we would recommend this in order for you to get the latest updates. Click continue to proceed
Click on picture for better resolution
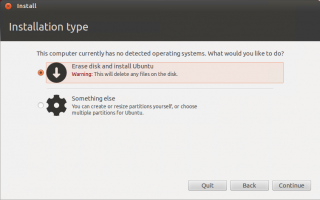
In the Installation type page, select the options that fits your need and press continue. I’ve performed a new installation using the full disk size.
Click on picture for better resolution
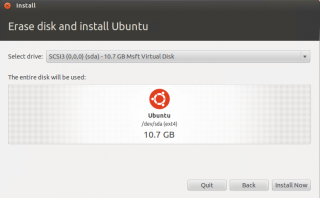
In the erase disk and install page, validate your choice and Press Install now
Click on picture for better resolution
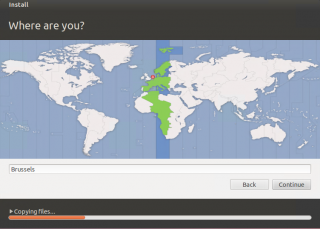
During the install process, you will be asked to specify your location
Click on picture for better resolution
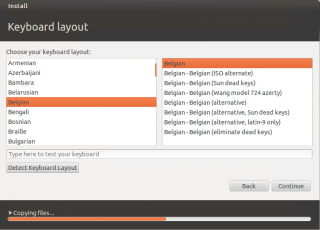
Then you will need to choose your keyboard layout
Click on picture for better resolution
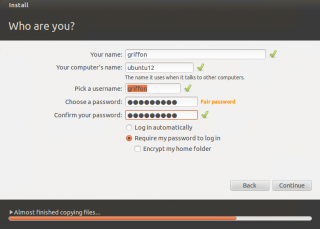
then you will need to provide the computer name, a user account and a password.
Click on picture for better resolution
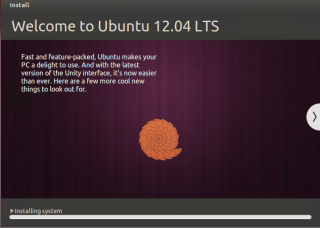
and finally the installation will proceed.
Click on picture for better resolution
When installation is completed, you will get a prompt asking you to reboot the machine.
Click on picture for better resolution
You are done. You can now enjoy your Ubuntu 12.04 (with Unity Desktop) newly installed system.
I’ve been positively surprised with this version because I was able to install it on systems where the graphic card was not well detected by the previous releases.
How To Install Ubuntu 12.04 (on non-PAE systems)
For people with non-pae capable system, you can use the network based installation procedure in order to get it installed. This means that you will need to have an internet connection available in order to perform the installation. In order to start the installation from the netboot file, you have mulitple options :
- you can burn a cd of the mini.iso file available here
- You can copy the file to a usb stick
- you can use a pxe infrastructure (I’ve used this method to perform the installation. I have re-used and tweak the pxe infrastructure that I’ve described here)
Whatever the method you will use to get access to the netboot files, once your system boots, you will see the text based installation wizard that will be presented to you. From here, you can perform the installation of your Ubuntu system on non-pae capable system.
A really good explanation of the non-pae installation process can be found here.
I’m happy to have found the information because as mentioned earlier I’m still running some old machines with no pae capable but still good for service. You will see that the process is not as painful as you might think.
Note :
For people with no internet connection can always fully use a PXE infrastructure. You will need to have the ubuntu files located somewhere on your network (usually on a NFS share) and you should be able to proceed with the installation. I might come up with a post for the PXE installation of Linux
Final Words
And voila, you have performed a basic installation of Ubuntu. Now, you might need to perform post-installation activities such as configuring a static IP address, configure your wireless….. After these basic setup activites, you should be able to start working. You will need to choose which desktop interface you want to use (Unity or Gnome-shell or even cinnamon Linux Mint Destkop Interface. This is up to you….
Usually, after installing an Operating system, I like to explore ways to customize it… So, in the coming weeks, you will see some posts about this
Till next time
See ya

