Hello World,
In the previous post, we have demonstrated how to resize the virtual disk within Proxmox VE. After resizing the virtual disk, you might want to extend the partition within the operating system and be able to use the full size of the disk. This is what we will do in this article. You will see, this is really easy.
Resizing Disks within Operating System
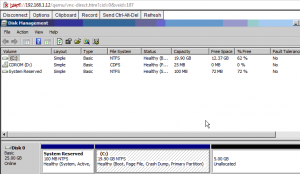
If you remember in the previous post, we’ve reached the point where the virtual disk file has been resized and the operating system has detected the disk size change. However, if you look in the disk management console, you will see that you have 2 partitions: the original partition + the additional disk space you have added.
Click to Enlarge
In most of the cases, we want to merge these 2 partitions (i.e. extend partition) to have only one bigger partition. This can be achieved more or less easily based on your operating system.
Resizing Process with “modern” Operating systems
If you are running Windows 7 or Windows 2008 (or later version) Operating system, you are lucky because the process is quite straightforward. With these versions of operating system, you can perform the operation on the fly. That’s really nice feature!
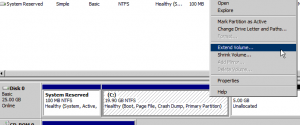
Open your Disk management console, right-click on the partition you want to extend and select the appropriate option. In my example, I want to extend the volume.
Click to Enlarge
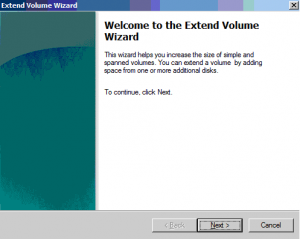
A wizard will start. Press Next in the Welcome page
Click to Enlarge
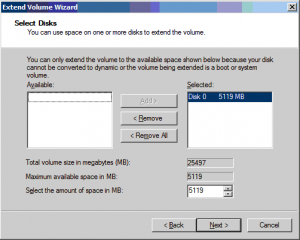
In the select disks page, select the volume from where the disk space will be taken. You can specify a specific amount or the full amount. In my example, I want to use the full size of the empty disk and add it to the c: partition. Press Next when you are done
Click to Enlarge
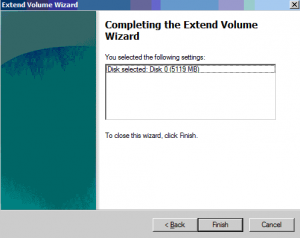
In the completing the Extend Volume wizard, press Finish. You are done
Click to Enlarge
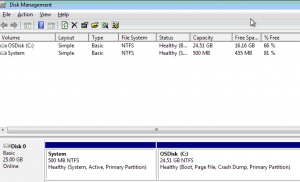
If you look in your disk management console, you should see that you have now indeed a single partition larger than the initial situation
Click to Enlarge
Resizing Process with “legacy” Operating systems
If you are running Windows XP or Windows 2003, things are a little bit more complex. If you are running 32-bit version of these operating systems, you can extend partition on the fly using the extpart utility provided by Dell.
Note : The extpart tool cannot be used to shrink disk partitions.
I prefer to use a standardized approach for those operating systems. To resize (shrink or extend) partitions of Windows 2003/XP operating systems (32-bit or 64bit), I use WINPE and DISKPART utility because they working and the process is “quite” fast compared to other solutions. WINPE is part of my toolbox set. The software can be really helpful in many situation (see my post about resetting password).
To come back to our problem, you need to have a winpe iso image that you can mount in the cdrom of the virtual machine – if you do not have it, you can use a windows 7/windows 2008R2 installation iso image to access the diskpart in “offline mode” )
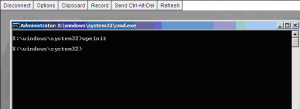
You simply reboot your virtual machine and you boot from the winpe. As a reminder, Winpe is a mini windows operating system running from memory. (version 2.0 and later). When the WINPE boot process is completed, you will see a dos box.
Click to Enlarge
Note:
I have a customized WINPE where I’ve added VIRTIO DRIVERS. IF you are using virtio drivers, you might not see your disks. You will need to get the virtio drivers and inject them in Winpe. You can perform this operation online or offline.
Within this box, you can type the following commands:
Diskpart
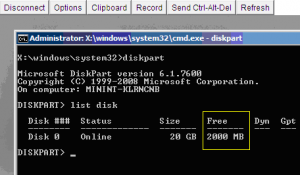
List disk
As show on the screenshot, you see that you have 2 GB of free space
Click to Enlarge
If you type the command
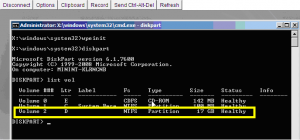
List Vol
You will see that your partition size is only 17 GB. You can thus extend your current partition up to 19 GB (adding 2 GB)
Click to Enlarge
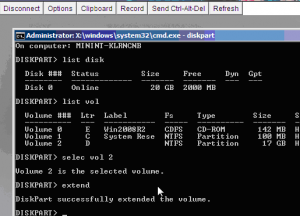
To do this, you will type the following commands
Select Vol x
Extend
This command below will allocate all the free space to the current partition. You will notice that the operation is really fast.
Click to Enlarge
If you want to grow the disk size by a certain amout, you would type the following command :
Extend size=<%nnn%>MB
To shrink the volume, you will use the shrink command (see screenshot below)
Select vol x
Shrink Desired=%nnn%
Click to Enlarge
To shrink the disk to the maximum, simply type
shrink
You will notice that this command take a little bit longer compared to the extend operation.
After that, you simply reboot your machine as usual and you should see that your partitions has been resized accordingly.
Final notes
This concludes the two-part article about resizing disks within a Proxmox VE infrastructure. The resizing process is easy to perform. To resize the disk within the operating system, you have multiple options. You can perform the operation on the fly (Windows Vista/Windows 2008 and later) or you can perform the operation offline using Microsoft Winpe software. I prefer to use WINPE over other solution (i.e Gparted) because I need to have standardized procedures and tools within my infrastructure.
I hope that this post was somehow useful
Till next time
See ya

I cannot thank you enough for the post.Thanks Again. Fantastic.
@motoapk,
No problem man… we are still happy to see that some posts are still read after so many years and that info can still be used…
Thanks for the feedback and the visit
Till next time
See you