|
|
The script hereafter is outdated and has been replaced by a newer version. Please Check the Download page for latest version. |
Hello World,
Since Ubuntu 18.10 has been released in October 2018 and because we want to stick the release cycle, we have done some home work in order to update the standard and custom installation script of xRDP on top of Ubuntu systems. No major changes have been introduced in these updated scripts. These scripts mainly integrate support for the newly released version of Ubuntu 18.10. In our previous post,we have covered the standard installation script. Today, we will provide the updated version of the custom installation script of xRDP on top of Ubuntu systems. Some months ago, we published an updated version of the custom script in order to integrate Ubuntu 18.04 support
If you are interested in previous version of the scripts or Ubuntu versions, you should have a look at the following link. This page should be your one stop page where you can find the latest version of the script (whatever the installation method you are using) but you will also find previous versions if you need to support some previous Ubuntu version
Let’s proceed ….
xRDP Custom install on Ubuntu 18.x
Looking around through this blog, you will see that two version of the script exists and the differences between them have been explained in this post. One script perform a standard installation meaning using the default packages available from Ubuntu repository. The custom installation script get the xrdp sources directly from the github repository and compile it. When using the custom installation script, you will be running the latest version of the xrdp (which is set to 0.9.8 at moment of writing). The standard installation script is using version 0.9.5 in Ubuntu 18.04 and version 0.9.7 in Ubuntu 18.10.
The choice is really up to you as nowadays the differences are minor so far and the Ubuntu package provides most of the desired features requested by the user such as drive redirection and clipboard support.
Assumptions
The script has been developed and updated based on the following assumptions
- Ubuntu 18.04 and later are supported by the script.
- At time of writing, all available updates were installed on the Ubuntu machine
- No alternative Desktop will be used. Default Ubuntu Gnome desktop will be the default desktop accessible via the xrdp session
- Ubuntu machine has been installed as virtual machine using Virtualbox software with sound enabled
- Default session used is x11
- Internet connection is available so latest xrdp packages can be downloaded
Click on Picture for better Resolution
The Script version 2.2
The script version 2.2 introduces minor changes compared to version 2.1.
The updated script will include support for Ubuntu 18.10 and will allow installation if you are running Ubuntu 18.04 or Ubuntu 18.10 version. Because Ubuntu 18.10 come with a new default theme, the version 2.2 of the script add also logic to set the proper theme within the remote desktop session. If you are running Ubuntu 18.04, the script will set Ambiance theme as default theme in your remote Session. If you are running Ubuntu 18.10, the script will set the Yaru theme in your remote session. This is a one time operation. If a user decide to change theme within remote session, the user choice will be the one that will take effect.
Some modifications have been introduced in the fix GDM lock screen section in order to have the file compiled in both version of Ubuntu and set the proper color scheme within the remote session
Important Note :
If you copy/paste the script, you might encounter some issues because font formatting might be not maintained during the copy/paste operation. Please ensure that format is accurate before launching the script. A downloadable version of the script is available at the bottom of the post
Disclaimer : As usual, use this at your own risk !!
#!/bin/bash
#####################################################################################################
# Script_Name : install-xrdp-2.2.sh
# Description : Perform a custom installation of xrdp
# on ubuntu 18.04 and later
# Date : October 2018
# written by : Griffon
# Web Site :http://www.c-nergy.be - http://www.c-nergy.be/blog
# Version : 2.2
# History : 2.2 - Add Support for Ubuntu 18.10 and Yaru Theme
#         : 2.1 - Add logic to enable sound redirection for U18.04
#               - re-write code logic to include functions
#               - Removed support for Ubuntu 17.10 as reached end of support
#         : 2.0 - Initial Version for Ubuntu system with Gnome Desktop
#         : 1.x - Script for Ubuntu 16.04 or later
# Disclaimer : Script provided AS IS. Use it at your own risk....
####################################################################################################

#---------------------------------------------------#
#  Detecting if Parameters passed to script ....
#---------------------------------------------------#

while getopts g:s: option
do
 case "${option}"
 in
 g) fixGDM=${OPTARG};;
 s) fixSound=${OPTARG};;
 esac
done

#---------------------------------------------------#
# Script Version information Displayed              #
#---------------------------------------------------#

echo
/bin/echo -e "\e[1;36m   !-------------------------------------------------------------!\e[0m"
/bin/echo -e "\e[1;36m   !   Custom XRDP Installation Script  - Ver 2.2                !\e[0m"
/bin/echo -e "\e[1;36m   !   Written by Griffon - October 2018 - www.c-nergy.be        !\e[0m"
/bin/echo -e "\e[1;36m   !-------------------------------------------------------------!\e[0m"
echo

#--------------------------------------------------------------------------#
# -----------------------Function Section - DO NOT MODIFY -----------------#
#--------------------------------------------------------------------------#

#---------------------------------------------------#
# Function 1 - Install Prereqs...
#---------------------------------------------------#

install_prereqs() {
echo
/bin/echo -e "\e[1;33m   !---------------------------------------------!\e[0m"
/bin/echo -e "\e[1;33m   !   Installing PreReqs packages..Proceeding.  ! \e[0m"
/bin/echo -e "\e[1;33m   !---------------------------------------------!\e[0m"
echo

sudo apt-get -y install libx11-dev libxfixes-dev libssl-dev libpam0g-dev libtool libjpeg-dev flex bison gettext autoconf libxml-parser-perl libfuse-dev xsltproc libxrandr-dev python-libxml2 nasm xserver-xorg-dev fuse pkg-config git intltool xserver-xorg-core

}

#---------------------------------------------------#
# Function 2 - Download XRDP Binaries...
#---------------------------------------------------#
get_binaries() {

echo
/bin/echo -e "\e[1;33m   !---------------------------------------------!\e[0m"
/bin/echo -e "\e[1;33m   !   Download xRDP Binaries.......Proceeding.  ! \e[0m"
/bin/echo -e "\e[1;33m   !---------------------------------------------!\e[0m"
echo

cd ~/Downloads

## -- Download the xrdp latest files
echo
/bin/echo -e "\e[1;32m   !---------------------------------------------!\e[0m"
/bin/echo -e "\e[1;32m   !  Preparing download xrdp package            !\e[0m"
/bin/echo -e "\e[1;32m   !---------------------------------------------!\e[0m"
echo
git clone https://github.com/neutrinolabs/xrdp.git
echo
/bin/echo -e "\e[1;32m   !---------------------------------------------!\e[0m"
/bin/echo -e "\e[1;32m   !  Preparing download xorgxrdp package        !\e[0m"
/bin/echo -e "\e[1;32m   !---------------------------------------------!\e[0m"
echo
git clone https://github.com/neutrinolabs/xorgxrdp.git

}

#---------------------------------------------------#
# Function 3 - compiling xrdp...
#---------------------------------------------------#

compile_source() {

# -- Compiling xrdp package first

echo
/bin/echo -e "\e[1;33m   !---------------------------------------------!\e[0m"
/bin/echo -e "\e[1;33m   !   Compile xRDP packages .......Proceeding.  ! \e[0m"
/bin/echo -e "\e[1;33m   !---------------------------------------------!\e[0m"
echo


cd ~/Downloads/xrdp
sudo ./bootstrap
sudo ./configure --enable-fuse --enable-jpeg
sudo make

#-- check if no error during compilation

if [ $? -eq 0 ]
then
/bin/echo -e "\e[1;33m   |-| Make Operation Completed successfully       \e[0m"

else
echo
echo
/bin/echo -e "\e[1;31m   !---------------------------------------------!\e[0m"
/bin/echo -e "\e[1;31m   !   Error while Executing make                !\e[0m"
/bin/echo -e "\e[1;31m   !   The Script is exiting....                 !\e[0m"
/bin/echo -e "\e[1;31m   !---------------------------------------------!\e[0m"
exit
fi
sudo make install

echo
/bin/echo -e "\e[1;33m   !---------------------------------------------!\e[0m"
/bin/echo -e "\e[1;33m   !   Compile xorgxrdp packages....Proceeding.  ! \e[0m"
/bin/echo -e "\e[1;33m   !---------------------------------------------!\e[0m"
echo

cd ~/Downloads/xorgxrdp
sudo ./bootstrap
sudo ./configure
sudo make

# check if no error during compilation
if [ $? -eq 0 ]
then
echo
/bin/echo -e "\e[1;33m   |-| Make Operation Completed successfully       \e[0m"
echo
else
echo
/bin/echo -e "\e[1;31m   !---------------------------------------------!\e[0m"
/bin/echo -e "\e[1;31m   !   Error while Executing make                !\e[0m"
/bin/echo -e "\e[1;31m   !   The Script is exiting....                 !\e[0m"
/bin/echo -e "\e[1;31m   !---------------------------------------------!\e[0m"
exit
fi
sudo make install

}

#---------------------------------------------------#
# Function 5 - create services ....
#---------------------------------------------------#

enable_service() {
echo
/bin/echo -e "\e[1;33m   !---------------------------------------------!\e[0m"
/bin/echo -e "\e[1;33m   !   Creating xRDP services.......Proceeding.  ! \e[0m"
/bin/echo -e "\e[1;33m   !---------------------------------------------!\e[0m"
echo

sudo systemctl daemon-reload
sudo systemctl enable xrdp.service
sudo systemctl enable xrdp-sesman.service
sudo systemctl start xrdp

}

#---------------------------------------------------#
# Function 6 - Install Gnome Tweak Tool....
#---------------------------------------------------#

install_tweak()
{
echo
/bin/echo -e "\e[1;33m   !---------------------------------------------!\e[0m"
/bin/echo -e "\e[1;33m   !   Installing Gnome Tweak...Proceeding...    ! \e[0m"
/bin/echo -e "\e[1;33m   !---------------------------------------------!\e[0m"
echo
sudo apt-get install gnome-tweak-tool -y
}

#--------------------------------------------------------------------#
# Fucntion 7 - Allow console Access ....(seems optional in u18.04)
#--------------------------------------------------------------------#

allow_console()
{
echo
/bin/echo -e "\e[1;33m   !---------------------------------------------!\e[0m"
/bin/echo -e "\e[1;33m   !   Granting Console Access...Proceeding...   ! \e[0m"
/bin/echo -e "\e[1;33m   !---------------------------------------------!\e[0m"
echo
sudo sed -i 's/allowed_users=console/allowed_users=anybody/' /etc/X11/Xwrapper.config
}

#---------------------------------------------------#
# Function 8 - create policies exceptions ....
#---------------------------------------------------#

create_polkit()
{
echo
/bin/echo -e "\e[1;33m   !---------------------------------------------!\e[0m"
/bin/echo -e "\e[1;33m   !   Creating Polkit File...Proceeding...      ! \e[0m"
/bin/echo -e "\e[1;33m   !---------------------------------------------!\e[0m"
echo

sudo bash -c "cat >/etc/polkit-1/localauthority/50-local.d/45-allow.colord.pkla" <<EOF
[Allow Colord all Users]
Identity=unix-user:*
Action=org.freedesktop.color-manager.create-device;org.freedesktop.color-manager.create-profile;org.freedesktop.color-manager.delete-device;org.freedesktop.color-manager.delete-profile;org.freedesktop.color-manager.modify-device;org.freedesktop.color-manager.modify-profile
ResultAny=no
ResultInactive=no
ResultActive=yes
EOF

}

#---------------------------------------------------#
# Function 9 - Fixing Theme and Extensions ....
#---------------------------------------------------#

fix_theme()
{
echo
/bin/echo -e "\e[1;33m   !---------------------------------------------!\e[0m"
/bin/echo -e "\e[1;33m   !   Fix Theme and extensions...Proceeding...  !\e[0m"
/bin/echo -e "\e[1;33m   !---------------------------------------------!\e[0m"
echo

#Check if script has already run....
if grep -xq "#fixGDM-by-Griffon" /etc/xrdp/startwm.sh; then
 echo "Skip theme fixing as script has run at least once..."
else
#Set xRDP session Theme to Ambiance and Icon to Humanity if Ubuntu 18.04.x
if  [[ "$version" = *"Ubuntu 18.04"* ]];
then
sudo sed -i.bak "4 a #fixGDM-by-Griffon\ngnome-shell-extension-tool -e ubuntu-appindicators@ubuntu.com\ngnome-shell-extension-tool -e ubuntu-dock@ubuntu.com\n\nif [ -f ~/.xrdp-fix-theme.txt ]; then\necho 'no action required'\nelse\ngsettings set org.gnome.desktop.interface gtk-theme 'Ambiance'\ngsettings set org.gnome.desktop.interface icon-theme 'Humanity'\necho 'check file for xrdp theme fix' >~/.xrdp-fix-theme.txt\nfi\n" /etc/xrdp/startwm.sh
#Set xRDP session Theme to Yaru and Icon to Suru if Ubuntu 18.10.x
elif [[ "$version" = *"Ubuntu 18.10"* ]];
then
sudo sed -i.bak "4 a #fixGDM-by-Griffon\ngnome-shell-extension-tool -e ubuntu-appindicators@ubuntu.com\ngnome-shell-extension-tool -e ubuntu-dock@ubuntu.com\n\nif [ -f ~/.xrdp-fix-theme.txt ]; then\necho 'no action required'\nelse\ngsettings set org.gnome.desktop.interface gtk-theme 'Yaru'\ngsettings set org.gnome.desktop.interface icon-theme 'Yaru'\necho 'check file for xrdp theme fix' >~/.xrdp-fix-theme.txt\nfi\n" /etc/xrdp/startwm.sh
else
echo "Error Occured somewhere...Exiting..."
exit
fi

fi
echo
}

#---------------------------------------------------#
# Function 10 - Fixing GDM - As an Option ....
#---------------------------------------------------#
fix_gdm()
{
echo
/bin/echo -e "\e[1;33m   !---------------------------------------------!\e[0m"
/bin/echo -e "\e[1;33m   !   Fix for GDM Lock Screen color...          !\e[0m"
/bin/echo -e "\e[1;33m   !---------------------------------------------!\e[0m"
echo
# Step 1 - Install prereqs for compilation later on
sudo apt-get -y install libglib2.0-dev-bin
sudo apt-get -y install libxml2-utils

# extract gresource info (from url...)
workdir=${HOME}/shell-theme
if [ ! -d ${workdir}/theme ]; then
  mkdir -p ${workdir}/theme
  mkdir -p ${workdir}/theme/icons

fi
gst=/usr/share/gnome-shell/gnome-shell-theme.gresource

for r in `gresource list $gst`; do
        gresource extract $gst $r >$workdir/${r#\/org\/gnome\/shell/}
done

/bin/echo -e "\e[1;33m    |-| Creating XML File...   \e[0m"
# create the xml file
bash -c "cat >${workdir}/theme/gnome-shell-theme.gresource.xml" <<EOF
<?xml version="1.0" encoding="UTF-8"?>
<gresources>
  <gresource prefix="/org/gnome/shell/theme">
    <file>calendar-arrow-left.svg</file>
    <file>calendar-arrow-right.svg</file>
    <file>calendar-today.svg</file>
    <file>checkbox-focused.svg</file>
    <file>checkbox-off-focused.svg</file>
    <file>checkbox-off.svg</file>
    <file>checkbox.svg</file>
    <file>close-window.svg</file>
    <file>corner-ripple-ltr.png</file>
    <file>corner-ripple-rtl.png</file>
    <file>dash-placeholder.svg</file>
    <file>gnome-shell.css</file>
    <file>gnome-shell-high-contrast.css</file>
    <file>no-events.svg</file>
    <file>no-notifications.svg</file>
    <file>noise-texture.png</file>
    <file>page-indicator-active.svg</file>
    <file>page-indicator-inactive.svg</file>
    <file>page-indicator-checked.svg</file>
    <file>page-indicator-hover.svg</file>
    <file>process-working.svg</file>
    <file>toggle-off-us.svg</file>
    <file>toggle-off-intl.svg</file>
    <file>toggle-on-hc.svg</file>
    <file>toggle-on-us.svg</file>
    <file>toggle-on-intl.svg</file>
  </gresource>
</gresources>
EOF
cd ${workdir}/theme
/bin/echo -e "\e[1;33m    |-| Modify Css...   \e[0m"
sed -i -e 's/background: #2e3436/background: #2c00e1/g' ~/shell-theme/theme/gnome-shell.css

##Delete the file noise-texture.png (grey one)
rm ${workdir}/theme/noise-texture.png

/bin/echo -e "\e[1;33m    |-| Download Purple image file...   \e[0m"
#Download the noise-texture.png with purple background
wget http://www.c-nergy.be/downloads/noise-texture.png

/bin/echo -e "\e[1;33m    |-| Compile Resource File...   \e[0m"
#Compile file and copy to correct location....
cd ${workdir}/theme
glib-compile-resources gnome-shell-theme.gresource.xml

/bin/echo -e "\e[1;33m    |-| Copy file to target location...   \e[0m"

# make a backup of the file and copy the file....
sudo cp /usr/share/gnome-shell/gnome-shell-theme.gresource /usr/share/gnome-shell/gnome-shell-theme.gresource.bak
sudo cp ${workdir}/theme/gnome-shell-theme.gresource /usr/share/gnome-shell/gnome-shell-theme.gresource
echo
}

#---------------------------------------------------#
# Function 11 - Enable Sound Redirection ....
#---------------------------------------------------#

enable_sound()
{
echo
/bin/echo -e "\e[1;33m   !---------------------------------------------!\e[0m"
/bin/echo -e "\e[1;33m   !   Enabling Sound Redirection...             !\e[0m"
/bin/echo -e "\e[1;33m   !---------------------------------------------!\e[0m"
echo

# Step 1 - Install xrdp-pulseaudio-installer package
sudo apt-get install xrdp-pulseaudio-installer  -y

# Step 2 - Enable Source Code Repository
sudo apt-add-repository -s 'deb http://be.archive.ubuntu.com/ubuntu/ '$codename' main restricted'
sudo apt-add-repository -s 'deb http://be.archive.ubuntu.com/ubuntu/ '$codename' restricted universe main multiverse'
sudo apt-add-repository -s 'deb http://be.archive.ubuntu.com/ubuntu/ '$codename'-updates restricted universe main multiverse'
sudo apt-add-repository -s 'deb http://be.archive.ubuntu.com/ubuntu/ '$codename'-backports main restricted universe multiverse'
sudo apt-add-repository -s 'deb http://be.archive.ubuntu.com/ubuntu/ '$codename'-security main restricted universe main multiverse'
sudo apt-get update

# Step 3 - Download pulseaudio source in /tmp directory
cd /tmp
sudo apt source pulseaudio

# Step 4 - Compile
pulsever=$(pulseaudio --version | awk '{print $2}')

cd /tmp/pulseaudio-$pulsever
sudo ./configure

# Step 5 - Create xrdp sound modules

cd /usr/src/xrdp-pulseaudio-installer
sudo make PULSE_DIR="/tmp/pulseaudio-$pulsever"

# Step 6 - copy files to correct location

sudo install -t "/var/lib/xrdp-pulseaudio-installer" -D -m 644 *.so
sudo install -t "/usr/lib/pulse-$pulsever/modules" -D -m 644 *.so
echo

}


#--------------------------------------------------------------------------#
# -----------------------END Function Section             -----------------#
#--------------------------------------------------------------------------#


#--------------------------------------------------------------------------#
#------------                 MAIN SCRIPT SECTION       -------------------#
#--------------------------------------------------------------------------#

#---------------------------------------------------#
# Step 0 - Try to Detect Ubuntu Version....
#---------------------------------------------------#

version=$(lsb_release -sd)
codename=$(lsb_release -sc)

echo
/bin/echo -e "\e[1;33m   |-| Detecting Ubuntu version        \e[0m"

if  [[ "$version" = *"Ubuntu 18.04"* ]];
then
/bin/echo -e "\e[1;32m       |-| Ubuntu Version : $version\e[0m"
echo
elif [[ "$version" = *"Ubuntu 18.10"* ]];
then
/bin/echo -e "\e[1;32m       |-| Ubuntu Version : $version\e[0m"
echo
else
/bin/echo -e "\e[1;31m  !------------------------------------------------------------!\e[0m"
/bin/echo -e "\e[1;31m  ! Your system is not running Ubuntu 18.04 Edition and later  !\e[0m"
/bin/echo -e "\e[1;31m  ! The script has been tested only on Ubuntu 18.04 and later  !\e[0m"
/bin/echo -e "\e[1;31m  ! The script is exiting...                                   !\e[0m"
/bin/echo -e "\e[1;31m  !------------------------------------------------------------!\e[0m"
echo
exit
fi


/bin/echo -e "\e[1;33m   |-| Detecting Parameters        \e[0m"


#Detect if argument passed
if [ "$fixSound" = "yes" ];
then
/bin/echo -e "\e[1;32m       |-| Sound Redirection Option...: [YES]\e[0m"
else
/bin/echo -e "\e[1;32m       |-| Sound Redirection Option...: [NO]\e[0m"
fi

if [ "$fixGDM" = "yes" ];
then
/bin/echo -e "\e[1;32m       |-| gdm fix Option.............: [YES]\e[0m"
else
/bin/echo -e "\e[1;32m       |-| gdm fix Option.............: [NO]\e[0m"
fi
echo

#---------------------------------------------------------#
# Step 1 - Executing the installation & config tasks .... #
#---------------------------------------------------------#

echo
/bin/echo -e "\e[1;36m   !-------------------------------------------------------------!\e[0m"
/bin/echo -e "\e[1;36m   !   Installation Process starting....                         !\e[0m"
/bin/echo -e "\e[1;36m   !-------------------------------------------------------------!\e[0m"
echo
/bin/echo -e "\e[1;33m   |-| Proceed with installation.....       \e[0m"
echo

install_prereqs
get_binaries
compile_source
enable_service
install_tweak
allow_console
create_polkit
fix_theme


if [ "$fixGDM" = "yes" ];
then
fix_gdm
fi

if [ "$fixSound" = "yes" ];
then
enable_sound
fi


#---------------------------------------------------#
# Step 2 - Credits ....
#---------------------------------------------------#
echo
/bin/echo -e "\e[1;36m#-----------------------------------------------------------------------#\e[0m"
/bin/echo -e "\e[1;36m# Installation Completed                                                #\e[0m"
/bin/echo -e "\e[1;36m# Please test your xRDP configuration.A Reboot Might be required...     #\e[0m"
/bin/echo -e "\e[1;36m# Written by Griffon - October 2018 - Ver 2.2 - Std-Xrdp-Install-2.2.sh #\e[0m"
/bin/echo -e "\e[1;36m#-----------------------------------------------------------------------#\e[0m"
echo
How to Use the Script
Set Execute Right on the script
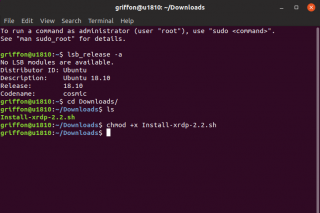
Download the install-xrdp-2.2.sh script to your system. You need to mark the script as executable . To do this, perform the following action in a terminal console
chmod +x ~/Downloads/install-xrdp-2.2.sh
Click on Picture for better Resolution
Note : Adjust the path where the install-xrdp-2.2.sh script to reflect your environment
Execute the script
As in the previous version, the script can be run with no parameters where no additional features/configuration settings will be performed or you can pass parameters to enable some optional features of configuration fixes. This is totally up to you. Parameters can be passed in any order as well
To install xRDP, simply open a Terminal console. In the Terminal console, Browse to the location where the script has been stored and then issue the one of the following command based your requirements
-
./install-xrdp-2.2.sh
Use this command to install xrdp version 0.9.8. No additional features such as sound redirection and GDM lock screen fix will be implemented
-
./install-xrdp-2.2.sh -g yes
Use this command to install xrdp version 0.9.8. and to enabe the GDM Lock screen fix
-
./install-xrdp-2.2.sh -s yes
Use this command to install xrdp version 0.9.8. and to enabe sound redirection additionally
-
./install-xrdp-2.2.sh -s yes -g yes
Use this command to install xrdp version 0.9.8. and to enabe all the additional features i.e. sound redirection and GDM lock screen fix
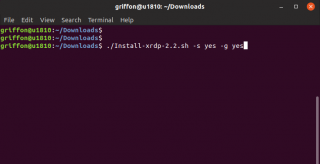
In this post, we will execute the script using all the parameters so we will be running the following command ./install-xrdp-2.2.sh -s yes -g yes and see what you should expect during the execution of the script
Click on Picture for better Resolution
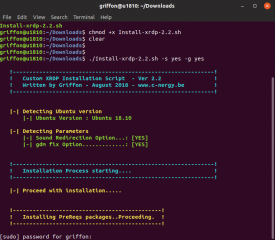
When the script executes, you can see some information about your choices and operating system version. You can see here that we have indeed select sound option and GDM fix option. You will be prompted for a password. Provide it and wait for the script to complete…
Click on Picture for better Resolution
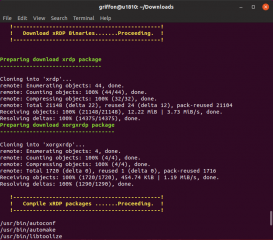
While the script is executing, you should see some outputs and see some information about which actions are being performed
Click on Picture for better Resolution
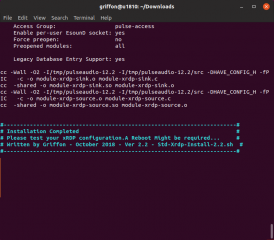
When the script complete, the machine will not reboot automatically. This will provide the possibility to review the script output in the screen in case something goes wrong
Click on Picture for better Resolution
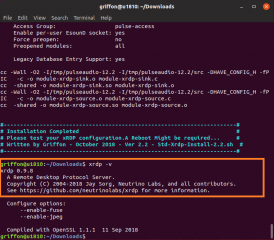
You can check that version 0.9.8 of xRDP has been installed
Click on Picture for better Resolution
Reboot at least once the machine in order to ensure that xRDP service start at boot time…
Test your configuration
To Test your configuration, you need to perform the following steps
- step 1 – Logout from the Ubuntu machine because you can only have a single connection to the machine for the same user (either local either remote)
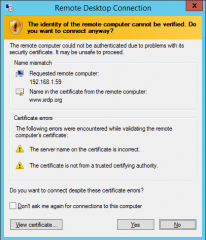
- step 2 – Start your favorite remote desktop client and provide the ip address or hostname of your ubuntu machine
Click on Picture for better Resolution
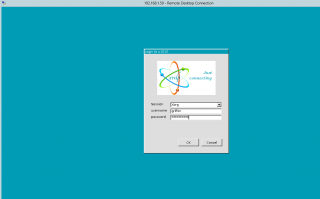
- step 3 – At this stage, you should see the xRDP login page. Provide your credentials
Click on Picture for better Resolution
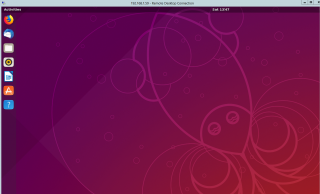
- step 4 – At this stage, you should see your standard Ubuntu Gnome Desktop with the Dock visible, the Yaru theme displayed and the icons set are set correctly as well
Click on picture for better resolution
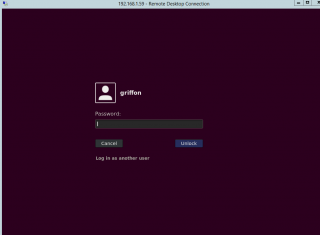
- step 5 – Lock the remote session and unlock it again. If you have executed the script with the fixGDM parameter, the background color should be purple (and not gray)…
Click on picture for better resolution
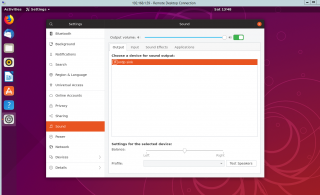
- step 6 – Check if the Sound redirection option has been enabled accordingly. If you open, in your remote session, the Sound Card settings, you should see the xrdp_sink sound card object. If you see this, there is a great chance that the sound redirection would work for your Remote Session
Click on picture for better resolution
Download the Script
Please download the script : install-xrdp-2.2.sh
Final Notes
This is it for this post ! We have been able to integrate support for Ubuntu 18.10 (quite easily) in the custom installation script. Now, it’s up to you to play around, test it and provide feedback if you detect some issues or possible bugs or scenario not covered yet by the script.
In 2018, we have put a lot of efforts in improving the installation script for Ubuntu 18.xx releases. The script has been re-written as well in order to ease the maintenance of the code. Our famous installation script offer the possibility to provide a better user experience, sound redirection feature and easy installation & configuration process. We are really happy to see that this work is being used by others and we like the feedback provided about this.
As already mentioned in this post, we are trying to stick to Ubuntu release cycle. This basically means that we are putting more efforts in LTS versions than in the Interim releases. As soon as Interim releases are out of support, the scripts will drop support as well for these versions… We are still wondering if we should keep two different branches (Standard Installation vs Custom installation script) or would it make sense to merge both script into a single script. We are still not sure if this is a good idea or not. Share with us your opinion about merging these scripts into a single one
Finally, please not also that we have created a page where you can find all the releases of the scripts. This page list useful information like which Ubuntu version is supported by the script and a link to the post explaining how to use the script. Please visit this page and have a look….
That’s is for today
Till next time
See ya
Thank you for creating this.
I tried to install it but got the following error:
make: *** No targets specified and no makefile found. Stop.
!———————————————!
! Error while Executing make !
! The Script is exiting…. !
!———————————————!
I noticed the script couldn’t find /root/Downlods.
I created the directory by using
mkdir /root/downloads
and it worked!
I was about to reinstall Ubuntu. I thought I tried everything and nothing worked until I found this script.
THANK YOU!
You should add a “Tips” or “Donation” link so I could buy you a coffee.
@Carlos;
Thank you for the visit, the comments and the suggestions (about buy me a coffee 🙂 )
Some people reported indeed that time to time the root/Download folder is not found….this can be due to the fact that you try to run the script using sudo (you should run it as a normal user)… We never encountered the issue but we are glad that the script has some basic error handling so people can identify the issue
Till next time
See ya
Hi! When connecting to remote session, there are no shortcats on the desktop and no ability to create them. Folder /home/test_user/Desktop is not empty and contain all files, folders and shortcuts that user can access when logged in localy. What am i doing wrong?
@Artur,
check the tweak utility and check if the option shortcut on desktop is enabled…in XRDP, this seems to be disabled…give it a try and provide feedback
till next time
see ya
Hello.
Thanks a million for you script.
But I have problems.
If first I logged by RDP I can’t login at workstation and backward, if I logged at my workstation I can’t to login via rdp – I see a blue screen.
@serg,
This is a known limitation of xRDP… you cannot using the same account simultaneously connect locally on the machine and using xrdp to connect…you have to either connect to workstation and then logoff and then you can perform the xrdp connection… To overcome the situation, you can create a “rescue” account on the ubuntu machine. if you are logged with one of the account, you can always login with the other one.
Hope this helpp
Till next time
See ya
This post is brilliant, thanks so much for sharing.
@James Spurin,
Thank you for the feedback. As you can see we have invested a little bit of time to simplify xRDP installation and add some small fixes
Till next time
See ya
Thank you for your friendly guide for installing xRDP.
But… I have a problem after ‘./install-xrdp-2.2.sh -s yes -g yes’ .
My labtop does not respond to keyboard / mouse / touchpad input.
Would you have some idea to fix?
Hello Shawn,
Just an idea
You might want to try to boot in rescue mode and re-install the following packages. sudo apt-get -y install xserver-xorg-input-all
You can try to do the same action from the remote desktop session if you have access to it.
No guarantee that this will work but this sounds like an old issue.
Hope this help
Till next time
See ya
Hello Shawn
sudo apt-get -y install xserver-xorg-input-all – it’s work! Mouse and keyboard live again!
but remoteconnection is blackscreen. blackscreen for any username.
Can you help with new wonder command for fix it?
@Sanjuro,
When you connect via xrdp, you reach the black screen, correct ? The blackscreen stays correct ? If this is the case, can you right-click on the black screen and select open terminal…This would open the terminal console, what happens when you issue the command exec unity (see here for more information – http://c-nergy.be/blog/?p=10448). Do you see the desktop loading. if this is the case, there might be a problem with you startwm.sh. You will need to check it
Hope this help
Till next time
See ya
Nice script. Thank you!
But can you publish it to github, for example? Other peoples can make your script better. For example better channge download dorrectory to /tmp (it present on every host).
@PRIHLOP,
Thank you for the visit and the feedback. Please note that the script and the post is little bit outdated and it has been replaced with a new one. You can find all versions of the script (and the latest one as well) at http://www.c-nergy.be/prodcuts.html. We are trying to maintain the script and make necessary improvements… Our readers and anonymous people are providing us with positive feedback and we try to integrate these comments into new releases of the script…
Hope this answer your question
Till next time
See ya