Hello World,
I’m still quite busy with different kind of projects which does not leave me much time to write some new posts. Today, I’ve finally found some time to blog. Today, we will write a relatively easy post related to MDT 2012 software and how you can customize the look’n feel of your MDT implementation. If you follow me, you know that I like to provide customization to the solution I implement. This can sometimes have a real impact on customers as they will remember the added-value of the solution.
Stop talking…time for actions
If you want to read the other posts related to MDT, check these links below :
- Part I : Installing MDT
- Part II : MDT Deployment Share
- Part III : Deploying OS with MDT
- Part IV : Adding PXE Capabilities to MDT
- Part V : Perform a Basic MDT Deployment
How to “customize” your MDT
In this post, we will show you how easy it is to customize the look’n feel of your MDT infrastructure. In this post, we will describe the standard changes that can be brough in MDT 2012. We will show you
- how to customize the background image displayed when the MDT Wizard run (in the Winpe environment)
- how to customize the text that appears in the dialog box (progress bar actually) when executing the selected task sequences
MDT 2012 provides more customization capabilities than previous versions (at least it seems like it). Let’s see how we can do that…
Using a custom background image in winpe during the deployment
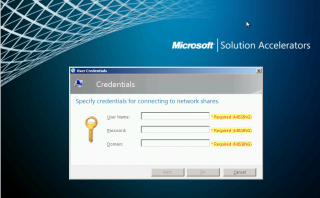
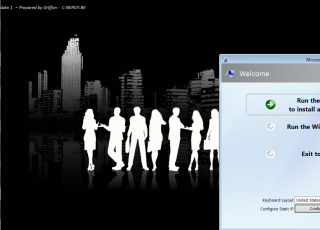
By default, when you start the MDT deployment operation, you will see the default background image used by MDT as shown in the screenshot below.
click on picture for better resolution
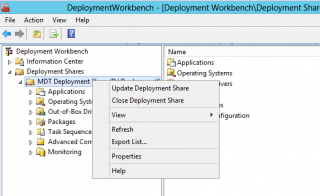
You can easily change this background image and use any other images you might want to display during the initial MDT deployment process. To change this background iamge, you will simply need to right-click on the Deployment share within the Deployment workbench console, select properties.
click on picture for better resolution
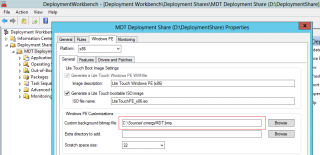
In the properties page, click on the WINPE tab, in the WINPE Customization section, you see that you can specify a custom background image. As you can see on the screenshot below, I’ve simply pointed to the custom image I wanted to use. If you read carefully the option, you will notice that you will have to use an image saved in the bitmap format.
click on picture for better resolution
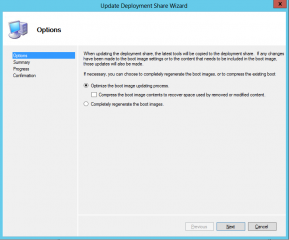
Click Apply or close to close the properties dialog box. Do not forget to update the deployment share before trying to deploy your master image to target computers.
click on picture for better resolution
After the deployment share has been updated, you should see that the background image used during the winpe phase of the deployment is now showing up the image you have selected.
click on picture for better resolution
This is done ! Let’s move to the next customization trick….
Customize text in the progress bard dialog box
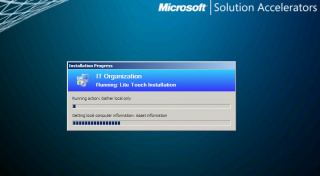
After going through the MDT wizard (as described here), a small dialog box will be displayed and will inform the user about the progress of the task. As you can see on the screenshot below, the text displayed is quite standard : IT Organization and Running Lite Touch Installation.
click on picture for better resolution
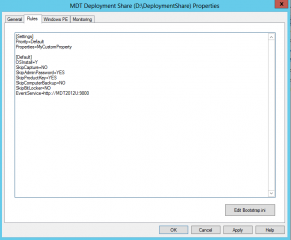
As you have guessed, yes, we can customize these two fields. In MDT 2012, updating these fields is quite straightforward. You simply need to add two variables in the customSettings.ini file. You can edit the customsettings.ini file directly or again go through the Deployment Workbench Console. We will use the GUI approach. Right-click again the deployment share and select properties. In the properties dialog box, click on the tab Rules.
click on picture for better resolution
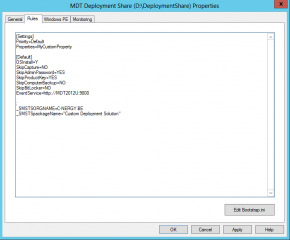
As shown in the screenshot above, you might already have some rules defined. To introduce a custom text in the progress bar dialog box, we will simply append the following 2 lines
_SMSTSORGNAME=”<Name of your Company>”
_SMSTSPackageName=”<Text you want to display>”
The screenshot hereafter shows the value we gave to these 2 variables.
click on picture for better resolution
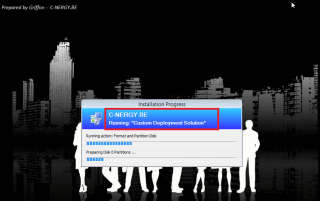
Again, when performing your deployment, you should noticed that the progress bar has been updated accordingly.
click on picture for better resolution
Additional Notes
If you want to display the name of the action currently executing instead of having a static text, you can edit the litetouch.wsf script (located in DriverLetter:\DeploymentShare\Scripts) and locate the line
oEnvironment.Item(“_SMSTSPackageName”) = “Lite Touch Installation”
When you have located this line, you can simply replace the line with the following line
oEnvironment.Item(“_SMSTSPackageName”) = oEnvironment.Item(“TaskSequenceName”)
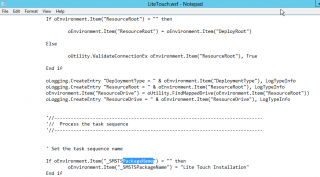
if you modify the litetouch.wsf script in order to display the task sequence currently running, you will have to remove the _SMSTSpackageName variable in the customSettings.ini file. Indeed, the screenshot below shows the content of the litetouch.wsf script and more specifically the _SMSTSPackageName section.
click on picture for better resolution
The logic in the script states that only if the variable is null the oEnvironment.Item(“_SMSTSPackageName”) = oEnvironment.Item(“TaskSequenceName”) will be processed.
Source and more information about this note :
- http://blogs.technet.com/b/mniehaus/archive/2012/08/23/displaying-the-task-sequence-name.aspx
Final Notes
As you can see, MDT offers quite some flexibility when it comes to the customization. With a mininal effort, we were able to already give another Look’n Feel of the deployment process.
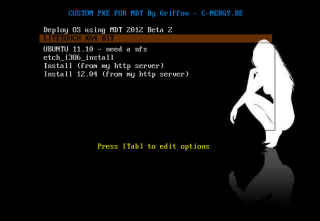
You can go even further with your branding efforts. If you replace the microsoft pxe boot file by the pxelinux one, you can create a custom pxe menu where you can specify advanced options such as booting from the disk or protecting the option via a password. As you can see in the screenshot below, we have also customized the background image. (Note : We might write a post about using pxelinux in the future..)
click on picture for better resolution
As you can see, you can really change the look and feel of the MDT solution.
That’s it for this post !
Till Next Time
See ya

Nice article!
I was wondering, does this work for none Sytem Centre environments?
I noticed the _SMSTS prerfix on those variables and that got me worried!
BTW, I wrote an article a while back on setting up PXELinux if people want that info
http://thommck.wordpress.com/2011/06/16/installing-linux-via-pxe-using-windows-deployment-services-wds/
and
http://thommck.wordpress.com/2011/09/09/deep-dive-combining-windows-deployment-services-pxelinux-for-the-ultimate-network-boot/
HEllo Thom,
Thank you for the visit and the comments
MDT uses some of the variables of SCCM. So, with SCCM, you can customize some of the settings from the GUI and other can be configured through task sequence variables
I’m preparing some posts on SCCM 2012….. we might speak about that in the future
Till Next Time
See ya
In reference to:
Additional Notes
If you want to display the name of the action currently executing instead of having a static text, you can edit the litetouch.wsf script (located in DriverLetter:\DeploymentShare\Scripts) and locate the line
oEnvironment.Item(“_SMSTSPackageName”) = “Lite Touch Installation”
When you have located this line, you can simply replace the line with the following line
oEnvironment.Item(“_SMSTSPackageName”) = oEnvironment.Item(“TaskSequenceName”)
If you change the LiteTouch.wsf content for “Process the Sequence” from
oEnvironment.Item(“_SMSTSPackageName”) = “Lite Touch Installation”
to
oEnvironment.Item(“_SMSTSPackageName”) = oEnvironment.Item(“TaskSequenceName”)
You will receive constant script errors upon trying to run this script and the deployment will fail as soon as startnet wpinit are ran. Maybe this was the correct wording in prior MDT versions of other deployment software that uses LiteTouch, however in order for this script to be written correctly, it must be “TaskSequenceID” NOT “TaskSequenceName”
Hello there,
Thanks for the info… We will check again with MDT 2013 and if there a need (and if we have time), we will update the post
Till next time
See ya
Didn’t work for me (MDT 2012/2013). I made the exact same edits to CustomSettings.ini and updated the deployment share, while completely regenerating the boot images and it didn’t work. I did this on two different instances of MDT.
Hello Jay,
This should be working… Can you retry doing a step by step approach ?
First try to replace only the background…. In the post, it’s explained how to perform the change……
However, note that you have to perform the change for x86 and x64 version (Check the dropdown box called platform in the winpe tab). Could it be that you have changed the background only for x86 version and you are booting from a x64 winpe image….
Check also that you are using a bmp image
Just tested the procedure some days ago on MDT 2013 and still working
As I said, try a step by step approach, if the background change worked, we can have a look to the other customization settings
Hope this help
Till next time
See ya
You can actually use MDT Property values in your CustomSettings.ini to get “Dynamic” information in your Status window as well (and much simpler than modifying the script).
e.g. “_SMSTSPackageName=%TaskSequenceName% on %OSDComputerName%”
Hello There,
Thank you for the info and for your visit
Till next time
See ya
Thanks man
@Mirshad,
No Problem man, happy to help
Till next time
See ya