Hello World,
In the first part of this post, we have explained what we want to achieve. Using the new Windows 2016 Server, it’s now possible to create a virtual machine that can run Hyper-V role and create virtual machines inside (i.e. nested VMS).
In the previous post, we have seen some of the prerequisites needed and how to install the new operating system (i.e. Windows Server 2016 TP4).
In this post, we will focus on the Hyper-V Role installation step and how to configure the virtual machine to have VM nesting feature enabled.
Let’s go !
Hyper-V requirements in Windows Server 2016
In Windows Server 2016, in order to be able to install Hyper-V role, you would obviously need a CPU that support virtualization technology. However, with the new release, in order to be able to install the Hyper-V role, you also need a cpu that support SLAT (Secondary level Address Translation) feature.
CPU SLAT Support Needed
To install Hyper-V Server Role on a Windows Server 2016 Operating System, you will need to ensure that the CPU is supporting SLAT technology. There are no workaround. You will need to fulfill this requirement if you want to move forward.
How to check if CPU supports SLAT extensions ?
You have basically two options. The first option is the most simple one. Try to add the Hyper-V Server Role. If the CPU does not support the SLAT extensions, the installation will not proceed and an error message will be displayed on the screen.
add img later on
The other option is to perform a check before installing the Hyper-V Role Server on the computer. To check if the SLAT extensions are available, you can use different tools and technics.
- You can download and run the coreinfo.exe utility from Microsoft web site
- You can use the systeminfo.exe utility which is available out of the box in the operating system
- You can use a simple powershell one-liner to check if slat is present or not
In this post, we will discuss only the last two options because they are based on built-in utility available within the operating system. The coreinfo.exe needs to be downloaded
To use systeminfo to check SLAT support, you will issue the following command in a command prompt window
systeminfo | findstr “Second”
If the cpu support SLAT, you will see an output similar to the one provided in the screenshot below
Click on Picture for better resolution
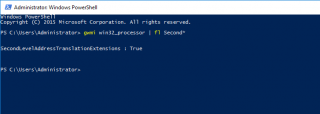
To use Powershell to check SLAT support, you will issue the following command in a Powershell command prompt window
gwmi win32_processor | fl Second*
If the cpu support SLAT, you will see an output similar to the one provided in the screenshot below
Click on Picture for better resolution
Important Remark:
If you have the Hyper-V role already installed, and want to check SLAT support and virtualization support using the above commands, you might have a big surprise as the results might tell you that no slat support is available. However, the Hyper-V role is installed.
This is an expected behavior. After the installation of the Hyper-V Server Role, the above commands and even coreinfo.exe utility will provide wrong information about cpu support.
Step by step Hyper-V Nested VMs
Installing Hyper-V Server Role on the Physical Host
Now, if the SLAT Check has been performed and the result is positive, it’s time to proceed with the installation of the Hyper-V Server role in Windows Server 2016. Usually, we use the GUI (Server Manager) to perform the installation but for this post we will use the powershell way.
To install the Hyper-V Server role, you will need to open the Powershell Command line window (as administrator) and issue the following command
install-Windowsfeature Hyper-V -includemanagementTools -Restart
Click on Picture for better resolution
Wait for the installation process to complete. You will need to reboot your machine after the Hyper-V Role is installed
Click on Picture for better resolution
When the machine has rebooted, it’s time to create your virtual machine that will be hosting the Hyper-V Role as well.
Creating a virtual machine
It’s time to create a virtual machine running Windows Server 2016 Operating System. This is needed in order to have the nested VM capability. We will not explain in details how to create a virtual machine as we assume that you have a little bit of experience with Hyper-V. If you do not have, please have a look here
When the virtual machine has been created, you have to install an operating system on it. For the purpose of this post, we need to install Windows Server 2016 Operating System. Instructions can be found here .
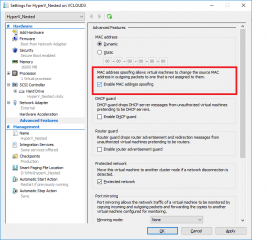
To have VM nesting working, you will need to ensure that the following settings are configured at the Virtual machine level. When configuring Nested VM, you need to ensure that the Mac spoofing functionality is enabled on the future Hyper-V Virtual machine
Click on Picture for better resolution
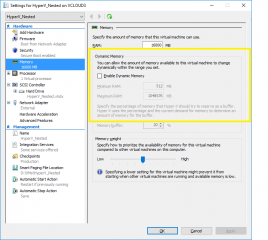
Note also that dynamic memory feature will not be working when using nested VMs. So, you should keep the dynamic memory feature turned off as shown in the screenshot below
Click on Picture for better resolution
Installing Hyper-V Server Role on the Virtual machine
Now, it’s time to install the Hyper-V Server role within your Virtual machine. However, before moving forward, there is still an important configuration change to be made at the virtual machine level.
To have Nested VMs, you need to expose the virtualization extensions to the virtual machine. To do that, you will need to use Powershell cmdlet.
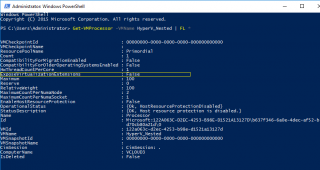
To check if the virtualization extensions are exposed to the vm or not, you can execute the following command
get-vmProcessor -VMName <%Name_of_the_VM%> | FL *
As shown in the screenshot below, we can see that the ExposeVirtualizationExtensions value is set to False
Click on Picture for better resolution
We need to change the value of ExposeVirtualizationExtensions from False to True. Again, we will be using Powershell. We will issue the following command
Set-vmProcessor -VMName <%Name_of_the_VM%> -ExposeVirtualizationExtensions $True
As you can see in the screenshot below, you have to run this command while the VM is Turned Off or you will receive the following message
Click on Picture for better resolution
When the VM is turned off, and you execute the command above, you should see something similar to the following screenshot
Click on Picture for better resolution
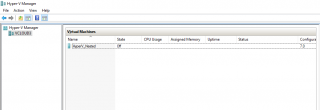
At this stage, in your physical Hyper-V server Console, you should see something like this.
Click on Picture for better resolution
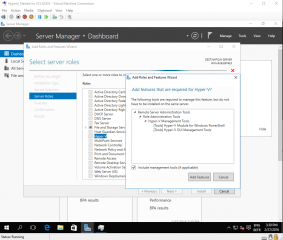
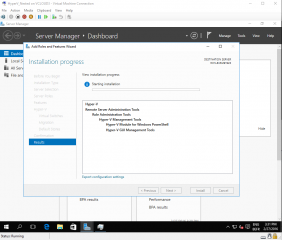
It’s time to start the virtual machine and to install the Hyper-V Server Role. We can perform the installation via the GUI or via Powershell (as described above). The following screenshots shows that the Hyper-V Server Role is being installed within the Virtual machine we have created on the Physical Hyper-V
Click on Picture for better resolution
Click on Picture for better resolution
Create the nested Virtual machine
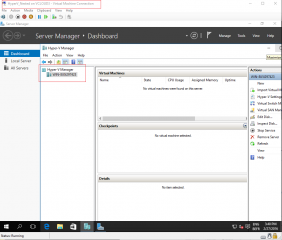
After the installation of the Hyper-V Server role, the virtual machine will reboot. When the virtual machine startups again, you can see that the Hyper-V server role has been installed accordingly and should be fully functional.
Click on Picture for better resolution
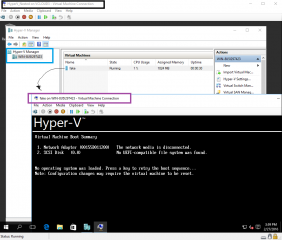
Within your Hyper-V virtual machine, it’s time to create the nested virtual machine and ensure that this one can run from within the virtualized Hyper-V server. The screenshot below demonstrate that the nested virtual machine has been started and that the virtualized Hyper-V is working as expected
Click on Picture for better resolution
Final Notes
Voila ! Now you can setup your test lab and starting testing Hyper-V Deployment using virtualized infrastructure as well. The configuration steps to enable nested VMs are really easy to perform. As long as the requirements are met, the process should be straight forward.
The post might let you thing that the process is quite difficult but not really. We have tried to provide a detailed set of instructions. If you have performed the operation once, you will see that you basically do not need to do much more than exposing the virtualization extensions to the virtualized Hyper-V machine to get started
Hope you enjoyed this one
Till next time
See ya
