Hello World,
Today we continue our discussion about using vnc server in order to perform a remote connection on a Ubuntu machine. In the previous post, we have seen how to configure your machine to have the vnc server starting at boot. By doing this configuration change, we are now able to connect to the desktop even if no users are connected and even after a reboot.
This is really cool.
We have seen also that one drawback would be that you would need to install the vnc viewer on all clients. The option we want to investigate is to use a web based vnc viewer. If you can install the vnc viewer on the remote machine running also the vnc server, you would not need any client on your computer and you could possibly perform all the operation from your browser.
This would be super cool, no ?
Web Based VNC Viewer
When I started this post, the first option in my mind was the freerdp-webconnect solution. This would have been a good solution because you could then also use other protocols (such as RDP). From the FreeRDP Web Site, “FreeRDP-WebConnect is an open source gateway for accessing RDP/VNC sessions using any HTML5 compliant browser”. The only problem is that there is no package available for Ubuntu 12.10 or later. This option is not available anymore.
The other option that people might think of is the fact that the x11vnc server (the vncserver we are using) offer a java-viewer applet that could be used to connect using a web browser. I didn’t test that yet and I’m not really keen on using this option. The reason behind is because I would need to ensure that all machines have java installed. This is not the best option
The third option would be to use a free and open source vnc viewer based on HTML 5. Using google, we have found the noVNC solution. The package seems small enough and there is not too much configuration to perform in order to have the noVNC viewer installed.
So, we will give it a try
Download and installing NoVNC Viewer (web based vnc viewer)
We assume that you have already installed and configured your Ubuntu machine with x11vnc server in a way that the VNC server is up and running at startup time. if you not, you should better have a look at the following post.
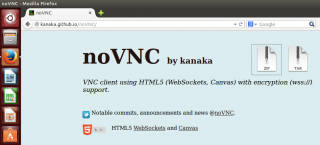
When you have finished the installation of the x11vnc server, it’s time to see if the novnc solution can be used in our scenario. First, you will need to download the noVNC package. The package can be found at this address : http://kanaka.github.io/noVNC/
Click on Picture for better resolution
Download the package on the computer where the x11vnc server is running and configured and extract it.
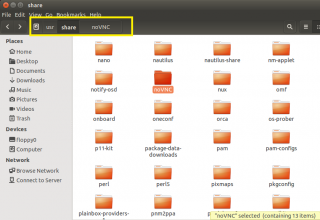
Copy the package under the /usr/share folder
Click on Picture for better resolution
Test noVNC Web based vnc viewer
From a terminal session, type the following command
/usr/share/noVNC/utils/launch.sh –vnc localhost:5900
or go to the directory /usr/share/noVNC/utils and then type
sh ./launch.sh –vnc localhost:5900
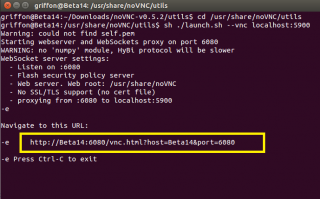
Click on Picture for better resolution
After launching this command, the script will provide you the url to be used. The default port used by noVNC seems to be 6080
Click on Picture for better resolution
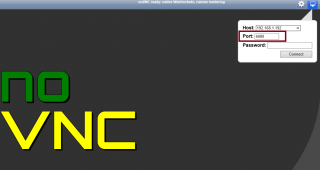
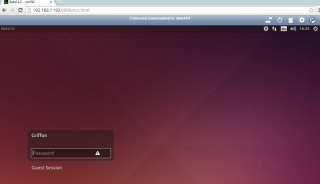
Open your browser and type the following url http://<ubuntu_machine_ip or hostname>:6080/vnc.html You should see a screen similar to the screenshot. if you provide the required information in the login box, you should be able to remote into your Ubuntu console.
Click on Picture for better resolution
Note the port number. Here, you do not specify the port number of the vnc server (5900) but the port used by the noVNC mini server (6080).
AutoStart the noVNC service
We have seen that starting manually the noVNC solution provide us a nice web based interface where we can remotely connect to our Ubuntu machine. Now, to make this really useful, we would need to have the web client always available. if nobody is logged on to the machine or if the machine restart, the noVNC process should be kept running.
So, based on the previous post, we have learned how to make a service auto start at boot time. We will thus perform exactly the same thing as we did for VNC server.
So, to create the startup script, you will execute the following command in your Terminal Console
sudo nano /etc/init/noVNC.conf
You might be prompted for a password
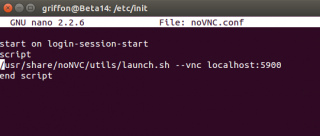
In the nano editor, add the following lines
start on login-session-start
script
/usr/share/noVNC/utils/launch.sh –vnc localhost:5900
end script
Press Ctrl + X to close the file
You will be asked if you want to save the file. Press Y and you are done.
Double check the content of the newly created file. The content should look like this
Click on Picture for better resolution
Reboot your machine and check that you have indeed access to your machine even if nobody is logged on
Click on Picture for better resolution
Final Notes
There are plenty of web based solution nowadays to remotely connect to your system. We liked the freerdp-webconnect but no new package is available and does not seem to work on Ubuntu 14.xx. In this post, we have configured our system to have the noVNC automatically started at boot time.
If you combine this post with the previous post about auto start the vnc server, you can basically have the possibility to perform a remote desktop connection to your Ubuntu using vnc protocol from a web browser. This is cool. You do not need to install any vnc viewer on user’s workstations. If you reboot the machine or if nobody is logged into the machine, and if you do not have vnc client installed on your workstation, you would be able to remotely access your machine via vnc and the web based client noVNC
This is cool, isn’t it ?
In the next post, we will show an alternative to noVNC viewer.
Till next time
See ya
