Hello World,
Since I’m busy with Ubuntu 14.04 topics, I decided to have a look to the gnome flavor (UbuntuGnome). Gnome Shell desktop has evolved dramatically and it’s a completely new interface compared to gnome 2. I do not want to compare Unity vs Gnome Shell. I just wanted to give it a try and see how the desktop has evolved. With this version, I think the desktop is nice,elegant and useable. There is a lot of improvements and work that has been done since the first version of the Gnome Shell Desktop.
I really like it. It’s minimalist and classy.
In this post,we will describe the installation process of Ubuntu Gnome in a Virtual box environment.
Step by Step Installation Guide – Ubuntu Gnome 14.04 – Fresh Install
Step 1 – You first need to download the latest source files from http://ubuntugnome.org/download/
Step 2 – When you have downloaded the iso, you can decide to burn the iso or to perform the install from a usb stick (preferred method). When you are ready, you can start your installation process. Because we install it on Virtual box, you can simply attach the iso file to your virtual machine.
Step 3 – in the Welcome Page, select the install ubuntu option
Click on Picture for better resolution
Step 4 – In the preparing to install, you can simply press continue or you can tick the check-boxes to download the updates and codec (if you have internet connectivity)
Click on picture for better Resolution
Step 5 – In the installation type, select your installation type. When you have selected your options, Press Continue
Click on picture for better Resolution
Step 6 – In the Where are you ? page, the wizard will try to detect your location. If this is not correct, locate your location on the map. Press Continue
Click on picture for better Resolution
Step 7 – In the keyboard layout, select your keyboard and Press Continue.
Click on picture for better Resolution
Step 8 – In the Who are you ? page, provide the requested information (computername,username,password). You can also decide to encrypt the disk if needed
Click on picture for better Resolution
Step 9 – The installation process will start. wait for completion
Click on picture for better Resolution
Click on picture for better Resolution
Step 10 – When installation is complete, you will see the prompt asking you to reboot the machine
Click on picture for better Resolution
Step 11 – After the reboot, you should see the login page for Ubuntu 14.04
Click on picture for better Resolution
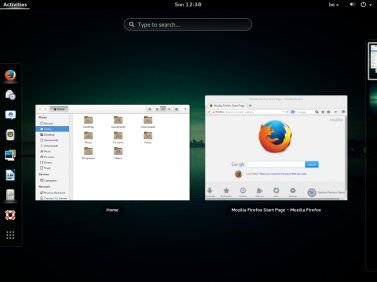
Step 12 – After login, you will see the nice and sleek Gnome Shell interface that you can start working with.
Click on picture for better Resolution
Resolution screen issue with Virtualbox and Ubuntu Gnome
After installing the Ubuntu Gnome as a virtualbox machine, and after installing the Guests additions into the machine, the screen resolution was low and I was not able to work. To fix this issue, I had to install additional drivers within the Ubuntu Gnome OS.
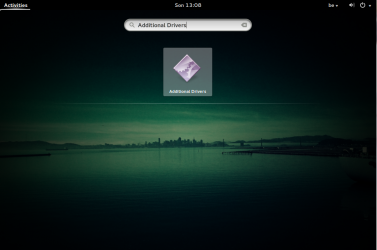
To fix this issue, I simply clicked on Activities link which displayed the Search function. In the search box, simply type Additional Drivers. In the returning results, select Software & Updates icon.
Click on picture for better Resolution
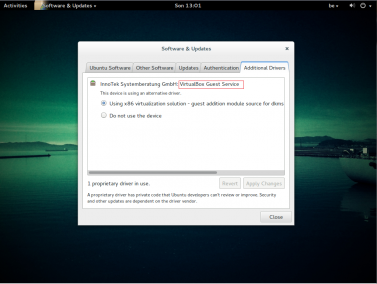
In the dialog box, at the additional drivers tab, wait for the system to detect additional drivers you might need. You will see something similar to this screenshot. Select the drivers for virtual box services and apply the changes.
Click on picture for better Resolution
When this is done; you might be asked to reboot your machine. After the reboot, you should have a adequate screen resolution for your newly installed Ubuntu Gnome.
Final Notes
You are ready to use your new Ubuntu Gnome system. I think that the interface is elegant, nice and minimalist. I like the fact that the Gnome team is developping more and more applications integrated within the Gnome Shell Desktop maintaining the same graphical code and classy design.
Linux is all about choice, right ? So, Choose you favourite desktop and enjoy working with Linux Operating System. If you are comfortable with Unity, stick to Unity. If you wanna try new desktops, give a try to the Gnome Shell, you might be seduced by this Desktop interface
That’s it for this post
Till next Time
See ya


