Hello World,
We are really busy but we managed some time to test and install the latest version of Ubuntu 13.10. This version will be only supported for 9 months by Canonical so a lot of people are wondering if it’s really worth moving to this new release. The other problem with this release is that some features seems to be broken (such as xrdp). We will briefly explained in a coming post how to implement a quick workaround. This post will describe how to perform the installation for a new installation. If you want to upgrade from a previous version, you should have received a popup prompting you to perform the upgrade. We might write a post about how to upgrade to ubuntu 13.10 (if we have time).
This post is the traditional step by step installation guide for Ubuntu 13.10.
New Ubuntu Installation Guide
In this post, we will describe the Install from Scratch of Ubuntu 13.10.
Step 1 – To perform this operation, you first need to download the latest source files from http://www.ubuntu.com/download/desktop
Step 2 – When you have downloaded the iso, you can decide to burn the iso or to perform the install from a usb stick (preferred method). When you are ready, you can start your installation process.
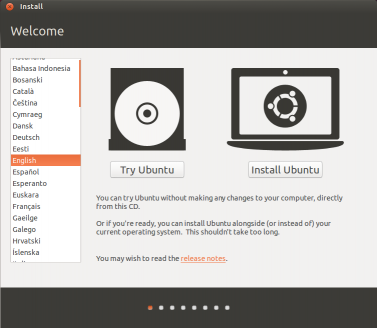
Step 3 – in the Welcome Page, select the install ubuntu option
Click on picture for better Resolution
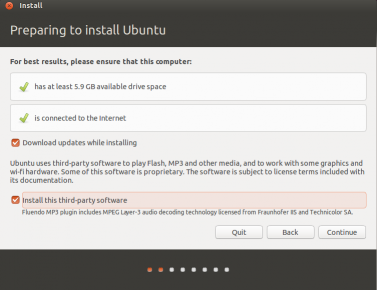
Step 4 – In the preparing to install, you can simply press continue or you can tick the checkboxes to download the updates and codec (if you have internet connectivity)
Click on picture for better Resolution
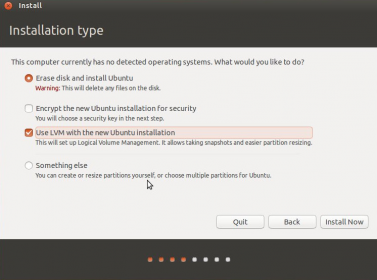
Step 5 – In the installation type, select your installation type. When you have selected your options, Press Continue
Click on picture for better Resolution
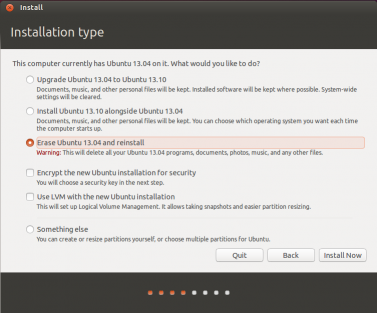
If you are upgrading your previous installation, you will see a screenshot similar to this one. Select the appropriate option
Click on picture for better Resolution
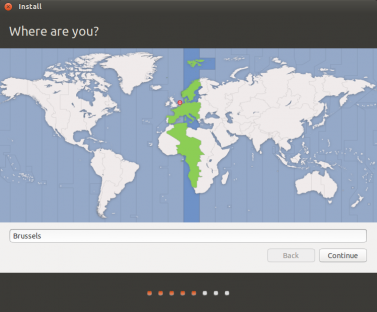
Step 6 – In the Where are you ? page, the wizard will try to detect your location. If this is not correct, locate your location on the map. Press Continue
Click on picture for better Resolution
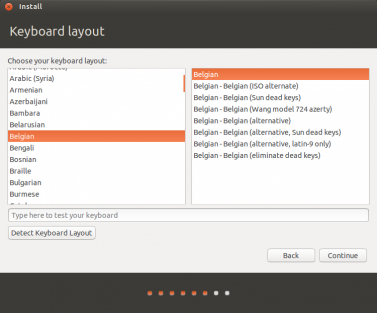
Step 7 – In the keyboard layout, select your keyboard and Press Continue.
Click on picture for better Resolution
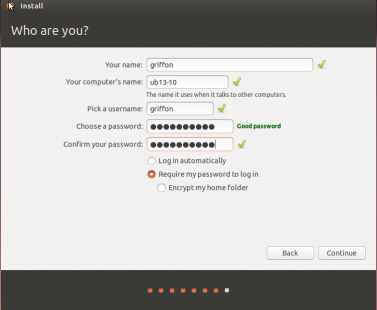
Step 8 – In the Who are you ? page, provide the requested information (computername,username,password). You can also decide to encrypt the disk if needed
Click on picture for better Resolution
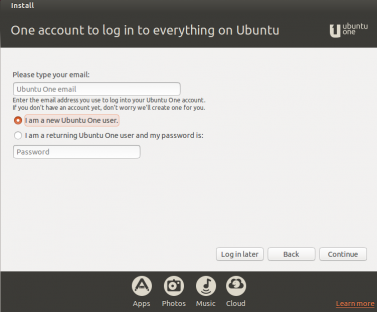
Step 9 – In the ONE account page, simply click on the login later if you do not have an ONE account or you can decide to create one.
Click on picture for better Resolution
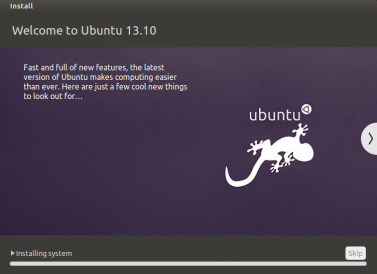
Step 10 – The installation process will start. wait for completion
Click on picture for better Resolution
Step 11 – When installation is complete, you will see the prompt asking you to reboot the machine
Click on picture for better Resolution
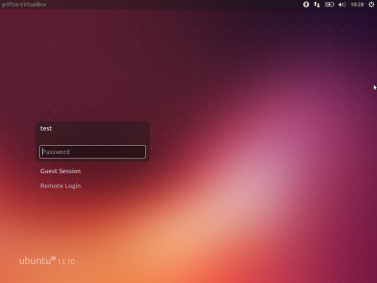
Step 12 – After the reboot, you should see the login page for Ubuntu 13.10
Click on picture for better Resolution
Final Notes
Voila ! You have performed a basic installation of Ubuntu 13.10. As you have seen, the installation is quite simple and straight forward. If you are used to perform Ubuntu installation, you will see that the installation process has changed very little. During the installation, you can create an account for the Ubuntu One services provided by Canonical. The general impression is that the installation is getting better and better.
We have performed a really basic installation. We might want to explore some additional features offered by Ubuntu such as disk encryption in some future posts. In the next post, we will see how we can install xrdp (remote desktop component) and make it usable in Ubuntu 13.10. We had indeed some difficulties to make the xrdp component worked on this latest Ubuntu version….
Till Next Time
See ya

