Hello World,
I’ve received an interesting question recently. One of my friend started playing around with Proxmox VE 2.0. He created Virtual machines and stored the files on the local disks. With time, the virtual infrastructure was growing and growing. The local storage started to fill up and he asked me if there was an easy way to move a virtual machine from the local storage to the network storage infrastructure.
The answer is…..yes, there is a way but it’s not a online move like in VMware (vMotion Storage)
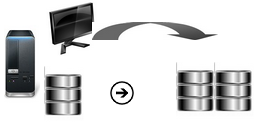
Moving virtual machines files between storage locations
With my friend, we’ve decided to build up an iscsi infrastructure where the virtual machine would be relocated. Within Proxmox Ve, we have simply connected the iscsi storage and created LVM Groups using this the iscsi storage infrastructure (LVM Groups with network backing).
As mentioned earlier, Proxmox VE 2.0 offers you the possibility to move virtual machines between storage location (using the web interface). The only limitation is that you will need to perform a “cold storage migration“. In order words, you will need to shutdown the virtual machine during the migration process (meaning that you will have some downtime).
The move process consist of making a backup of the virtual machine and restore the virtual machine to the target location. As you can see, we are not really moving files between locations. At the end of the process, you will need to delete the original virtual machine.
It’s time to show you how to perform this move….
Step 1 -Configure your Storage for Backups files
You will need to perform a backup of the virtual machine you want to relocate. However, before being able to perform this backup, you will need to define a storage location where you can store these backup files. To perform this, you will open your Web Interface, click on Datacenter node. In the right pane, select the storage tab. From the list of available storage location, select one and click on the Edit Button.
In the Edit Window, ensure that in the Content type; you have selected the Backups Option

Click on Picture for better resolution
Step 2 – Shutdown the virtual machine you want to relocate
To ensure that your virtual machine is up to date, we would recommend to shut it down before performing the backup operation (even if there is possibility to perform a online backup – snapshot) . By enforcing downtime, you can ensure that after the move the virtual machine is working as expected and in case of problem, you can easily roll back to the previous situation.
Step 3 – Backup the virtual machine you want to relocate.
It’s time to backup the virtual machine. Locate your virtual machine in the web interface , go to the backup Tab. There, press the button Backup Now. The Backup Now window will be displayed

Click on Picture for better resolution
In this window, specify the location where to store the backup, the compression mode and the backup mode. Because we have already shut down the virtual machine, the backup mode is not important. Press the Backup Button. The task viewer window will be displayed and backup operation will start

Click on Picture for better resolution
Note :
As you can see, you can also perform an online backup (snapshots). If the virtual machine you want to relocate, do not change a lot with time, you could minimize downtime by performing an online backup and then restoring the files to the new location. When the restore operation is complete, you can simply switch off the old virtual machine and simultaneously start the newly relocated virtual machine…
Step 4 – Restore the Virtual machine to the target storage location you have defined
When the backup is complete; you can move to the next step consisting of restoring the virtual machine to the target location. Again, you browse to the virtual machine that needs to be moved, go to the Backup tab, select the backup file generated in the previous step and click on the Restore Button. The Restore window will be displayed

Click on Picture for better resolution
From this window, in the storage field, specify where to restore the virtual machine. In our example, we have selected the lvm group with network backing. Press the Restore Button
Step 5 – Validate your migration
At this stage, when the restore is complete, you can startup your virtual machine and ensure that everything is working as expected. If this is the case, you can then decide to remove the backup and the original files of the virtual machine you’ve just restored
Final Notes
In this post, we have shown you how to perform in an easy way relocation of virtual machines files from one storage to another. The solution is easy to implement even if not the most efficient way to relocate virtual machines. The process involves performing a backup/restore operation of the virtual machine that you want to move. Then, you need to delete the original files….
There might be other ways to perform the same thing (I’m thinking of dd command) but I think that this approach is the easiest even if you have some small drawback (downtime)
If you know another way to perform the same thing, just share the info with us….
What would be great is to have a way to move this virtual machines online…. maybe in the coming version
Till next Time
See ya
I tried this method and it trashed the machine… What I did in the end was to simply copy the files to a new location, then edit the configuration file for the virtual machine to reflect the new datastore name for disk images. That worked flawlessly.
/per
Ok thank for the info,
note that the post is quite old now… so maybe stuff have changed… we didn’t check/update this procedure since a long time
Thank for the visit
till next time
See ya
I love this post, thanks Griffion! Your site is also nice. I hope you keep exploring Proxmox and posting, please update the migration post. I’d love to know what else you’ve tried. What other fast ways to move VMs from host to another independent host are there, is shared storage the only way ( non-live)?.. Also what is your rig setup like? Hardware,raid-level,ram,cpu,etc Appreciative of the knowledge you’ve shared bro!
Hello There,
We are still working with Proxmox VE solution. Thank you for the positive feedback and inquiries.
If you follow us, you would know that for the moment we are overloaded with work which limits our time for blogging activities.
January 2016, we should be back on Proxmox VE and we can start providing more and more info
Till next time
See ya
I recognise this is an old post…I had the requirement and was searching…then found that Proxmox 4.2, which I run, has this facility in the GUI…Go to the VM, Select Hardware tab, Use Move Disk option. Worked nicely.
Hello Jeff,
Indeed our post is a bit old and new feature have popped up since it was published
Thank you for providing updated info about Proxmox and file location and sharing it with our readers
Till next time
See ya