Hello World,
It’s time for me to decommission my Proxmox VE 1.x infrastructure and start rolling out the latest iteration of the software (i.e. Proxmox VE 2.0). I’ll miss the familiar simple and clean web interface that was introduced in PVE 1.x. This post will describe how you can upgrade a proxmox ve node running 1.9 to Proxmox VE 2.0.
Let’s go !
New Installation Vs In-place Upgrade
Normally, I prefer to perform a clean installation when I need to upgrade to newer software version. This is also the recommendation of the Proxmox VE team. If you use the new installation approach, you will need to
- Backup your VM’s
- Install the PVE 2.0 on the new machine
- Configure the PVE Host as required
- Restore the VM’s on the target machine
The advantage of this method is that minimize the impact of the upgrade procedure. Because you are running the old and new infrastructure side by side, if there is a problem during the upgrade process, you will be able to rollback quite easily. You can also minimize the impact on the user community because you can choose to move only specific VM’s at specific time.
The upgrade process might look simpler but has more impact. Once you have performed your upgrade, if something goes wrong, you cannot go back as quickly as you would with a new installation scenario. The user impact can also be important because when you will perform the upgrade process, all your virtual machines should be turned off.
If you have a clustered installation, you have to know that the cluster technology is different between these 2 versions. This means that whatever the approach you will be using for your Cluster, you will need to rebuild it. This is why I would recommend to build up a new cluster from scratch using PVE 2.0 and starting moving your virtual machines to the new cluster. However, note that you can still upgrade the nodes from PVE 1.9 to PVE 2.0 and then recreate your cluster from there.
Even if I prefer to use the new installation approach (we might come back on this on a later post!), in this post, we will see how you can perform an upgrade of a standalone PVE 1.9 host.
In-place Upgrade Process
Pre-Upgrade Tasks
Proxmox VE Team has developed an upgrade script that make the upgrade process simple and painless (most of the time). In order to successfully perform this upgrade, you need to perform some pre-migration tasks :
- Backup all your settings (Virtual Machines, OpenVz Container, ..). This can be useful in case the upgrade fails
- The node to be upgraded must be running PVE 1.9. You should check that you have the latest updates as well on your host
- the PVE host must be using the kernel version 2.6.32 (you can check that within the web Gui > Home or from a command line by typing pve -v)
- You will need to ensure that you have enough free space on your disk/partition to perform the upgrade
- No VMS or CT should be running when performing the upgrade process. So, ensure that they are turned off.
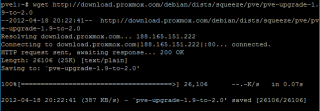
- Download the upgrade script provided by Proxmox Ve Team. In order to obtain it, you simply issue the following command (from ssh console of locally connected to the host)
wget http://download.proxmox.com/debian/dists/squeeze/pve/pve-upgrade-1.9-to-2.0
Click on image for better resolution
- Make the script executable by issuing the following command : chmod +x pve-upgrade-1.9-to-2.0
Click on image for better resolution
Upgrade Tasks
If you have performed the pre-migration activities, you can move on and start your upgrade process. As a reminder, ensure that all your VM’s and CT’s are turned off before launching the upgrade script.
Navigate to the location where you have dowloaded the migration script and run it by issuing the following command
- ./pve-upgrade-1.9-to-2.0
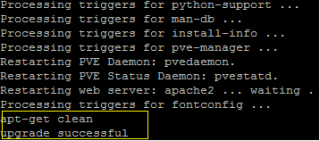
The upgrade process is quite straight forward. You simply wait 10 to 20 minutes and check at the end if you have “Upgrade successfully” message.
Click on image for better resolution
If the upgrade process is successful, you will need to restart your Pve node (and see if it boots correctly after the upgrade).
Note :
If something goes wrong, you can simply re-run the script and try again. When performing the upgrade, the script will generate a log file that can be reviewed after the upgrade process and will be located in the same directory where the script is located. The file is called pve-upgrade.log
If this went ok, the Proxmox VE wiki documentation mention that you should run the following command ‘upgrade-from-grub-legacy’ .
Click on image for better resolution
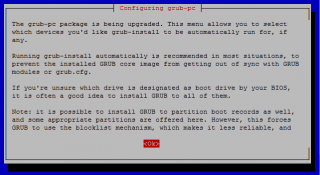
After issuing the above command, a windows similar to the screenshot below will be displayed. Press OK
Click on image for better resolution
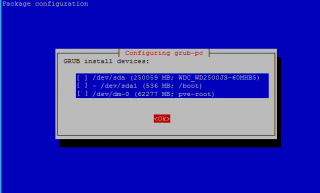
In the Grub install device window,you will need to select on which device you want to have the Grub install. Logically, you should select the /boot partition
Click on image for better resolution
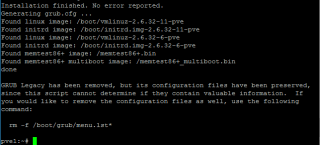
If everything is working as expected, you should go back to the console mode and see a message stating that the legacy grub has been removed
Click on image for better resolution
We are ready to move the final part of the upgrade process….
Post -Upgrade Activities
If you reach this point, you should be ready to import back your old VM and CT’s and check that they are running as expected. To do this, you simply run the following command :
./pve-upgrade-1.9-to-2.0 –import
Click on image for better resolution
At this stage, you should boot your virtual machines and check that they are running as expected. During the upgrade process, everything went fine for me.
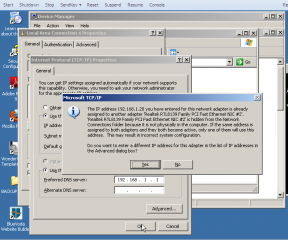
However, I encountered a small issue with my virtual machines. They were starting correctly but I was not able to ping any of them…..So, I open the virtual machine and check the network connection. It was set to DHCP. So, I went to set back the original static IP Address and got the following error
Click on image for better resolution
During the Upgrade process, it seems that a new network card has been installed within the virtual machine. The error message you get state simply that there is a network card (that’s not visible to you) that is using exactly the same settings you’ve entered.
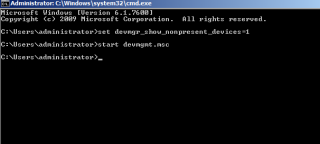
Because I wanted to have a clean infrastructure, I decided to remove this ghost network card. To perform this, you will simply need to issue the following command in a command prompt.
Click on image for better resolution
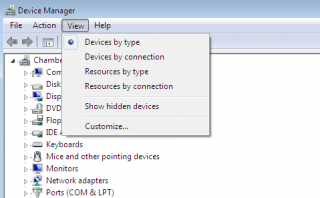
This will open the device manager console in a mode where you will be able to see the hidden devices. From the console, on the view menu, click on the Show hidden devices
Click on image for better resolution
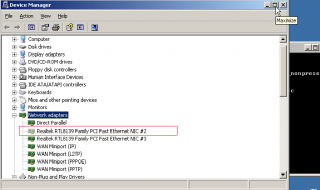
When this is done, you can expand the network adapter node. You should see a dimmed network card. This is the one you want to remove. Simply right-click on it and choose uninstall
Click on image for better resolution
Note :
I had to do that on all my kvm virtual machines. So, the upgrade script seems to discard some of the VM’s settings.
The final step consists of cleaning up your system by purging obsolete packages in order for your to save some disk space. This step is optional but again because we like to perform these maintenance tasks and keep our server out of trouble. To purge the files, you simply issue the following command from your console
./pve-upgrade-1.9-to-2.0 –purge
Click on image for better resolution
Final Notes
As you can see, it’s possible to upgrade a PVE 1.9 server to PVE 2.0. and you can see that the process is not too complex and does not take too much time. I was able to perform my upgrade in less than 1 hour. The upgrade of the PVE operating system didn’t return any errors. However, the upgrade progress had changes some VM configuration. I do not know if this is specific to my environment or if this can happen to other environment. At least, you know what to do if you encounter the problem
Till next Time
See ya
References
- http://pve.proxmox.com/wiki/Upgrade_from_1.9_to_2.0
- http://support.microsoft.com/kb/315539 (how to view “hidden devices” in MS Operating system)

