Hello World,
In a previous post Ubuntu 24.04 – Deploy Ubuntu 24.04 Desktop through PXE (BIOS & UEFI), we have demonstrated how to perform a network installation of Ubuntu Desktop 24.04. This post has described the necessary steps needed to setup a PXE server and how to create the proper configuration file to boot the target host in the Ubuntu Live session environment. At this stage, we would need to go through the Setup Wizard to start the installation and complete the installation.
We have been asked recently if it was possible to provide some guidance on how to automate the process and provide enough information to perform an unattended installation. In this post, this is exactly what we will try to do…
Overview
Canonical has introduced a number of changes and deviations compared to the original Debian Linux Distribution. One of the changes introduced concerns the new Ubuntu Installer and the technology used to perform automated or unattended installation.
Debian based distribution usually uses preseed method to automate the installation of the operating system. Ubuntu was using this technique as well. However, recent Ubuntu releases are not using preseed method option anymore. Ubuntu is now using yaml file and the autoinstall method to automate the installation of Ubuntu.
More specifically, you have to know that
- Ubuntu Server, Version 20.04 and later is using the new Autoinstall approach
- Ubuntu Desktop, Version 23.04 and later is using the new Autoinstall approach
To perform unattended installation against those releases, you will need to create an autoinstall configuration file used to perform the installation without any user interaction. In this guide, we will provide some guidance on how to create the Autoinstall file and how to update the PXE Server configuration so the file is effectively used during the setup.
Step by Step Guide
This section provides some guidance on how to create an autoinstall file. The file provided here is really basic and should allow you to perform an unattended installation. In this guide, we will not explain all the options and syntax used in the autoinstall file. You cand find more information about autoinstall by visiting the Autoinstall configuration reference manual.
You can use this post as a starting point. If you need to better control the installation process, feel free to update the Autoinstall file so he meets your specific requirements.
Pre-requisites
To successfully follow this specific guide, you will need to ensure that you have implemented the necessary PXE infrastructure that is needed. We have described how to implement a PXE server within your network. This information can be found at Ubuntu 24.04 – Deploy Ubuntu 24.04 Desktop through PXE (BIOS & UEFI)
After following these instructions, you can move to the next step where you will be creating a simple autoinstall.yaml file.
Creating the autoinstall.yaml file
To automate the installation of Ubuntu Desktop 24.04 (in our example), you will need to use the new approach based on the autoinstall.yaml file. The file contains instructions about what to show or not to show during the setup wizard process. Hereafter, we are providing the content of our simple autoinstall.yaml file.
#cloud-config
autoinstall:
   version: 1
   mode: oem
   locale: "en_US.UTF-8"
   keyboard:
     layout: be
     variant: ""
     toggle: null
   source:
     id: ubuntu-desktop
   timezone: "Europe/Brussels"
   shutdown: reboot
In this file, we have specified the oem installation mode. When using this mode, after the installation, you will see the gnome setup wizard that will be displayed and you will be asked to provide user and computer account information. In this example, you would deliver your Ubuntu computer to the user which can finalize the last bit of the configuration. It is possible to provide hostname and default user account within the autoinstall file (but we didn’t use this approach here)
We have also set the keyboard layout to Belgian. You would need to change this if you want to use a different keyboard layout.
Updating the PXE Server Config Files
After creating the autoinstall.yaml file has been created, you will need to place the file into the correct location and we will need to update some of the pxe files.
Copy the file autoinstall.yaml on the PXE Server
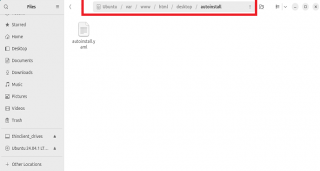
We assume that you have setup the PXE Server as described in our previous post (see Ubuntu 24.04 – Deploy Ubuntu 24.04 Desktop through PXE (BIOS & UEFI)). We will create an additional folder under /var/www/html/desktop
sudo mkdir /var/www/html/desktop/autoinstall
We will place our autoinstall.yaml file that we have created in the previous step in this location
Click on Picture for better Resolution
Update the PxeLinux.cfg
You will need to update the default file (located under /tftp/bios/pxelinux.cfg/). You will add a new section (Ubuntu 24.04 – Autoinstall). In this section, we have specified additional parameters pointing to the autoinstall.yaml file.
DEFAULT menu.c32
MENU TITLE ULTIMATE PXE SERVER - By Griffon - Ver 2.0
PROMPT 0
TIMEOUT 0

MENU COLOR TABMSG 37;40 #ffffffff #00000000
MENU COLOR TITLE 37;40 #ffffffff #00000000
MENU COLOR SEL 7 #ffffffff #00000000
MENU COLOR UNSEL 37;40 #ffffffff #00000000
MENU COLOR BORDER 37;40 #ffffffff #00000000

LABEL Ubuntu Desktop 24.04 - NFS
kernel /boot/casper/vmlinuz
append nfsroot=192.168.1.160:/var/www/html/desktop/u2404 netboot=nfs ip=dhcp boot=casper initrd=/boot/casper/initrd
#systemd.mask=tmp.mount --

LABEL UBUNTU 24.04 - AutoInstall
kernel /boot/casper/vmlinuz
append nfsroot=192.168.1.160:/var/www/html/desktop/u2404 netboot=nfs ip=dhcp boot=casper autoinstall cloud-config-url=http://192.168.1.160/desktop/autoinstall/autoinstall.yaml initrd=/boot/casper/initrd
Note : Update this file to reflect the ip address you would be using. In our example, the pxe server is using the ip address 192.168.1.160 but you can use any ip address on your internal network.
Update the Grub.cfg
You will need to update the grub.cfg file (located under /tftp/grub/). You will add a new section (Ubuntu Desktop 24.04 – Autoinstall). In this section, we have specified additional parameters pointing to the autoinstall.yaml file.
if loadfont /grub/font.pf2 ; then
set gfxmode=auto
insmod efi_gop
insmod efi_uga
insmod gfxtermterminal_output gfxterm
fi
set menu_color_normal=white/black
set menu_color_highlight=black/light-gray
set timeout=5

menuentry "Ubuntu Desktop 24.04" {
set gfxpayload=keep
linux /boot/casper/vmlinuz ip=dhcp nfsroot=192.168.1.160:/var/www/html/desktop/u2404/ netboot=nfs ip=dhcp boot=casper
#systemd.mask=tmp.mount --
initrd /boot/casper/initrd
}

menuentry "Ubuntu Desktop 24.04 - AutoInstall" {
set gfxpayload=keep
linux /boot/casper/vmlinuz ip=dhcp nfsroot=192.168.1.160:/var/www/html/desktop/u2404/ netboot=nfs ip=dhcp boot=casper autoinstall cloud-config-url=http://192.168.1.160/desktop/autoinstall/autoinstall.yaml
initrd /boot/casper/initrd
}
Note : Update this file to reflect the ip address you would be using. In our example, the pxe server is using the ip address 192.168.1.160 but you can use any ip address on your internal network.
Post Setup
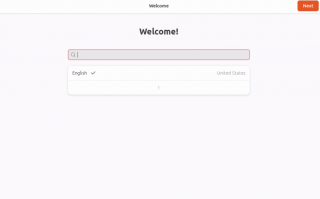
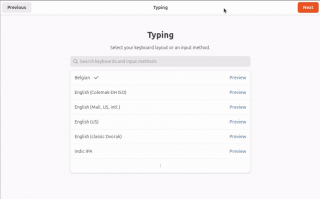
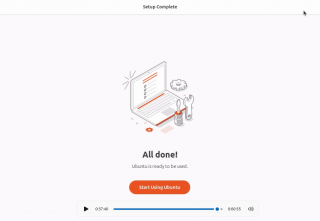
If everything is working as expected, the target host will boot in pxe mode and the installation will proceed with no GUI showing up. It might take some time before it completed ( +/- 30 min). The system will reboot automatically and you will be then presented with a the Gnome-Setup Wizard. This is because we have used the OEM mode in the autoinstall file. This will trigger the Gnome Setup Wizard which allows to provide OOBE experience and finalize the installation.
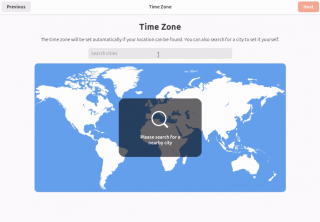
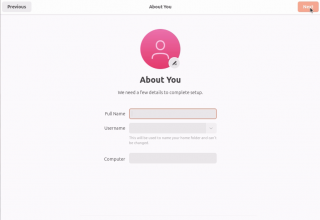
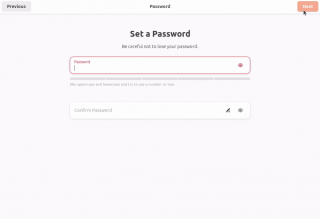
The Gnome Wizard will ask you to provide information about Language, keyboard, TimeZone, UserName, ComputerName, Password as you can see in the following screenshots
Click on Picture for better Resolution
Click on Picture for better Resolution
Click on Picture for better Resolution
Click on Picture for better Resolution
Click on Picture for better Resolution
Click on Picture for better Resolution
Final Notes
This is it for this post !
We have only scratched the surface here but with this post, you should be able to perform an unattended installation of Ubuntu Desktop 24.04 while using PXE technology. This post is not about to explain all the options and settings of autoinstall. We only wanted to test and demonstrate how autoinstall could be used. In the next post, we will try to do the same for the Ubuntu Server Edition which seems again different.
Till next time
See ya
