Hello World,
Since the release of Ubuntu 20.10, we had not much time to play with this short term release. Ubuntu 20.10 ships with an interesting feature in terms of interoperability with Active Directory. A lot of people has mentioned that Ubuntu 20.10 setup now offers you the possibility to join an Active directory Domain during the initial setup. In this post, we will quickly go through this process and see if this is working as expected and if we can authenticate against Domain Controllers.
So, let’s give it a try and see how fun it is….
Overview
Ubuntu 20.10 has been released in October 2020 and it’s a Short Term Support (STS) release which will be supported for the next 9 months. These STS releases provide a way to include new features that will probably become mainstream in the next Long Term Support (LTS) Release.
One feature of interest would be the possibility to join an Ubuntu machine into an Active Directory domain. A lot of organization are still running IT infrastructure based on Microsoft software products and more specifically Active Directory as their Identity management solution. The addition of this feature would provide a better interoperability (and possibly better adoption) between windows and Ubuntu machines. Surprisingly, more and more Linux based machines (Linux Servers mainly) are making their way into corporate IT infrastructure and joining these machines into the Active Directory is becoming a standard process. However, Linux desktop machine are not yet commonly deployed within organizations. The addition of this option might be a possible reason to move ahead and starting deploying Ubuntu desktop through their networks.
This post will quickly go through the setup process of Ubuntu 20.10 (Desktop edition) and join the machine into an existing Active Directory infrastructure. The process is quite straight forward as you will see…
Step by Step Installation Process
Going through the Wizard
Step 1 – Download the iso image from the Ubuntu web site
Step 2 – Attach the iso to the virtual machine where you want to deploy Ubuntu or burn iso into a cd or make a bootable usb stick
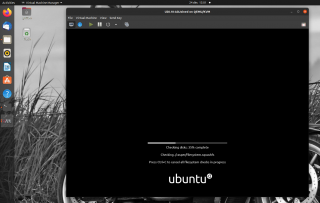
Step 3 – Startup your machine. As you can see on the screenshots, we will be using KVM Virtual machine on top of our Ubuntu 20.04 desktop instance (:-)). Ensure that you are booting from the cdrom or usb stick and you should see a screenshot similar to this….
Click on Picture for better Resolution
If everything is ok, you will get notified that no errors have been found
Click on Picture for better Resolution
You will see the new Ubuntu logo spinning animation while the “Ubiquity” installer is loading….
Click on Picture for better Resolution
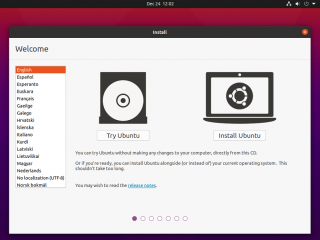
Step 4 – In the Welcome screen, you can decide to Try Ubuntu or Install Ubuntu.
If your machine is configured with DHCP settings and they are pointing to the Active Directory DNS server, you can simply press the install button. If you need to perform some configurations related to IP address (i.e. static vs DHCP) or you need to specify manually the Active Directory DNS Server, Press the option Try Ubuntu
In our situation, we had to go to the “Try Ubuntu” mode first in order to configure accordingly IP settings and more importantly the DNS server where to connect to.
Click on Picture for better Resolution
In “Try Ubuntu” Mode, you will have access to the Gnome Desktop and from there, you can perform the needed configuration and access network settings if you need to update them.
Click on Picture for better Resolution
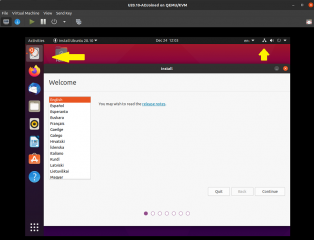
Step 5 – When changes are performed (and applied accordingly), you will be able to launch the Ubiquity Installer by clicking on the icon on the desktop or dock bar. The Welcome page will appear. Select the Language to be used and press Next to proceed with the installation
Click on Picture for better Resolution
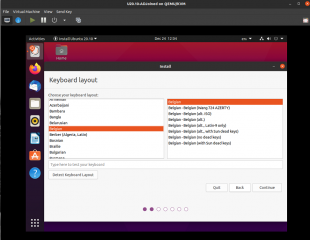
Step 6- In the keyboard layout, select your keyboard and Press Next
Click on Picture for better Resolution
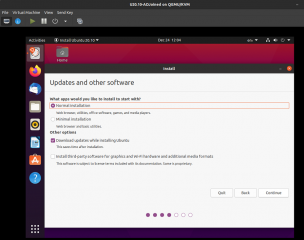
Step 7 – In the Updates and Other Software page, select your preferred options and Press Next
Click on Picture for better Resolution
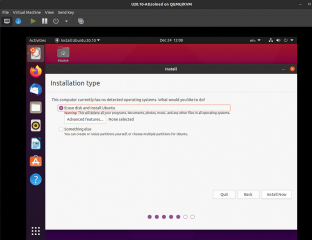
Step 8 – In the Installation Page, Select the default option (as we assume that you have performed a brand new installation) and Press Next
Click on Picture for better Resolution
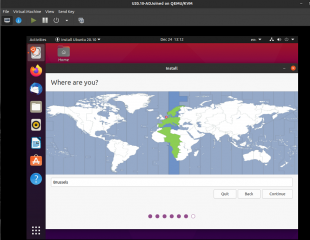
Step 9 – In the Where are you ? page, select your time zone and Press Next
Click on Picture for better Resolution
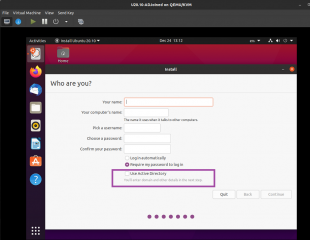
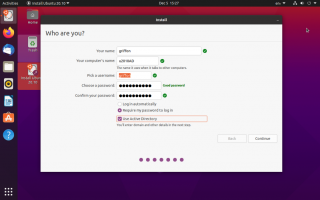
Step 10 – In the Wo are you ? page, provide the information of the local account that will access the Ubuntu machine at the end of the process. Note the additional option at the bottom of the form. As you can see, there is indeed a new option that would allow this computer to join the Active Directory domain. When this computer will be join to AD, Active Directory USers accounts could then be used to log into this Ubuntu machine
Click on Picture for better Resolution
Joining Active Directory From the Ubiquity Installer
Now that we are aware of the option, we can indeed join this machine into our Active Directory domain. As a reminder, we had to configure our Ubuntu desktop machine to point to the correct DNS server in order to retrieve the necessary information about the Active Directory we are about to join…
Step 11 – So, Let’s fill in the required information and be sure to tick the box “Use Active Directory” and then Press Next
Click on Picture for better Resolution
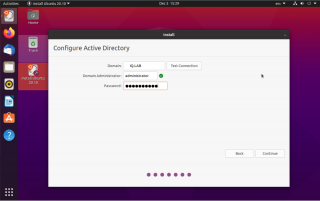
Step 12 – A new wizard page called Configure Active Directory will be displayed. In this page, you have to provide the AD Domain name, and user account that has the rights to join the domain. You have also the test connection button that will validate your settings. If the information provided are correct, after pressing the test connection button you should see the green flag on your screen…. Press Continue
Click on Picture for better Resolution
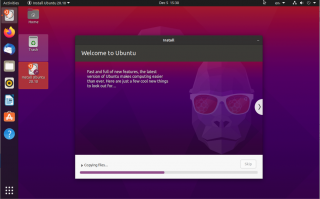
Step 13 – The wizard will start the installation and you see a dialog box showing your installation progress
Click on Picture for better Resolution
At the end of the installation process, you will be requested to restart your computer. Proceed with the instructions and reboot the machine.
Authenticating against Active Directory
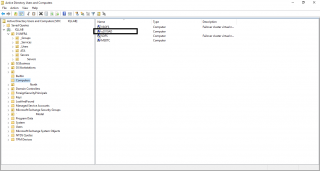
Before authenticating against your Active Directory server from Ubuntu Desktop machine, we will first check if a computer account has been created for the newly deployed Ubuntu machine. So, if you open your Active Directory and browse to the Computers container, you should see that a new computer account has been created for your Ubuntu machine. This is cool indeed. By default, the computer accounts will be created in the Computer Containers. If you need to have the computer object located somewhere else in Active Directory, you can probably pre-stage the account in the correct location and the Ubuntu Wizard would be able to retrieve the information….
Click on Picture for better Resolution
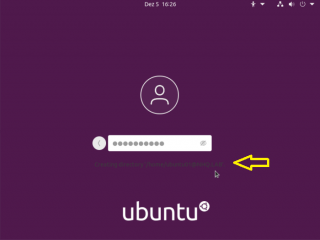
Now, it’s the big moment. We want to login in our Ubuntu machine using an Active Directory account. At the login screen of Ubuntu, you will not see any information about Domain membership. You need to click on Not Listed link in order to be able to provide AD Domain credentials
Click on Picture for better Resolution
After clicking on the link, you will be able to enter your AD Domain User account information. We have used the UPN format (which looks like an email address). Press Next
Click on Picture for better Resolution
Then, you will be prompt for a password. Press Enter or click on the Arrow to initiate the login process and wait for login process to complete.
Click on Picture for better Resolution
If the information provided are correct, you will see that the login process will be executed. You can even see on the screen that some activities are taking place in the background
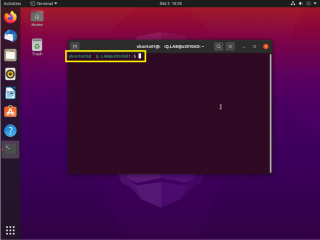
To assess and check that you are indeed authenticated against Active Directory, we can perform some basic tests. First, open a Terminal console and check the user name information provided. Based on the information displayed, it seems that we are indeed using an Active Directory User Account
Click on Picture for better Resolution
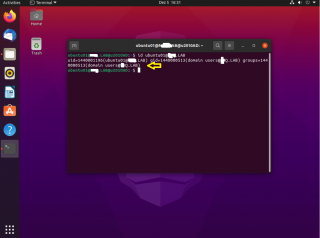
Another test would consists of issuing the following command to see our group membership
id <%userName%>
As you can see on the screenshot below, we are members of some Default Groups in Active Directory domain (i.e. Domain users…)
Click on Picture for better Resolution
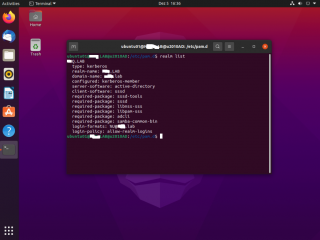
Finally, we can check the Kerberos configuration loaded on our Ubuntu workstation by issuing the following command
realm list
Click on Picture for better Resolution
You can see that indeed configuration file is showing us that we will be using and consuming services and information from the Active directory Domain that we have joined during the Ubuntu Setup.
Final Notes
This is it for this post !
We have been able to demonstrate how easy it was to have Ubuntu Desktop computers joining an Active Directory Domain. Once joined to the Active Directory domain, all AD users would be able to login into the Ubuntu machine and perform their work. This “small” feature added in Ubuntu 20.10 really simplify the configuration process and push forward the interoperability possibilities between Windows world and Linux world. We have not performed extensive testing on how Ubuntu interact with Active Directory. This was not the purpose of the post but we might come back to this topic if we start implementing this some environments.
Since we have an Ubuntu machine joined to an Active Directory domain, we can now test and provide some step by step guides on how to use LDAP Authentication when using the xRDP software solution. Indeed, we have noticed that more and more people are trying to use xRDP software while using LDAP authentication mechanism and fail to connect to their Linux remote desktop session. We will be providing some guidance about this specific scenario in one of our future posts
Till next time
See ya






Is it possible to connect to an AD domain after 20.10 has already been installed?
Thanks.
@Dan,
yes it’s possible. You will have to install additional packages and perform the configuration activities. Please have a look at
https://discourse.ubuntu.com/t/service-sssd/11579
and see if this can help you
Till next time
See ya
What are the concrete benefits to join the windows domain? Today, even if I authenticate with my local Ubuntu user I’ve always been able to get access to shared domain resources specifying the username and password (of my windows domain account) at the first access.
In addition, would I be always able to use the sudo command and get admin privileges on my machine?
Would windows domain administrators be able to authenticate into my machine?
Thanks
@Fab,
Joining Active Directory would provide single sign on and centralized user management. If you have 10 Ubuntu machines not joined into the domain, you will have to login to each of them using an local account and password and the local account might not exists on all your machine. With active Directory, using the same account, you will be able to login to your ubuntu or any other ubuntu joined to the domain and access with no credentials prompt to resources that are made available to you in Active Directory. Using Active Directory, you can deploy some specific settings through Group Policies that can be then enforced on your UBuntu machines (like Cache credentials, login rights…)
If configured accordingly, yes you will be able to perform sudo operations
If configured accordingly, yes, domain admins can login into an Ubuntu machine. However, please note this is a security concerns and you should avoid using Domain admins account to be logged in on end user workstations (valid for ubuntu and windows machines)
Hope this help
Till next time
See ya
Thanks for this info – was unaware of the option to join during install. But Ubuntu is imposing a requirement for Domain Administrator “Must start with a lower-case letter”? What? Why? I can’t proceed beyond this.
Has anyone else perhaps run into this? I find surprisingly little via google search. Our domain has a convention for admin names beginning with __double-underscore. This unfortunately breaks the installer; I can’t figure why this restriction was even added
@Joe P,
Thank for visiting our blog and sharing your findings… As we have used the standard admin account, we have not noticed this possible issue. It should be possible to create another admin account or use another account that has the right to join the domain and have it working…. Again, will need to test and validate this..
will come back to you with some more info a little bit later on…
Till next time
See ya
@Joe P,
coming back to you… we have done some tests with Ubuntu 21.10 and we were able to join the ubuntu machine using basically any accounts (with proper rights)… We have renamed the domain admin account and we were able to join the AD Domain with no problems.. AD Object created accordingly and it basically works… So, your problem might not be related with the case sensitive situation you are mentioning
Hope this help
Till next time
See ya