Hello World,
In our previous post, we have described the common approach to have xRDP working with Ubuntu systems. The common approach consist of installing an alternate Desktop and use this desktop environment during the remote session connection. In another post, we have been able to demonstrate that it was possible to perform a remote connection against the Unity Desktop directly with no need to install any additional desktop environment.
In this post, we will see if the same approach would be possible. We will see if can perform a remote session against the Unity Desktop.
Note :
This approach is still somehow experimental and small issues might still popping up. so keep that in mind and perform this installation in a test environment. Use this procedure at your own risk….
xRDP Remote session against Unity Desktop
Assumptions
When we have performed our installation & testing, we have been using the following infrastructure
- We have performed a Fresh installation of the Ubuntu 16.10 Released
- We have performed the installation on a Virtual Machine running on Hyper-V Server and Virtualbox
We are assuming that
- Your Ubuntu machine is connected to Internet (so you can download the necessary packages for the installation to occur). If you are not connected to internet, you can still manually download the necessary packages and copy them to your Ubuntu machine
- You have your Ubuntu machine installed,configured and have the latest patches installed…
- Your Ubuntu computer is running 16.10
Installation Process
Step 1 – Install XRDP Package from Ubuntu Repository
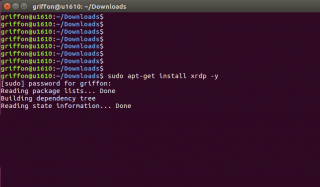
A standard installation for us means that we will be using the xrdp package available within the Ubuntu repository. To install the xrdp software from Ubuntu repository, you will need to issue the following command in a terminal.
sudo apt-get install xrdp -y
Because of the sudo command, you will be prompted for a password. After entering your password, your xrdp installation will start. Wait for completion
Click on Picture for Better Resolution
The version of xrdp package in Ubuntu 16.10 is 0.9.0. By default, you do not need to install any vnc server anymore as the xrdp package will use the xorg rdp new driver to accept the connections.
Step 2 – Configure the xRDP keyboard Layout
By default, xrdp remote session would be using the English layout keyboard. To try to set the proper keyboard layout within your remote session, you can execute the following commands. This step might not be necessary in the future. It seems that xRDP tries to use your current keyboard.
# Set keyboard layout in xrdp sessions
cd /etc/xrdp
test=$(setxkbmap -query | awk -F":" '/layout/ {print $2}')
echo "your current keyboard layout is.." $test
setxkbmap -layout $test
sudo cp /etc/xrdp/km-0409.ini /etc/xrdp/km-0409.ini.bak
sudo xrdp-genkeymap km-0409.ini
Note :
In the past, the xRDP login box was also using by default the En-Us keyboard layout. This seems to be changed and the proper keyboard layout is detected now.
Step 3 – Reconnect to the Same Session
No additional actions are required anymore in order to be able to reconnect to the same session.
Test your Remote Desktop Connection
Important Note :
Before trying to remote desktop into your ubuntu machine, you have to ensure that the user account you are using is not logged in the system. The user that you want to use to make the remote connection must not be logged on the system.
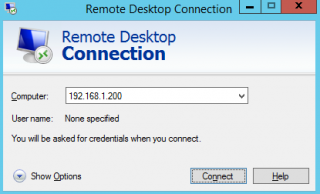
At this stage, you should be ready to test your connection. Get the ip address or the hostname of your ubuntu machine and fire up your mstsc.exe client on a windows machine.
Click on Picture for Better Resolution
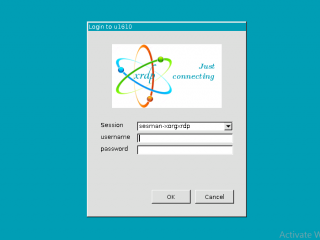
In the xRDP Login page, provide your credentials and accept the default settings presented to your for the session choice. You should see the option sesman-xorg-xrdp
Click on Picture for Better Resolution
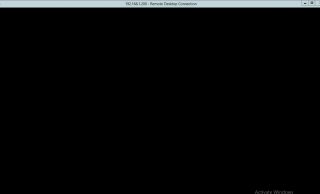
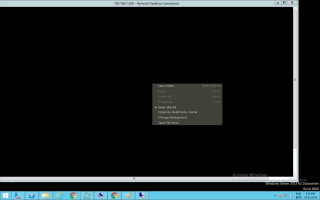
You will need to be patient. When your connection, you will see a gray screen, then a black screen like the one below…
Click on Picture for Better Resolution
When you see a cross cursor, this means that your session has been established but you still do not have the unity desktop started. Right-click on your desktop and select open Terminal option
Click on Picture for Better Resolution
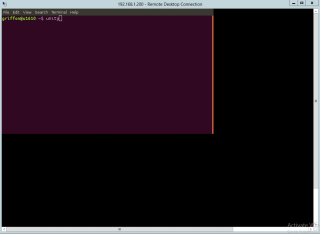
In the Terminal that opens, type the command
unity
Click on Picture for Better Resolution
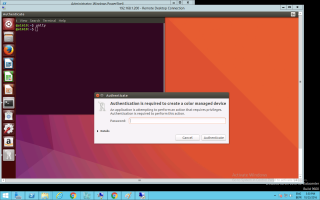
After some screen flickering, you will see your Unity Desktop presented to you. However, you might get prompted with an authenticate popup. At the moment, click cancel on it (we will provide the fix later on)
Click on Picture for Better Resolution
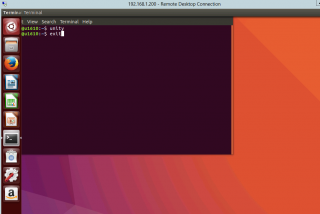
At this stage, your terminal box is still open and you cannot move it anywhere. Type exit and the Terminal will close.
Click on Picture for Better Resolution
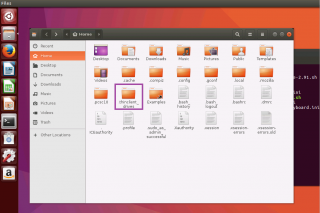
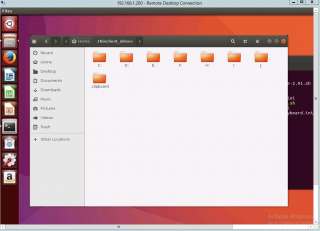
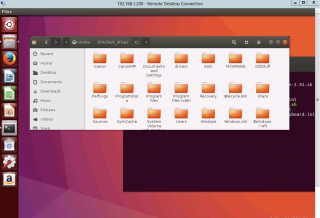
At this stage, you can start working with your Unity Desktop through the Remote Session. Out-of -the-box, you should be able to use Drive Redirection and Clipboard function within your remote session as you can see in the following screenshots below
Click on Picture for Better Resolution
Click on Picture for Better Resolution
Click on Picture for Better Resolution
Detected Issues (so far…)
First Login Experience
The first time you will login into your remote session you will need to manually call the unity Desktop. At this stage, we didn’t find any workarounds. Each time you logout from your Remote session, the next time you login into it, you will see the black screen. You will need to open your Terminal and issue the unity Command.
If you have disconnected your session, you will be able to reconnect and have direct access to your Unity Desktop
Logged Users locally and remotely
This sounds like a major issue. The user that will perform the remote session cannot be logged on on the physical machine. If this is the case, when you trying to perform the remote desktop operation, your session will be disconnected after a few seconds. If a user is logged on via remote desktop to the system, the user will also not be able to log into the local system. You will loop into the login screen.
Again, at the moment, we didn’t look into this issue. To be safe, I would recommend to create an additional user on the system that can be used to terminate sessions in case you need to access your system in a way or another
System Settings Not working in Remote Session
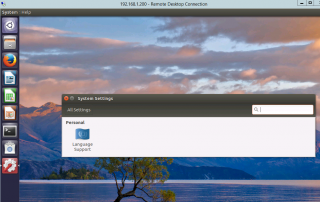
We have not tested all the applications and settings within the remote session. However, be aware that some stuff might not work. we cannot change desktop background while connected remotely. Moreover, it seems that the system settings application is simply not available when remotely connected through xrdp
Click on Picture for Better Resolution
As more and more people try to use this approach, we might find out more issues and solutions…
Performance
I might have a slow machine in my test lab but the performance are not that great. It take some time to open apps or to simply refresh the screen. The behavior is kind of sluggish… Again, this could be due to the virtual machine we are using which has really low specifications…
Authentication required to create color managed device error
When you login into your system via remote session, you will see this message popping up. You can simply cancel and you will be able to proceed till the next time you login and start a new session.
Click on Picture for Better Resolution
To avoid this prompt, we will need to change the polkit configuration. Using admin privileges, create a file called 02-allow-colord.conf under the following directory /etc/polkit-1/localauthority.conf.d/
The file should contains the following instructions and you should not be prompted anymore with such authentication request while remoting into your system
polkit.addRule(function(action, subject) {
if ((action.id == “org.freedesktop.color-manager.create-device” ||
action.id == “org.freedesktop.color-manager.create-profile” ||
action.id == “org.freedesktop.color-manager.delete-device” ||
action.id == “org.freedesktop.color-manager.delete-profile” ||
action.id == “org.freedesktop.color-manager.modify-device” ||
action.id == “org.freedesktop.color-manager.modify-profile”) &&
subject.isInGroup(“{group}”)) {
return polkit.Result.YES;
}
});
Working Stuff
Indicator Panels & logout
In our previous post about Unity and Remote Desktop, the unity indicator panel were not working really well. Implementing some workarounds, it was possible to display the indicator panel but the logout functionality was not working at all. Using the approach described above, the indicator panel is showing and you can basically perform a standard logout action… This is working out of the box.
Final Notes
This is it for this post. In this post,we have demonstrated that even if it’s not straight forward and the user experience might be a little bit different, it’s possible to have a remote session directly to the Unity Desktop interface. Most of the features are working.
The only annoying part is that you cannot have users logged in on the system directly or via remote session in order to gain access to the system. It’s like xRDP is not creating a new session but tries to takeover the existing one which then break something in the process.
Hope you find this post useful
Till next time
See ya
Currently working with 16.04, but have a question about sesman-xorg-xrdp. Which encoding library does it use? (libvnc.so, libxup.so, librdp.so, etc). And is this pushing the physical display, or creating a virtual one like libxup.so usually does?
@Tommy,
I do not know which encoding library is used for the sesman-xorg-xrdp. Checked in the xrdp.ini file to see if you can see the info about the library
for the display, I would have to check as well.. I thought that it was creating a new virtual desktop but given the issues we have encountered; we have to investigate a little bit more
Till next time
see ya
Just FYI, wanted to let you know I got it working using your instructions.
I’m running Ubuntu 16.10, clean install, inside Hyper-V running on Windows 10.
I did notice it running much slower than just running the machine in Hyper-V, so I think for now I’ll RDP to my Win 10 box, then run it inside there. But your instructions do work.
With the love Microsoft is now showing for Linux, and the wide spread install base of the Windows RDP, I’m surprised this is still an issue. Hopefully Microsoft (or someone) will aid Canonical in getting this looked at.
@ArconeCode,
Thank you for the feedback. Indeed, using unity is a little bit sluggish and we hope that indeed somebody will tackle this RDP situation. xRDP is doing a great job but I think there is a need for a really good solution that could allow strong interoperability between Windows and Linux…
Till next time
See ya
try
XDG_CURRENT_DESKTOP=Unity unity-control-center
It works for me.
@Martian
we will surely try this…Thank you very much for this useful information and sharing this with our readers
We alwasy happy to discover new things and share this out 🙂
Till next time
See ya
Hi, do we have any idea about boring sound from Ubuntu to Remote desktop?
@Jon,
We are working mainly with virtual machines where no sound capability is present… You might need to configure either no redirection the sound to your system or need to check that sound pulse-audio component is compiled accordingly
Hope this help
Till next time
See ya