Hello World,
It has been some time since I have written something about xrdp. Recently, the posts related to xrdp attracted some new users and they came up with new questions,comments, remarks and some requests. One question was about using lxqt (the next version of the LXDE Desktop) in conjunction with xrdp. So, this post will describe in details which operations need to be performed in order to have LXQT desktop installed on Ubuntu 14.10 and have it working with XRDP.
If you want to use another desktop environment than LXQT with your XRDP session, please have a look at our previous posts :
- Ubuntu 14.10 – How to install XRDP and have it working (describe mate-desktop,xfce and LXDE installation on ubuntu 14.10)
Note :
These posts are also available for Ubuntu 14.04. We recommend to read the post mentioned above as it contains the most recent information.
- Ubuntu 14.04 – Gnome Classic alike Desktop for XRDP : MATE-Desktop
- Ubuntu 14.04 – LXDE Desktop Alternative for XRDP
- Ubuntu 14.04 – How to install xrdp in Ubuntu 14.04 (to use xfce desktop interface)
So, if you are ready, let’st install XRDP pacakge and use the LXQT as default desktop environment during your XRDP remote session.
Installing XRDP and LXQT on your Ubuntu machine
Install XRDP Package from Ubuntu Repository
In this post, we will be installing the standard xrdp package from the Ubuntu Repository. In order to perform the installation of the xrdp package, you will login into your ubuntu 14.10 machine.
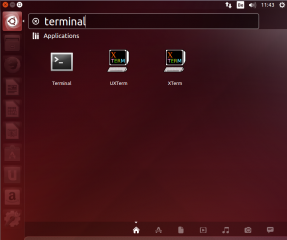
Using the Dash button, in the search box, type Terminal
Click on Picture for Better Resolution
Click on the terminal icon and the Terminal console will open
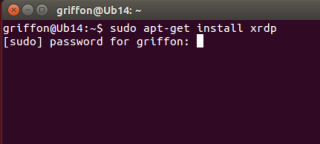
In the Terminal, type the following command
sudo apt-get install xrdp
You will be prompted for your password
Click on Picture for Better Resolution
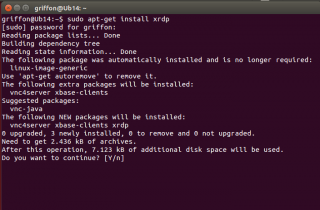
You will be then informed about the package size. To proceed with the installation, press Y
Click on Picture for Better Resolution
Wait for the completion
When done, you need to install an alternate desktop environment. In our scenario, we are using lxde
Installing the LXQT Desktop environment
At time of writing this post, the latest LXQT version released was version 0.8. This version does not seem to be already included in the default Ubuntu repository. This means that you will need to add repository source on your ubuntu machine.
To add the LXQT repository to your ubuntu machine, from the terminal console, you will need to issue the following command :
sudo add-apt-repository ppa:lubuntu-dev/lubuntu-daily
When this is done, you can start installing the lxqt packages on your machine. From the terminal console, issue the following commands :
sudo apt-get update
sudo apt-get upgrade
sudo apt-get install lxqt-metapackage lxqt-session lxsession
Wait for the process to complete.
Checking the LXQT Desktop interface
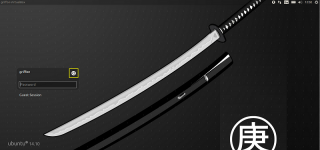
To ensure that you have installed the LXQT interface and if you wanna see how it looks like, you should logoff from your Ubuntu machine.
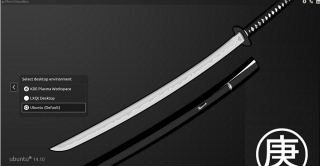
At the login page, click on the Ubuntu logo in the login box.
Click on Picture for Better Resolution
after clicking, you should see a menu similar to the one on the screenshot where you can select a list of alternate desktop interfaces installed on your system
Click on Picture for Better Resolution
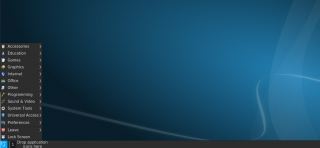
In our scenario, we will select the option LXQT. When you have made your choice, you can enter username and password and login into your Ubuntu machine. The LXQT desktop interface should look like something captured on the screenshot below
Click on Picture for Better Resolution
Configure xrdp to use LXQT desktop environment
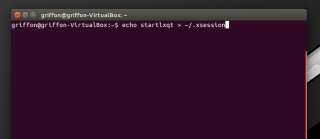
At this stage, you have to configure your Ubuntu machine in order for xrdp to know that the LXQT desktop will be used instead of the Unity. To configure this, from the terminal console, you will issue the following command
echo startlxqt >~/.xsession
Click on Picture for Better Resolution
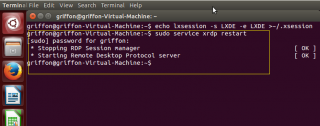
Restart the xrdp service by issuing the following command
sudo service xrdp restart
Click on Picture for Better Resolution
Note :
This configuration will only allow one user to connect to XRDP and use the LXQT desktop environment. This would be the user for which you have updated the xsession file. If you need to have all of your users to perform remote desktop session through XRDP and to load the LXQT desktop environment, you should update your /etc/startwm.sh file. We have described the process in the following post
Configuring the XRDP keyboard layout
By default, the xrdp login screen is set to use an english keyboard layout. If you are using another keyboard layout, you would need to configure the XRDP server in order to use your preferred keyboard layout. The procedure below will update the keyboard layout used during the xrdp sessions. In order to configure XRDP keyboard layout (the , perform the following actions :
Step 1 : You go to the /etc/xrdp directory
Step 2 : you issue the command setxkbmap -layout <%your layout%> to define which keyboard map/layout to use
Step 3 : create a copy of the km-0409.ini file into the same directory. It seems that this is the default file used by xrdp to define the keyboard layout. You will need to use sudo in order to be able to write into the directory
Step 4 : Check that you have a backup of your file by typing the dir or ls command
Step 5 : update the file by issuing the following command sudo xrdp-genkeymap km-0409.ini
Test your xrdp connection
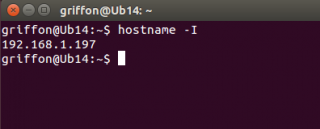
At this stage, you should be able to perform a remote desktop session to your ubuntu machine and have the LXQT desktop loaded. To test your xrdp solution, find the ip address of your linux machine (or use the name if you have DNS Infrastructure in place). To find the ip address, issue the command
hostname -I
Click on Picture for Better Resolution
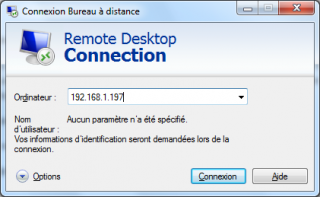
Now go to your windows machine, start remote Desktop client and enter the ip address/name of your ubuntu machine
Click on Picture for Better Resolution
You should see then the login screen of xrdp presented to you. Remember that by default the keyboard layout is set to English. If you have not changed your XRDP keyboard settings (see procedure above) to your preferred keyboard layout, you will need to ensure that the password entered is following the english keyboard layout.
Enter your username and password and Press OK
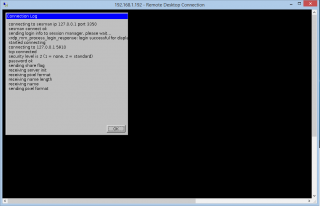
You will see a dialog box showing the login process
Click on Picture for Better Resolution
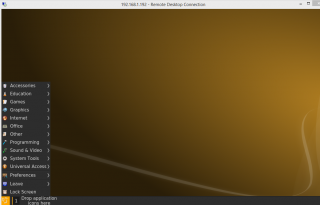
If everything is configured correctly,you should see your LXQT desktop loading and you should be able to perform you work through this desktop environment.
Click on Picture for Better Resolution
Reconnect to the same session throug xrdp
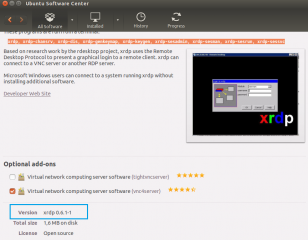
If you are using Ubuntu 14.10 or if you are using the XRDP package 0.6.1-1, there is no need to perform any additional configuration in order to reconnect to the same session.
Click on Picture for Better Resolution
As described in our previous posts, the xrdp packages have been updated and now out-of-th-box, you can indeed reconnect to the same sessioin. To have more information about that, please check the following posts :
- XRDP – Reconnect to existing sessions made easier – New xrdp package on Ubuntu repository
- XRDP – Quick Demo Installation & Reconnection
Final Notes
You did it ! You have installed LXQT desktop and now you can use your XRDP software in order to remote into your Ubuntu machine.
There might be other desktop interfaces that might be useable with XRDP and Ubuntu. We have (and will not test) all of them. If you have another Desktop installed on your Ubuntu and you have the XRDP solution working. Drop us a note, a link… This might be useful for other people
That’s it (for this easy) post
Till next Time
See ya
