Hello World,
I’ve recently received the question about a how to resize the virtual disk of a virtual machine. In this previous post, we already talked about this topic. At that time, we discussed on how to resize disks when the vm files were located on local storage. In this post, we will see how you can resize virtual disks of your virtual machines if the VM files are located on a LVM group.
LVM Groups in Proxmox VE
Based on the proxmox ve wiki pages about storage model used by Proxmox VE, we know that the preferred storage model is to use LVM Groups. When working with LVM Groups, you can use 2 different configuration. You can use local storage to create your LVM Groups (aka LVM groups with Local backing). If you have an iscsi infrastructure, you can use the network storage infrastructure to build up your LVM groups as well. This configuration is often called LVM Group with Network backing.
In this post, we will quickly demonstrate how to create these LVM Groups with network backing. Based on this configuration in our Proxmox VE infrastructure, we should be able to demonstrate how to achieve in an elegant way the resizing of a virtual disk. Let’s start….
Creating your LVM Groups with Network Backing
We assume that you have already an up and running iscsi infrastructure ready to be used by the Proxmox VE infrastructure. We assume that a iscsi target is already available and that we just need to connect to it from our Proxmox VE infrastructure.
Step 1 – Connect to the iSCSI Target
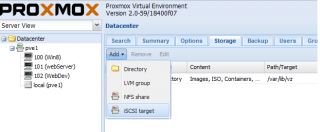
When you are ready with your iscsi infrastructure, you can open the Proxmox VE web interface and click on the Datacenter node in the Tree. In the right pane, you will see the Storage Tab. In this page, you will see the “Add” button at top left. Click on it and you will see a dropdown menu. From the menu, select the ISCSI target.
Click on picture for Better resolution
You will see a small dialog box form similar to the following screenshot
Click on picture for Better resolution
You will need to enter the required information.
- in the ID field, provide a name that will help you identify the iSCSI target you are about to connect to
- In the Portal field, provide the ip address of the iscsi appliance/server that will be serving the iscsi disks
- In the target field, you will see the availabe iscsi target that you can connect to. Select the appropriate one
- Ensure that you uncheck the box “Use LUNs direclty”. The checkbox is enabled by default
Press Add when you are ready. Within the Web Interface, you should see an additional storage item displayed.
Click on picture for Better resolution
Step 2 – Create your LVM Group on top of the iscsi target
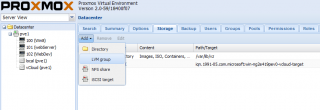
Again, from the storage tab, you will click on Add. From the drop down menu, you will select the option LVM Group.
Click on picture for Better resolution
The following input box will be displayed.
Click on picture for Better resolution
Again, you will have to provide the correct information.
- In the ID field, provide a name that can help you identify this LVM Group.
- In the base storage, from the dropdown box, select the iscsi target you’ve just created in the previous step
After selecting the base storage, you will see 2 additionial fields displayed in the dialog box.
Click on picture for Better resolution
- Select the base volume to be used
- Provide a name for the volume group
- ensure that you’ve ticked both checkboxes in this wizard.
At the end of the process, within the web interface, you should see that the LVM storage object has been created.
Click on picture for Better resolution
Creating your Virtual Machine and store it on the LVM group
Here, we will simply create a virtual machine that will be located on the LVM Group we have just created in the previous step. We will create a virtual machine with a small disk. In the following steps, we will increase the size of the disk.
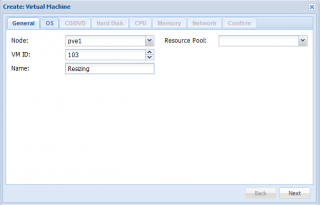
To create your virtual machine, from within the Web server, you click on the Create VM button in the top right corner of the interface. The Create VM Wizard will start.
In the general tab, Provide the requested information. Press Next
Click on picture for Better resolution
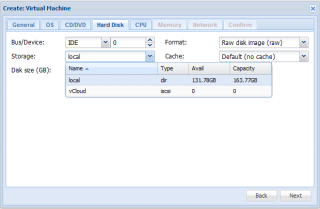
In the Hard disk page, in the storage field drop down menu, ensure that you select the LVM Group. Specify the size of the hard disk. Accept default configuration
Click on picture for Better resolution
Accept default configuration in the rest of the Wizard. In the confirm tab, click confirm and the virual machine will be created for you. You can review the configuration of the virtual machine within the web interface (see screenshot)
Click on picture for Better resolution
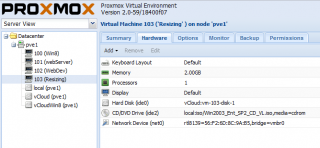
We have installed Windows 2003 as operating system on the newly created virtual machine. The following screenshot shows that the virtual machine is using a 12-GB hard disk. We will need to increase the size
Click on picture for Better resolution
Resizing the disk of the Virtual Machine
That’s the part that you are probably interested in. As you will see the process is quite simple. Most of the operation are to be performed from the command line. So, connect to your proxmox console.
Step 1 – Shut down the virtual machine
As a best practice, ensure that the virtual machine is turned Off before resizing the disk.
Step 2 – Get information about your LVM Groups by issuing the following command
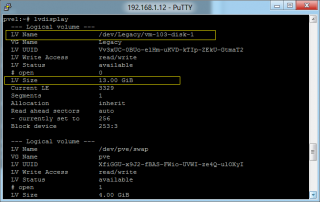
- lvdisplay
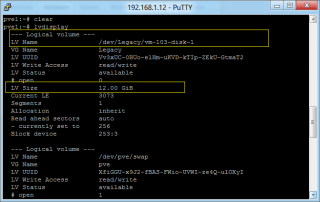
From the output, you have to find out on which LV your virtual machine is located. In my example, the virtual machine that needs to be reconfigured is stored on the LV Name /dev/Legacy/vm-103-disk-1. (see screenshot above). Write down the LV Name because you will need it later. Note also the size of the disk : 12 GB
Step 3 – resizing the disk of the virtual machine
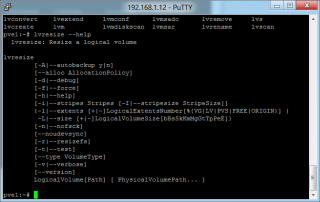
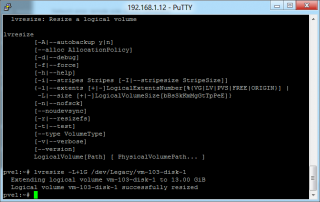
Using the lvresize command, you will be able to increase/decrease the size of the hard disk. If you type lvresize –help, you will get an idea on how to use it
Click on picture for Better resolution
Let’s assume that in our example, we need to increase the size of hard disk by 1 GB, you will then type the following command
- lvresize -L+xGB <LV NAME>
- lvresize -L+1GB /dev/Legacy/vm-103-disk-1
Step 4 – Update the information about the size
- lvchange –refresh /dev/Legacy/vm-103-disk-1
If you issue again the command lvdisplay, you should see that the size of the disk has increased passing from 12 GB to 13 GB
Click on picture for Better resolution
At this stage, the disk has been resized. You need to start up your virtual machine and perform changes within the operating system
Step 6 – resize the disk size within the Operating system.
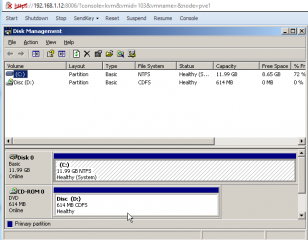
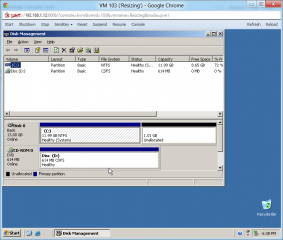
If you open the disk management, you will see that the size of the hard disk has been increased.
Click on picture for Better resolution
Within the operating system, you will need to perform the additonal operation as required. You can create a new partition using the additional disk space created or you can increase the size of the existing partition. To resize an exisiting partition, you can follow the procedure that we have decribed in this post
Final Notes
And Voila ! That’s as simple as that. Proxmox VE and LVM technology provide enough flexibility in order for you to resize in an easy way to resize virtual machines hard disks. As far as I know, this is the easiest (fastest way) to resize disk files located on a LVM group storage. Other options/ways exists (such as the dd command) but these methods might not be as effective as the lvresize command.
Till Next Time
See ya
P.S. Dave, I hope this answer your question : -)
Reference & additonal information: http://pve.proxmox.com/wiki/Storage_Model





Excellent post! Thank you! 🙂
– – Dave
What if the the storage is NFS share. I have iomega storcenter ix4-200d. I have created an NFS storage there. The qcow2 disk for my windows 2008R2 server is residing on the iomega NFS storage. It is working great.
If I want to increase the size of my disk, how do I do it.
Thanks in advance.
Hello Kumar,
sorry for the delay…..
You would use exactly the same procedure as described here and here for part II
You would need to first find where your image is located. From the console, you type
mount and you will see where the nfs share is mounted on your system
you change dir to this location up to the image you want to resize
At this level, you simply use the qemu-img command line to resize as required
Hope this help
See ya around
Idea for a new theme: how to copy/convert .vdi or .vmdk or raw file to Logical Volume for proxmox2
Interesting points: logical volumes for virtual machines have LV Status: NOT available in output from lvdisplay. This prevents you from access.
Hello Angel,
I’ll first take some holidays :-p and then I’ll have a look to your request…Might become a new post indeed
Till next time
See ya around
Thank you for this post it is very useful. However when I extend the lvm for a linux vm I do not see that the drive extends within linux. Can you pleae advise?
Thank you very much!
Hello There,
If I understand your question, you are asking how to increase the size of the disk inside the virtual machine, correct ? To extend the size of your disk, you can probably use the GParted Tool.
Depending of your Linux distribution, the tool can be already included or you will need to download the GParted iso and boot from it….You can have a look at http://gparted.sourceforge.net/screenshots.php
Hope this help
Till Next Time
See ya