Hello World,
In our previous post, we talked about deploying Office 2013 using MDT 2013. We have seen that the process was quite similar as the previous versions. The only main change is the way Office 2013 behaves after the installation.
Indeed, after the installation of Office 2013, the first time you run the application, you will get an annoying first Time RunWizard that will display 5/6 dialog boxes before you can start using your application. In our previous post, we have seen how you could use the Office Customization templates (in combination with MDT 2013) in order to avoid this first run time Wizard.
In our previous post, we mentioned that was possible to control Office 2013 behavior through GPOs. Some people asked me to describe this process simply because they have already deployed their workstations through the organization before checking the Office 2013 First Time Wizard Behavior. So, as a quick fix, you could use the GPOs to control the behavior.
Let’s go
Assumptions
In this scenario, we assume that you have an Active Directory and you are using GPOs. We assume that you have some experience with GPOS and the new ADMX Central Store Feature.
Central Store Explained
Quick Overview
If you have implemented group policies in a windows domain, you know that each gpo created in a domain are stored in the SYSVOL directory of your domain controllers. Until Windows XP, each gpo was containing a copy of the ADM files (which controlled settings you could configure on a computer). ADM files represents 4 MB in size. Imagine the impact on your domain if you have 1000 GPOs each containing these ADM files. ADM file tends to increase the size of the SYSVOL and can have an impact on your Active Directory Replication.
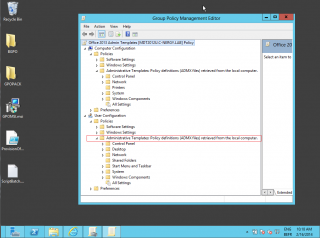
To overcome the adm file problem, since Windows Vista/Windows 2008, the new ADMX files has been introduced. By default, every computer would have a copy of the ADMX files stored locally in %windir%\policyDefinitions even on Domain controllers.
Click on Picture For better Resolution
In an Active Directory domain, in order to get always the lastest ADMX administrative templates, you can centrally store these files in your domain controllers. Microsoft offers a way to centrally manage ADMX files through the concept of Central Store.
The central store is simply a folder that you would create under your Sysvol folder which will contains only one copy of the ADMX files.
Creating Central Store (or Central Repository)
When using Active Directory Domain, in place of loading local ADMX files from your adminsitrative workstation, you can implement a Central Store or Central Repository location.
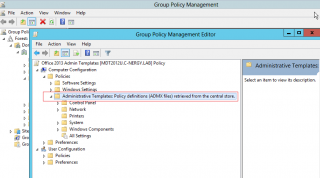
Basically, you will copy only once the content of the Local repository files into the sysvol folder of a Domain Controller (%WinDir%\SYSVOL\SYSVOL\%domainName%\Policies\PolicyDefinitions) with subfolders for all languages needed. The Central Repository will be then replicated between Domain Controllers. However, it’s recommended to load the ADMX Files on the PDC emulator given that the Group policy editor connect to the PDC emulator by default.
Click on Picture for Better Resolution
When Central Repository is used, local ADMX Files are not used anymore except if the central store becomes unavailable. You cannot use local and Central Repository at the same time. It’s one way or the other way not both of them.
Click on Picture for Better Resolution
Updating your Central Repository
With new releases of Windows, you will need to update your ADMX files in your central repository. In order to update your ADMX, you will need to download the latest ADMX files from Microsoft Web site. For example, if the release of Windows 2012 R2/Windows 8.1, Microsoft has released a new set of ADMX files.
To Update your Central Repository, simply download the ADMX files and copy them in your central repository. You will override the existing admx files with the new release and you should get the latest version installed.
Add the Office 2013 ADMX files to your Central Store
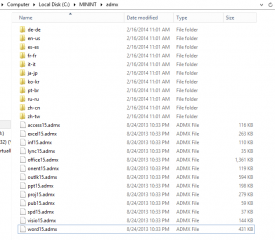
In the previous post, we have explained how to download and install the Office 2013 adminitrative templates. To add these ADMX files to your central store, you will simply copy the admx files into your central store folder.
Click on Picture for Better Resolution
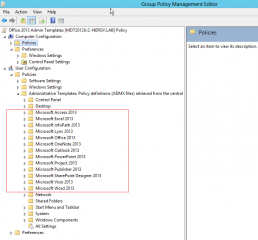
Once this is done, you can close and open again your Group Policy management console, edit the gpo you need and you will see that the new Admin templates for Office 2013 are available.
Click on Picture for Better Resolution
Configure your GPO for Office 2013
It’s time to configure your GPO in order to control your Office 2013 behavior. You will create a new GPO, edit it and you will select the appropriate options. You will see that the name of the options are quite the same as the one available in the Office customization Tool.
To control the first Run Wizard, in your GPO editor, expand the User Configuration > Administrative Templates > Microsoft Office 2013 > First Run
Click on Picture for Better Resolution
There you can configure your options
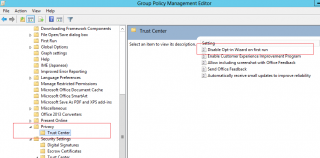
To control the first Run Update notification, in your GPO editor, expand the User Configuration > Administrative Templates > Microsoft Office 2013 > Privacy >Trust Center
Click on Picture for better Resolution
Select the Disable Opt-in item and configure it accordingly
Final Notes
Voila ! You have configured your infrastructure to use ADMX templates which allows you to control the office 2013 first run time behavior. I hope you enjoy this post. In the next post, we will start talking about Remote Desktop Services in Windows 2012 R2.
Till Next Time
See ya
