Hello World,
In the previous post, we have described the configuration changes needed in order to support certificate-based authentication in your infrastructure. This first part described mainly the implementation of the PKI infrastructure and changes needed to enable Active Directory Certification authentication.
In this part, we will focus on Exchange configuration changes in order to implement certificate-based authentication for Exchange ActiveSync and Outlook WebApp.
Let’s go !
Configure Exchange ActiveSync Certificate-based authentication
Surprisingly, the process is really straightforward once you have configured your IIS accordingly. To configure your Exchange CAS server to accept certificate-based authentication, you will perform the following actions
- Open you Exchange management console
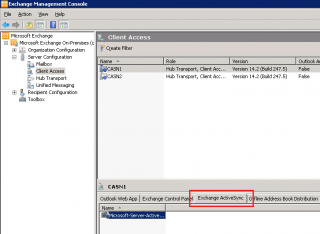
- Expand the Server Configuration Node and select the Client Access Server to be configured to accept certificates
- On the mid bottom pane, click on the Exchange ActiveSync tab
- Right-click on the folder object and select properties.
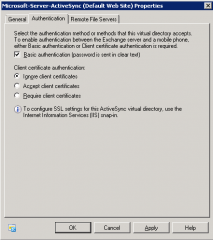
- In the properties dialog box, go to the Authentication tab
- The settings should look like something like this
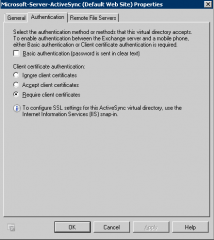
- You have to change your settings to the following. Remove basic authenticate and ensure that you have checked the option require SSL
As an additional check, you should verify that the settings you’ve selected in the Exchange Console are reflected in your IIS virtual directory.
- Go to the IIS, click on the virtual directory Microsoft-Server-ActiveSync
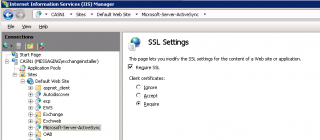
- In the mid pane, click on the SSL Settings
- In the SSL settings, ensure that you have something similar to the following
Note :
You will need to perform this operation on all your Exchange ActiveSync directories that will be providing certificate-based authentication.
Testing your ActiveSync configuration
How can you check that the certification-based authentication mechanism is working ? If you have the chance to have smartphones that can be used in conjunction with Exchange ActiveSync, you can simply confgure your device and configure your mailbox. Remember that you will need to import the user certificate into the device as well. If you are like me, and you do not have an advanced mobile phone, you still have some options left
- You can use an Windows Phone emulator to test your configuration. If I have some spare time, I might write a post on how to use Windows Phone emulator to test your Exchange Infrastructure.
- or you can use this wonderful tool (EAS MD) that I discovered while working on this project. This tool will be able to emulate ActiveSync connections from your computer.
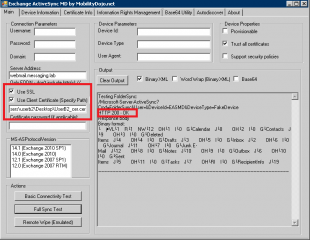
So, in this post, we will be using the EAS MD tool provided by the mobilitydojo.net web site. You download the tool double-click on it and you fill in the window with the correct information
In my test, I didn’t use user account and password. Insted, I have specify the location where the certificate for the user was located. (As a reminder, you need to have the public and private key installed on the computer where you perform the test). If you push the button full sync test, and if everything is configured correctly, the utility should return a HTTP 200 OK in the output section (see picture above)
If this is sucessful, you have achieved your goal i.e. Exchagne ActiveSync is using Certifcate based authentication and you will not be prompted for a user account and password.
Note :
Here, to perform the activeSync test, we have used the EAS MD desktop utilty version. There is also a web based version of the tool available at https://easmd.labs.mobilitydojo.net/
This is really a nice tool and will be definitly included in my toolbox list. Thank you mobilitydojo.net
Configure Outlook WebApp Certificate-based authentication
This configuration was not part of the initial post (and project where I was involved). But I think that demonstrating the certification-based authentication mechanism for Outlook Web gives a better understanding of what’s it’s happening. To configure this, we will need again to perform some changes in the Exchange Management console and change the Authenticatio options. Let’s try this…
- Open you Exchange management console
- Expand the Server Configuration Node and select the Client Access Server to be configured to accept certificates
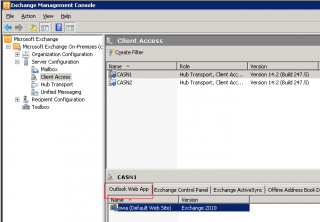
- On the mid bottom pane, click on the Outlook WebApp tab
- Right-click on the folder object and select properties.
- In the properties dialog box, go to the Authentication tab.
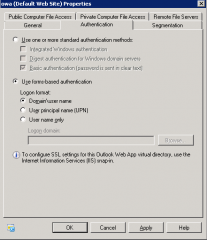
- The settings should look like something like this
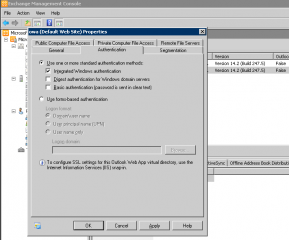
- You have to change your settings to the following. Remove basic authenticate and ensure that you have checked the option Integrated Authentication
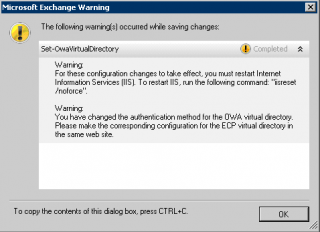
- You will be prompted with the message that you need to run the command iisreset /noforce on your CAS. Press OK
As an additional check, you should verify that the settings you’ve selected in the Exchange Console are reflected in your IIS virtual directory.
- Go to the IIS, click on the virtual directory Microsoft-Server-ActiveSync
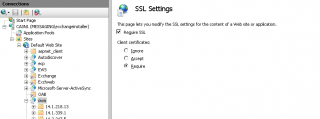
- In the mid pane, click on the SSL Settings
- In the SSL settings, ensure that you have something similar to the following
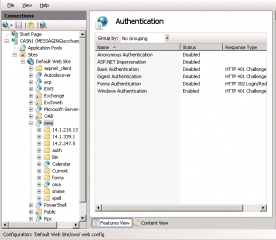
- Ensure also that in the authentication section, you have the option Windows authentication enabled
Important Note
You will need to perform exactly the same changes on the ECP Virtual directory in order to be able to access all the settings from your Outlook WebApp interface with no issues.
Test your Outlook WebApp Access
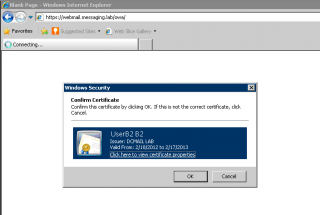
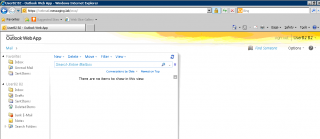
Open your Browser and provide the url of the CAS server where you need to connect to. If you perform this operation from the computer where public and private key are available, you will see the following screen
Yes, you are prompted to confirm that the certificate to be used is OK. Press OK. Immediately after, you will be redirected to your Outlook WebApp mailbox without any prompt for a user or a password.
You can have a look to your settings (in the ECP Panel) and you will see that you are able to access this page with no problems. You did it. You have configured Outlook WebApp to use certificates for authentication… Cool isn’t it ?
Final Words
In Part I and II of this post, we have seen that it’s not too difficult to configure certificate based authentication as long as you configure correctly your IIS Infrastructure. I might come back to this topic and explain a little bit more in details the certificates part and how you can export user certificates to other computers or devices.
Till Then
See ya

I am tired testing active sync with certificate based auth. I even MS and your article to setup my exchange and PKI but active sync with CBA doent work. But it work when I roll back the setting i.i. ignore certificate.
I am using internet PKI ent.
I get “the remote server returned an error: (401) unauthorized in exchange active sync MD tool
Hello Kewal,
Fist, I would need to ask you some basic questions. Are you using Exchange 2010 only or do you have other versions running in your organization ?
Can you check that the user you are using is indeed associated to a certificate.
Have you followed the step by step guide Part I and Part II that covers the Certifcate-Based Authentication. The error message you are getting let me think that the IIS part is not configured accordingly. Check which authentication options you are using. (basic,Integrated,AD certificate based…)
Cannot help you more than this
Hope this Help
Thank you very much for that article, it is really great 🙂 Everything works fine 😉
Hello Anthony,
thank you for the feedback… I’m glad to see that this blog can help people
cheers
till next time
see ya