Hello World,
In our previous post, we have quickly described the steps needed to perform a manual installation. The post also described the expected user experience when using such method. So, there is room for improvements. When using our standard installation scripts (see here), you can overcome this situation and provide a better user experience. As Canonical has released Ubuntu 19.04, we have decided to review the scripts code and see if some improvements could be achieved.
In this post, we will explain what the problem is when performing a manual installation. We will then explain how we used to fix this issue. Finally,this post will show a new way to fix this issue which seems to be better and reduce the code needed to reach our goal…
So, Let’s move forward…..
Overview
This section will quickly explain what the issue is and how to fix it. This section will explain how to manually fix it and then will provide two different ways to fix it that can be used in a script to automate the process.
Assumptions
For this post, we have make some assumptions.
- The Ubuntu 19.04 final release will be used
- At time of writing, all available updates were installed on the Ubuntu machine
- No alternative Desktop will be used. Default Gnome desktop will be the default desktop accessible via the xrdp session
- We are using the standard xrdp package available within the Ubuntu repository for Ubuntu 19.04
- Ubuntu machine has been installed as virtual machine using Virtualbox software
- xRDP packages have been manually installed
Look’n feel issue explained…
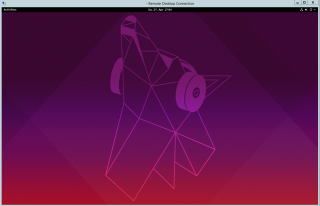
After performing a manual installation of xRDP with no additional post configuration, when a user perform a remote desktop connection, the Look’n feel of the remote session will not be similar to the one they get used to where the Dock bar is available and Ubuntu theme is pre-configured. As you can see on the screenshot below, the desktop interface while performing a remote connection is basically the Gnome desktop with no customization (no Dock visible).
Click on picture for better Resolution
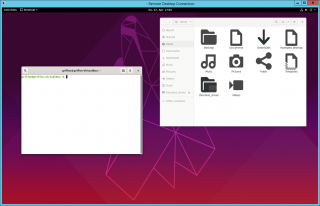
Opening the Terminal console, you see also that the Ubuntu Theme (i.e. Yaru by default in Ubuntu 19.04) is not used either. Opening Nautilus application, you can see that the standard icons set is not displayed….
Click on picture for better Resolution
This can been seen as a minor issue. However, users can be really disturbed by such situation and there is usually a need to provide a similar working interface so user acceptance is greater and such solution can be used more widely
How to manually fix it…
Fixing Ubuntu Theme
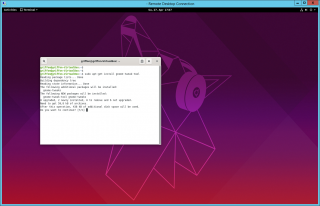
To fix this visual issue, you will need to install some additional packages so you can tweak your system. First, you would need to install gnome tweaks package by issuing the following command in a terminal session
sudo apt-get install gnome-tweak-tool
Click on picture for better Resolution
Type Y or enter to confirm the installation of the package. Wait for completion
When installation is completed, go to activities and search for Tweak. Click on the icon in order to open Gnome Tweak
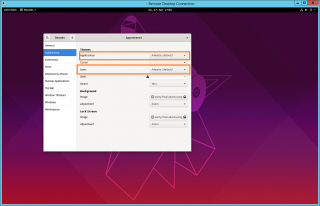
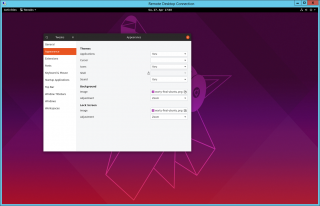
In Gnome Tweak > Appearance, under the Themes section, the applications field and icons field shows the option Adwaita (see screenshot)
Click on picture for better Resolution
Changing this value to Yaru will set the standard look to your remote session.
Click on picture for better Resolution
After changing these values, you will see immediately that the look n feel and color scheme of the windows have changed and show more colors (brown and orange :-))
Fixing Missing Dock bar
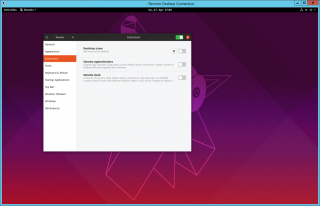
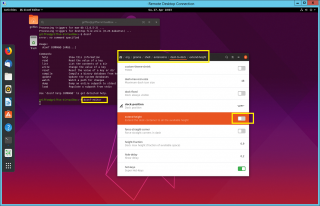
At this stage, the Dock bar is still not visible. To make it visible, still in the Tweak utility, you have to move to the Extensions node. You will see that these options are turned off. These options actually control the Dock Bar visibilty
Click on picture for better Resolution
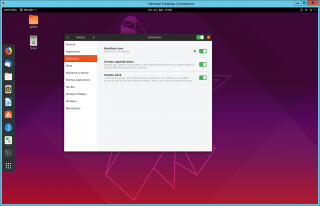
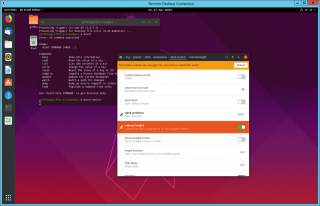
By enabling them, you should see immediately a mini dock bar displayed in your remote session as well as the desktop icons
Click on picture for better Resolution
A new behavior seems to be present in Ubuntu 19.04. As you can see, the Dock bar is not extended through the full screen. We also need to tell the system to extend the dock bar in order to mimic the local desktop interface. To do that, we will need to install another piece of software called dconf-editor. From a Terminal console, issue the following command
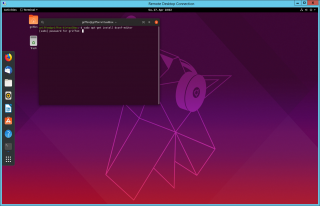
sudo apt-get install dconf-editor
Click on picture for better Resolution
You might get prompted for a password. Provide a valid one and proceed with the installation
When installation is completed, still from the Terminal console, type the following command to start the application
dconf-editor
You might get a warning that changes here are risky and you need to be careful. Click on the Thanks, I will be carefull button. Then, you will need to browse to org/gnome/shell/extensions/dash-to-dock node and find the setting called extend height
Click on picture for better Resolution
After enabling it, you should see the standard Ubuntu Dock on the left side of the screen within your remote session
Click on picture for better Resolution
At this stage, the local desktop and the remote desktop should be really similar for the user that was performing the remote connection.
Fixing GDM Login page color inconsistent
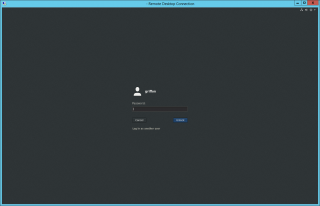
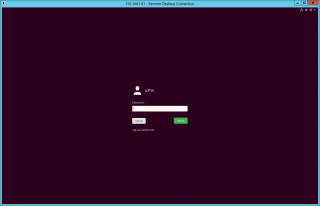
The GDM login page background page displayed on the local computer and on the remote session will be different. On the local computer, you can see the customized purple gdm login screen. However, when logged into the remote session and for whatever reason you need to login again, you can see that the Login background screen color is not the purple one but the default gray one used by gnome.
Click on picture for better Resolution
In one of our previous posts, we have provided a way to change it and provide again the same look ‘n feel while logged on locally or remotely. The process we have used so far is working great but it’s not a straight forward process. We need to modify some gnome files in order to provide a consistent login experience. This approach is still valid but we have found a better way to achieve this result. The next section will provide the necessary information that can be used to fix this issue
Fixing Theme issues through X startup script
Ubuntu comes with some Startup X script that can be used to configure the Desktop interface at user login. If you remember, in the past, we were using the .xsession file to start the proper Desktop interface when performing a remote desktop session. We will not use the ./~xsession file but instead we will use a file called ~/.xsessionrc. This file is apparently executed on Ubuntu by the X startup scripts when a user perform a login on a computer. Based on the information founded here, we can populate the ~/.xsessionrc file with the following information
You will need to create this file. Open a Terminal Session and copy the following code
cat <<EOF > ~/.xsessionrc
echo export GNOME_SHELL_SESSION_MODE=ubuntu
export XDG_CURRENT_DESKTOP=ubuntu:GNOME
export XDG_CONFIG_DIRS=/etc/xdg/xdg-ubuntu:/etc/xdg
EOF
When this approach is used, we have basically fixed the Ubuntu theme issue, the Dock bar issue and also the GDM inconsistency. When this configuration is performed for the specific user used to test the connection, the gdm login locally and remotely would be consistent and use the same color scheme…
Click on picture for better Resolution
The code below fixes the issue for a single user. To fix it for all users, this piece of code will be added into the /etc/xrdp/startwm.sh file….Doing this will ensure that any users performing a remote desktop connection will get the proper configuration. As you have probably understood, this piece of code will be integrated into our famous xrdp installation scripts which will basically fix the look’n feel issues detected so far when a user performs a remote connection.
These 4 lines of code will be replace quite some code in the current script and will simplify it greatly 🙂
Final Notes
Voila ! This is it for this post !
We have revisited the theming issues in Ubuntu Desktop environment when connecting remotely through xRDP software solution. A manual installation of xRDP provide really the basic functionality (i.e. perform the remote connection). However, without post-configuration actions, look n feel between local session and remote session are different. Through this post, we have explained how to fix manually but also we have explained how to fix it in an automated way through x Startup scripts. This approach will be integrated in our installation scripts and will replace the current approach we are using.
Till next time
See ya
guys i have problem with wired unmanaged i try all the solution but still i dont fixed :/ (i use dedicated server with static ip)
https://prnt.sc/onfwkm
ubuntu 19.04 gnome 3.32.1
@Vlad,
You can try one of the following and see if this is working for you…
edit this file as sudo
/etc/NetworkManager/NetworkManager.conffin the line starting with managed
if you config file contains the following info
managed=falsethen change it to
managed=trueRestart the network-manager service (using this command line for example)
sudo service network-manager restart
and check if this fix your issue
Hope this help
Till next time
See ya
@Griffon i try this but nothing, see this https://prnt.sc/ood3ps is not using the network-manager but the networkd is changing something?? and this problem is only on gnome in my second server i have mate 1.20.4 and the network is ok…
@Vlad,
Based on your screenshots, I see that you have Ubuntu 19.04 and I see that, in the netplan config file, you are still using the networkd
renderer: Networkd
Try to replace it with this line
renderer: NetworkManager
then type again
sudo netplan apply
Again, we are assuming that you have installed Ubuntu Server Edition where you added Gnome Desktop….. We are not sure if this will work but this would be the way to go….
Hope this help
Till next time
see ya
Thank You for your information! I was trying to use xRDP in 19.04 but was discourage by the way it looked. Now that everything is fixed it was a blessing to keep working on my remote linux again.
@Andy,
Thank you for the visit and for the positive comments 🙂 Good to know that this information was helpful to you. Enjoy your new remote desktop session experience
Till next time
See ya
thank you for the information that has been given, in this process which is often considered difficult by novice strings for this? can you explain how the highest difficulty is?
Hello.
I’m usinsg Ubuntu 20.04 and xrdp 0.9.12
It’s possible to start xRDP with the GDM Display Manager Login page.
So users can choose the Desktoks (ubuntu, plasma, etc.)
Thanks, a lot.
Hello Pascual,
using xRDP, you are not able to be presented with the GDM login page as you would when connecting physically to your computer…
If you want to see the GDM login screen, you can use VNC technology but this has also drawback as you need to perform two connections….
Hope this help
Till next time
see ya