Hello World,
Today, I’ll be writing again about Windows 2008 R2/Windows 7 virtual machines when used within your Proxmox VE infrastructure. We will explain how you can change the disk type from IDE To Virtio of a kvm virtual machine. In this post, I explained how to create a Windows 2008 R2/Windows 7 virtual machine using virtio drivers. However, some people out there might have performed a standard installation and thus using IDE Drive type.
This operation is quite easy to perform and I’ll be simply following the instructions that you can find on the Proxmox VE Wiki pages. The wiki focuses on “legacy” Operating systems. This article will cover this topic but related to Windows 2008R2/Windows 7 virtual machines
Source : http://pve.proxmox.com/wiki/Paravirtualized_Block_Drivers_for_Windows
The Conversion Process – Detailed procedure
The process is quite simple in fact. We will need to add an additional Disk into the Windows 2008R2/Windows 7 Virtual machine and make sure that this additional disk is configured as Virtio.
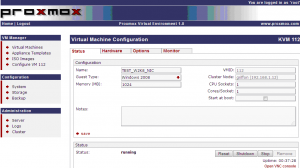
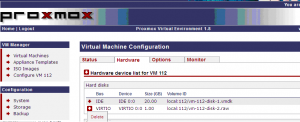
First, locate the virtual machine that’s using IDE disk that you want to convert to VIRTIO. The screenshot shows you that it’s indeed a Windows 2008 Virtual machine using an IDE Disk Type
Click to Enlarge
To perform the conversion, you need to shutdown the virtual machine. When the virtual machine is turned off, we can add an additional disk. To perform this action, you go to the Virtual machine configuration and you click on hardware tab.
Click to Enlarge
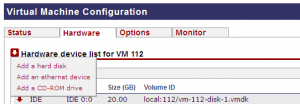
Click on the Arrow next to the Hardware device list for VM xxx and you will see an option called Add Hard Disk
Click to Enlarge
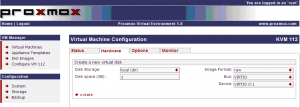
The Add hard disk wizard page is displayed. Create a small Disk – 1 GB and be sure to select the option Virtio for the Disk Type
Click to Enlarge
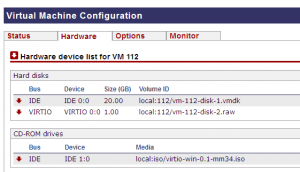
At the end of the process, you should see both IDE and virtio Disk in your web interface (see screenshot)
Click to Enlarge
At this stage, you can restart the virtual machine. You might have to press F12 if your system does not boot properly. You have to select the correct bootable disk from the list or you can ensure that the original IDE disk is set as the first bootable device (in Virtual Machine Configuration Tab >Options>First Bootable device = IDE Disk)
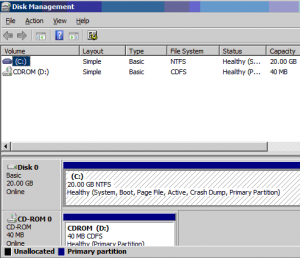
After login on into your virtual machine, you will notice no changes. No Wizard will start automatically and if you look in the disk management console, you will only see the orginal disk (IDE) but not the additional disk you’ve just added.
Click to Enlarge
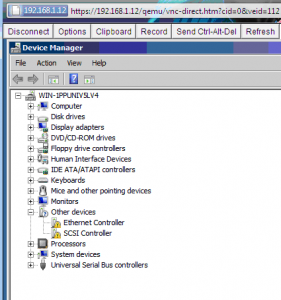
If you go to the device manager, you will notice that under Other devices, you will get an unknown SCSI controller device. This is our virtio disks.
Click to Enlarge
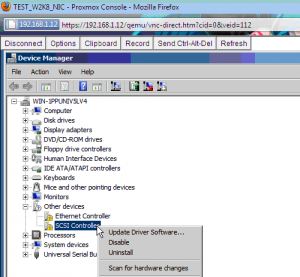
We need to install the virtio drivers for this SCSI Controller. We assume that the virtio iso image is already mounted in the cdrom. To install the virtio driver, you simply right-click on the scsi controller and select Update drivers Software…
Click to Enlarge
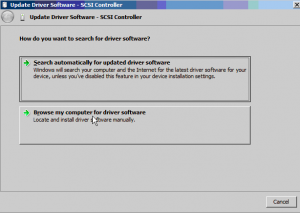
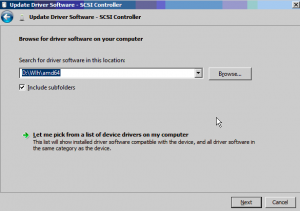
The Driver Wizard will start. Click on Browse my computer for driver software.
Click to Enlarge
You simply provide the location of the virtio Drivers and you press next
Click to Enlarge
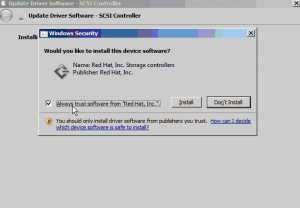
During the install process, you will get a warning message like the following below. Simply press Install and you should also tick the checkbox.
Click to Enlarge
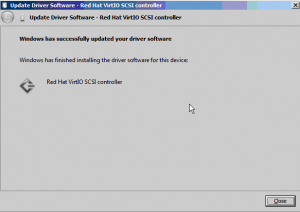
At the end, you will get a successfully install message and you can press on the close button. We are done (well not quite)
Click to Enlarge
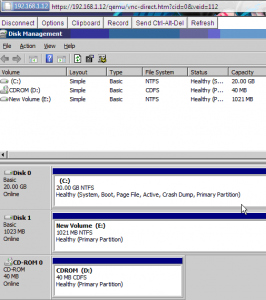
You can check the disk management console that the virtio disk is now recognized by the Windows system operating system. It’s time to convert the remaining disks also to use virtio Drivers.
Click to Enlarge
First, you need to shutdown your virtual machine.
At this stage, we are ready to convert all the disk drives into Virtio Drives. To do this, we will go to the Web interface and delete all the disks attached to the virtual machine we are working on. So, in the Proxmox ve web page, click on the virtual machine you need to convert. In the virtual Machine configuration page, click on the hardware tab.
To delete the hard disk, you simply click on the red arrow and you select delete (see screenshot). No Panic here ! we are simply detaching disks, the disks file will not be deleted from the proxmox ve system.
Click to Enlarge
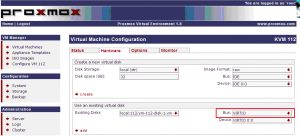
Then again, we have to re-add the disk (or disks) that you need to the virtual machine and ensure that you select the virtio type. To do that, again in the hardware tab, you click on the red arrow next to the title Hardware device list for vm xx and you select Add hard disk device. The new add Disk page will be displayed. As shown, in the screenshot below, do not create new disks. Instead, add existing virtual disks to your virtual machine.
Click to Enlarge
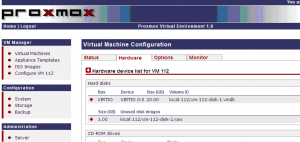
At the end of the process, you should see that the hard disk are set to virtio type. If you have unused disks, you can delete from disk them by clicking the red arrow next to the listed unused disk. Note that if you select this option, the virtual disk will be permanently deleted.
Click to Enlarge
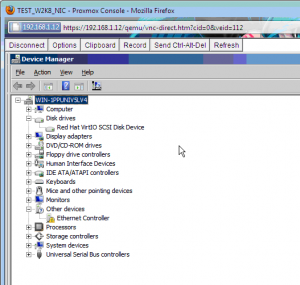
It’s time to reboot the virtual machine and check that it boots as it should. You can verify that the system is indeed using the virtio drivers by opening the device manager console and expand the disk drives node. You will see that the device is recognized as a virtio devices.
Click to Enlarge
Final notes
As you have seen, converting from IDE to Virtio is really not too complex and you can find a lot of information out there. This post has simply described the process for Windows 2008 R2/Windows 7 Virtual machines and confirmed that this procedure is working for more recent operating system than windows 2003/windows xp.
From now on, you have no more excuses ! you know how to use virtio drivers with Windows 2008 R2/ Windows 7 operating systems with newly installed systems or existing virtual machines.
That’s it for this post ! Next post will describe how to resize virtual disks of KVM virtual machine.
Till Then See ya

Thanks very much, i was fearing i had to reinstall! Worked fine for Win7 and SBS 2011
Hi,
Although not running porxmox, the concept was easiliy done on virt-manager. Thanks for the well documented explanation.
Hello Paul,
thank you for the comments….
See you soon
Hi, thank you for this informations.
No Problem Stefan…
See you soon
Very good i try in version 2.3 and work good.
Very helpful.
Just a little add: before rebooting the VM, in it’s options > Boot order, it is necessary to select the new disk (VE 4.4)
@bastet,
Thank you for the feedback…Please note that this post is quite old as well…
Till next time
See ya
Great info, thanks
@Guido Rolon;
Kind of outdated post but if still useful we happy with that
thank you for the visit and the feedback
Till next time
See ya