Hello World,
Today, we will provide a quick how to guide. If you have noticed, Proxmox VE wiki provides a lot of information about how to install Windows XP/Windows 2003 operating systems and how to install virtio drivers. However, you will not see much information about installing/configuring a Windows 7/Windows 2008 (or later) operating system. As I mentioned in other posts, It’s time to move on and start to use and work with the recent operating systems version. This post is a first step in that direction.
1. Preparing your Windows 2008 R2/Windows 7 installation
We assume that you have a running Proxmox VE infrastructure in your infrastructure.
Step 1 – Get Windows 2008R2/Windows 7 and Virtio ISO images
To perform such installation , you will need to upload the following iso images
- Windows 7/windows 2008 R2 Iso image
- Virtio Drivers (can be downloaded from the Fedora project web site : http://alt.fedoraproject.org/pub/alt/virtio-win/latest/images/bin/)
Step 2 – Upload your ISO Images
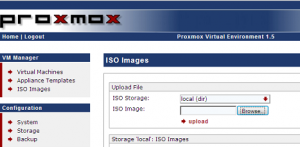
To upload the ISO images on your Proxmox VE server, you simply open the web interface. On the navigation menu, in the VM Manager Section (on the left side on your screen, you click on the ISO images. You will be presented with the following screen
Click to Enlarge
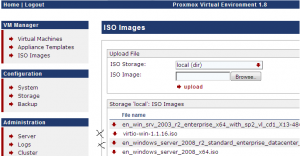
You click on the Browse button, you specify the location where you have stored you ISO images and then you click on Upload link. When the upload is completed, at the bottom of the page, you can list the ISO Files that have been loaded
Click to enlarge
Step 3 – Create you Virtual Machine
In this post, we have explained in details how to create a virtual machine. We assume that you have a working experience with the Proxmox VE software and we will simply describe the big steps of creating the virtual machine.
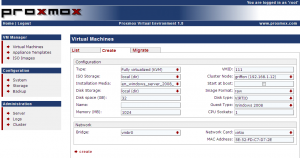
Within the Interface, you click on virtual machine in the left menu. In the virtual machine page, you have to click on the Create tab. The virtual machine creation form will be displayed as shown in the following screenshot
Click to Enlarge
In this page, be sure to select the following options :
- Disk type : Virtio
- Guest Type: Windows 2008
- Network Card: Virtio
- Installation medio : the Windows 2008 or Windows 7 ISO image
Press on the create button. Click then on the List Tab and you will see that your new virtual machine has been created. You are ready to move to the next step : Installation of the operating system
Perform your Windows 2008 R2/Windows 7 installation
We are ready to perform our standard Windows 2008/Windows 7 installation. This post will demonstrate how to install the Windows 2008 Operating System. The procedure should be the same for Windows 7 installation.
Within the Proxmox VE (PVE) web interface, you click on the Virtual machine link (on the menu on the left). Click on the virtual machine you’ve just created in the previous section. In the Virtual Machine Configuration page, click on the Start button. After a short time, you will see a link called Open VNC Console
Note : Do not close you browser, we will need to come back to this screen
Step A – Starting the Windows 2008 Setup routine
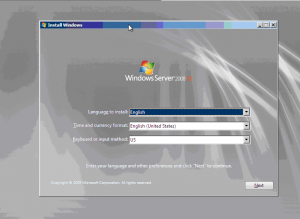
Click on the link to access the virtual machine through the console. After sometime, you will see the familiar Windows Setup Wizard starting. Select your settings accordingly and press Next
Click to Enlarge
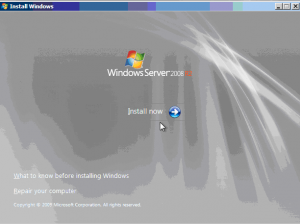
In the Install Windows Page, Click on Install Now
Click to Enlarge
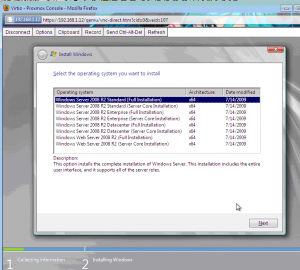
Select the Correct version of the Operating System you want to install and Press Next
Click to Enlarge
Step B – Upload Drivers
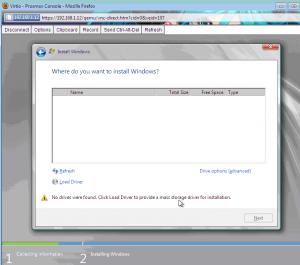
At this stage, you will be presented with the following window. As you can see, there is no disks detected by the Setup routine. We are indeed using VIRTIO drivers. The new Setup routine make it more easy (compared to windows 2003) to specify additional drivers. On this page, you can click on the Load Driver option
Click to Enlarge
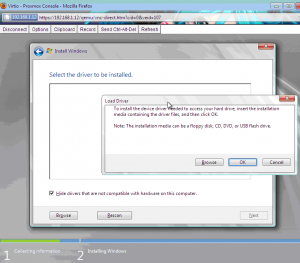
You will then be presented with a screen where you will be asked to specify the location of the additional drivers to be used
Click to Enlarge
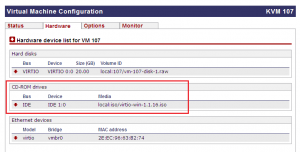
Before continuing, we will need to go back the PVE Web Interface, in the Virtual Machine Configuration Page and we will need to click on the Hardware Tab. There, we have to load the Virtio ISO image into the CD-ROM Drive. When this is done, we can go back to the Virtual machine and proceed with the installation.
Click to Enlarge
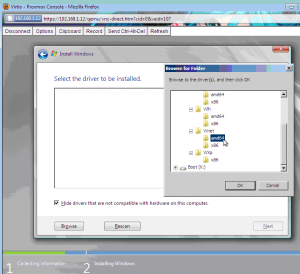
Back on the Virtual Machine, you can browse to the CD-Rom device and select the appropriate drivers
Click to Enlarge
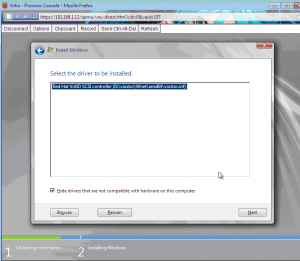
As you can see on the screenshot below, the VIRTIO Drivers are now recognized by the Setup routine and we are ready to install them onto the system. Press Next
Click to Enlarge
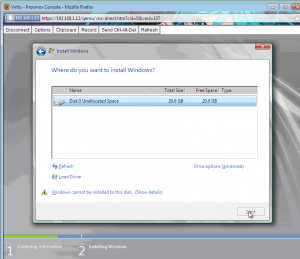
At the end of this process, you will see that the installation wizard page is now presenting you 1 or more disks (depending on your configuration).
Click to Enlarge
Step C – Setup Routine Installation Completion
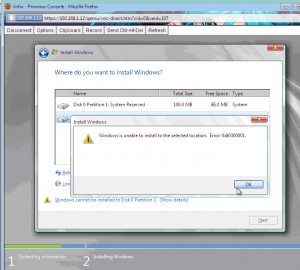
We are almost there. But you will notice that the button Next is greyed out and that a warning message is available at the bottom of the dialog box. You can click on Show details to have more information.
Click to Enlarge
What’s does that means ? Okay, no panic ! This cryptic message simply means that the Windows installation files are not available. We simply need to go back the PVE Web interface and again unload the Virtio drivers and reload the Windows installation iso image into the cdrom of the virtual machine (same procedure as above – Step B)
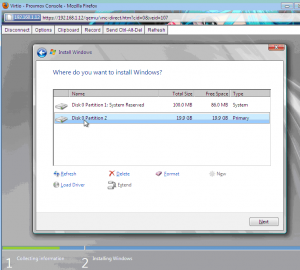
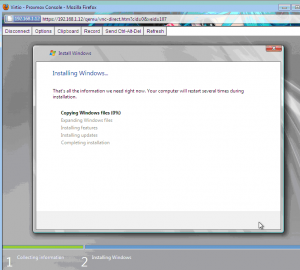
When the Windows CD is reload into the virtual machine, you will see that you can now indeed click on the next button and that the Windows Setup process will simply continue as it should.
Click to Enlarge
Click to Enlarge
Final Steps
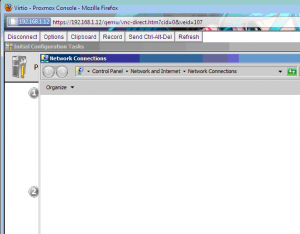
The Setup routine will finalize the installation and the system will reboot automatically. When the virtual machine reboots, you will get a running Windows 2008 R2 virtual machine. However, we haven’t finished yet. If you have a look at your network connections, you will see that no network card are available within your virtual machine.
Click to Enlarge
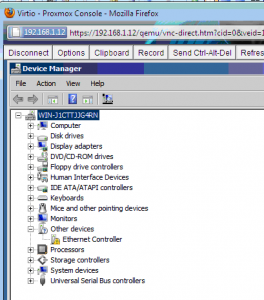
If you open the Device Manager, you will see that the ethernet controller is there but that no drivers are available for it.
Click to Enlarge
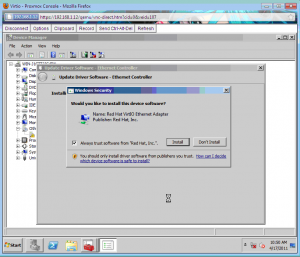
Again, we have to load the Virtio ISO in the virtual machine and install the missing drivers. Simply right-click the Ethernet controller in the device manager and click on Update Drivers. The Wizard will start. You simply specify to the wizard where to look for the needed drivers. During the wizard, you might see a warning message. Simply press Install to authorize installation of the virtio drivers and have your network card installed within Windows operating system.
Note : You might be prompted to reboot your server after installing the driver
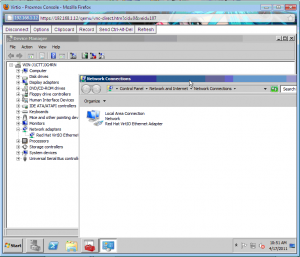
At the end of the process, you should see your network card (as shown below). We are done. Now simply configure your virtual machine as you need.
Click to Enlarge
Conclusion
In this post, we explained how to create a Windows 2008R2/Windows 7 Virtual machine using VIRTIO drivers when using a Proxmox VE infrastructure. As you have seen the process is quite straightforward (isn’t it !). Because we are using virtio drivers, you will need to perform some additional operations in order for windows to recognize the storage controller. The process to specify additional drivers within Windows 2008 R2/Windows 7 is far easier than with previous versions.
In the future post, we will see how we can integrate the drivers into your windows installation file
Till then, Stay Tuned
See ya
Have you tested with 64bit version?
Hello there,
if you look the screenshots, you will see that I’ve made the test with Windows 2008 R2
So, to answer your question, yes I’ve tested with the 64 -bit version (given that Windows 2008 R2 only comes in 64-bit) :-))
see ya
Thank you, Thank you, Thank you, Thank you, Thank you!!!!!
This got me past my hurdle of getting the damn disk drive recognized!
Great post, very helpful!
Thank you for writing the most understandable and useful stuff on Proxmox I have found!
Hello Audun
Thank you for the comments and the support… I’m happy to see that this blog can be useful
Till next Time
See ya
Very clear instructions on how to get win server or windows 7 to work.
I would add the following link:
http://alt.fedoraproject.org/pub/alt/virtio-win/latest/images/bin/
for those who are still searching for disk drivers required for their installations. Took me some time (a couple of minutes) to find it on the internet. The only version virtio-win-0.1-30.iso which is available there is working good!
Hello Peter,
Thank you for comment. By the way, I think you missed the link to download the drivers from the post. If you look carrefully, under the step 1, you can see the link that point to the url you provided.
Till next time
See ya
Is it me or doesn’t this tutorial work anymore?
I don’t have signed drivers, so it won’t install
Somebody has the same problem
Hello Joris
I’ve just tested it and seems to work.
I’m not using the latest version of Proxmox. I have the version 2.1 but everything seems fine
Which version are you using so I can test this
Tell me also which version of the virtio driver you are using
Till next time
See ya
Hello Joris;
I even updated my proxmox ve install to the latest one.. and I can perform installation when using VIRTIO DISKS
are you having problems with disk or network cards ?
Which OS are you trying to install; Win2003,Win2008R2, Win8/2012